Meet My Little Turtles: The Cutest Way I’ve Found to Grow String of Turtles

Who knew String of Turtles could be even cuter growing out of a turtle planter? From choosing the right soil to plant care and propagation, I’ll share how I grow these adorable little houseplants and why they’ve become some of my favorite plant projects.

There are some plant and planter combinations that are just meant to be.

A trailing String of Hearts spilling out of a heart-shaped planter? Adorable.

Herbs growing in mason jars on the kitchen counter? Perfect.

But String of Turtles growing out of an actual turtle?

Come on!
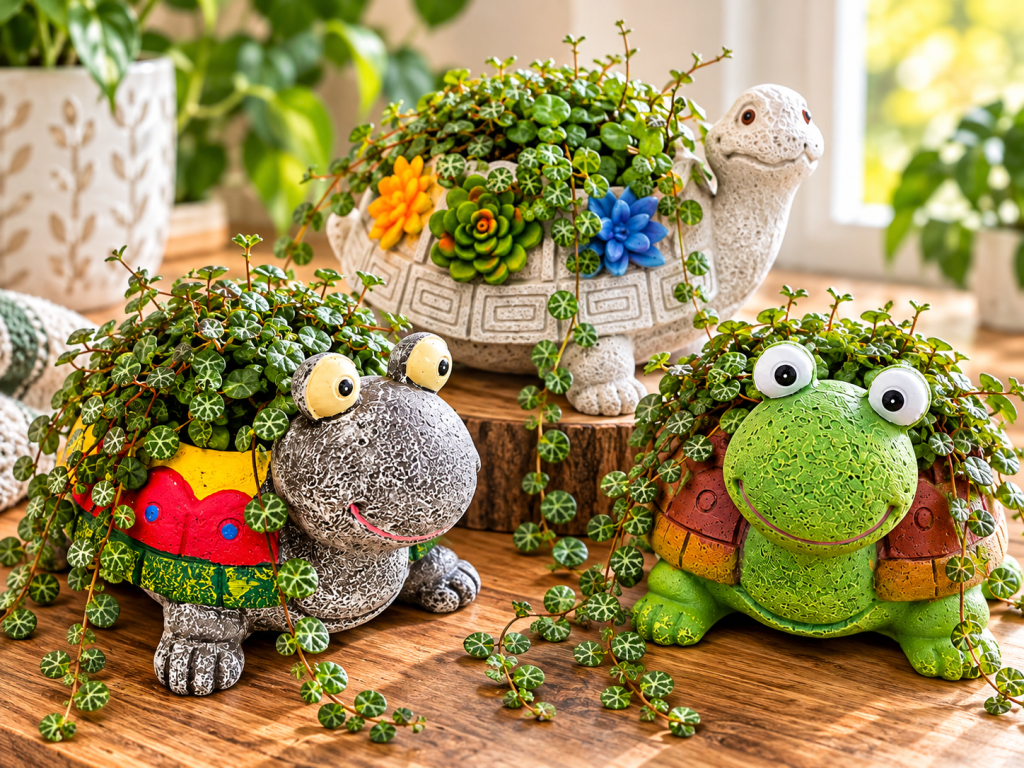
Three colorful turtle planters filled with trailing String of Turtles plants, arranged on a wooden table with a bright, cozy indoor background.

Affiliate Disclosure: This post contains affiliate links. As an Amazon Associate I earn from qualifying purchases.

Meet String of Turtles

String of Turtles (Peperomia prostrata) is a small trailing houseplant with round leaves covered in beautiful markings that look remarkably like tiny turtle shells.

Which, of course, is exactly why putting one inside a turtle planter is irresistible.

As the plant grows, the vines begin spilling over the sides of the planter, creating a living green “shell.”
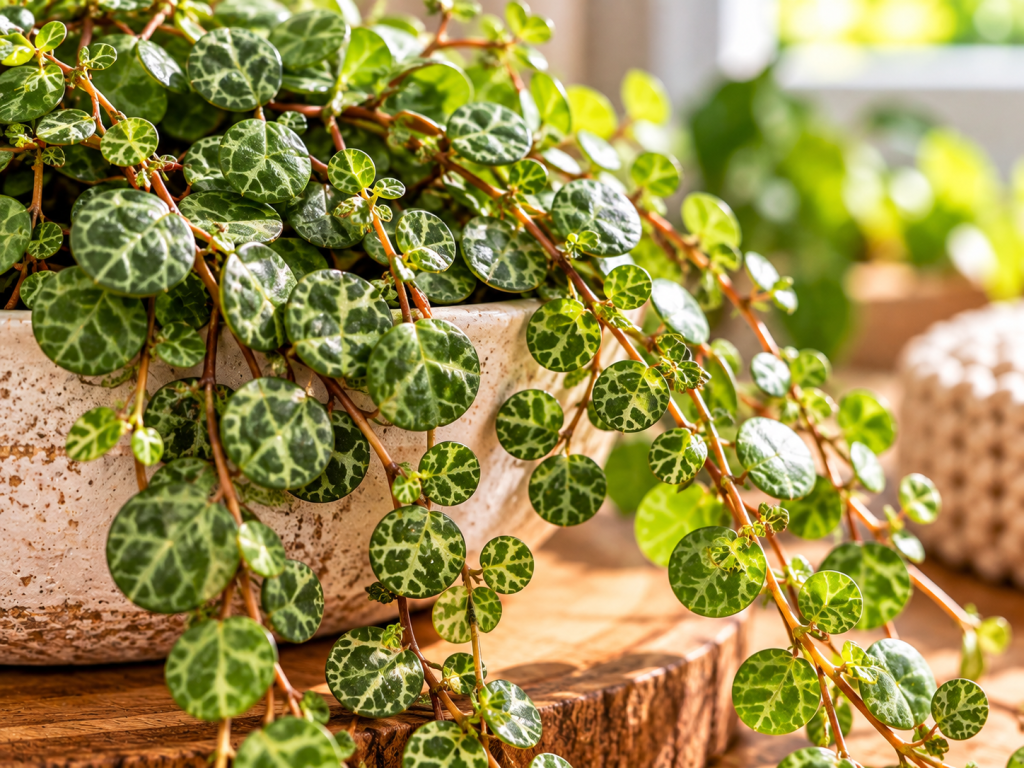
Close-up of String of Turtles houseplant showing small, round green leaves with intricate turtle-shell patterns cascading from a ceramic planter.

Why Turtle Planters Work So Well

These are two of the actual turtle planters I used for my String of Turtles arrangements! I loved how much personality they added to such a tiny houseplant.

Shop my turtle planters:

Look for a small decorative turtle planter that’s large enough to hold your plant without overwhelming its relatively small root system.

The most important thing isn’t how adorable its face is. Although, let’s be honest, that certainly helps.

Drainage matters.

If your perfect turtle doesn’t have drainage, another option is to keep the plant inside a small nursery pot that fits inside the decorative planter. You can remove the inner pot when you water and allow it to drain completely before putting it back.
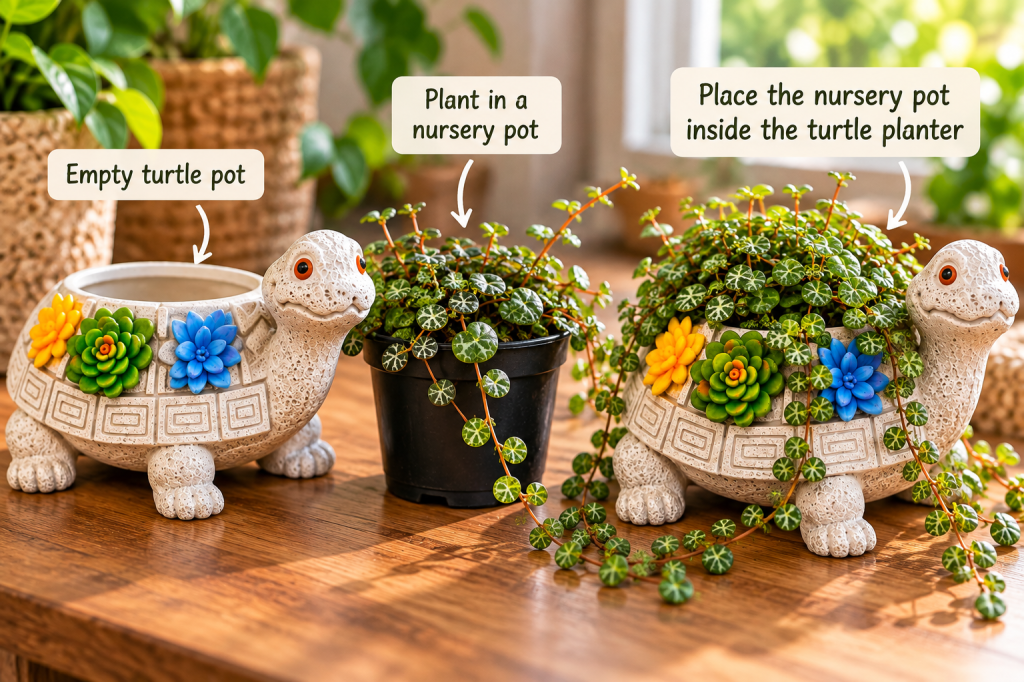
Three-step visual showing an empty decorative turtle planter, a String of Turtles plant in a nursery pot with drainage holes, and the nursery pot placed inside the turtle planter.

The Soil I Use for String of Turtles

These little plants have delicate roots, so I prefer a light, airy potting mix that holds a little moisture while allowing excess water to drain away.

My DIY String of Turtles Soil Mix

If you’d like to make your own, here’s a simple combination:

  • 50% indoor potting mix for a little moisture retention
  • 30% perlite or pumice to improve drainage and airflow
  • 20% fine orchid bark (rather than large chunks) to keep the mix loose and airy

Mix everything together before planting.

Prefer a Ready-Made Mix?

If you’d rather use a premixed option, this chunky houseplant mix contains coco coir, pumice, and fir bark to help with drainage and airflow.

How to Plant a String of Turtles Turtle
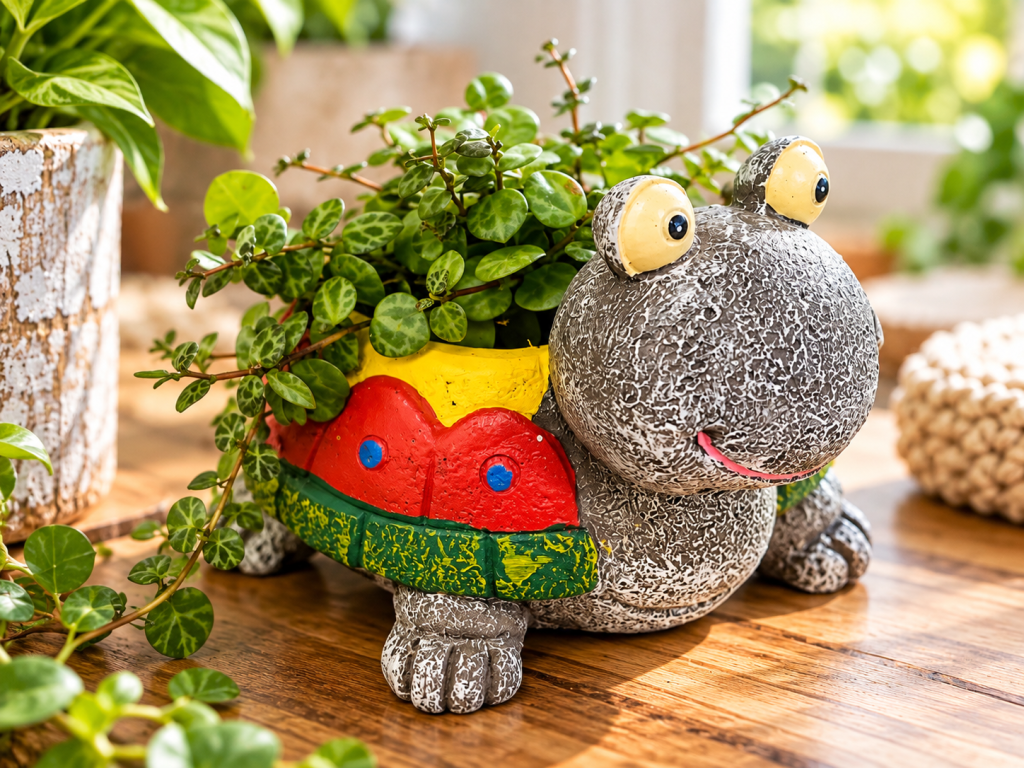
Gray turtle planter with a colorful red, yellow, and green shell, filled with String of Turtles vines on a wooden table in a bright indoor setting.

Once you’ve found your turtle, and a healthy String of Turtles plant, it’s a pretty simple project.

Add your potting mix, leaving enough room for the plant’s existing roots.

Gently position the plant in the planter and fill around the roots with additional soil. Avoid burying the little leaves or packing the soil down too firmly.

Give Your Turtle Plenty of Light

String of Turtles generally does best with plenty of bright, indirect light.

Good light helps maintain compact growth and those beautiful markings on the leaves.

One thing worth watching is the top of the planter. With trailing plants, it’s easy to admire all those long vines while forgetting that the crown of the plant needs light too.

If your String of Turtles isn’t getting enough bright, indirect light (and in a northern December, whose is?), a small LED grow light can be a helpful option.

I especially love the idea of a little turtle planter sitting beneath its own miniature grow light. How cute would that be?!
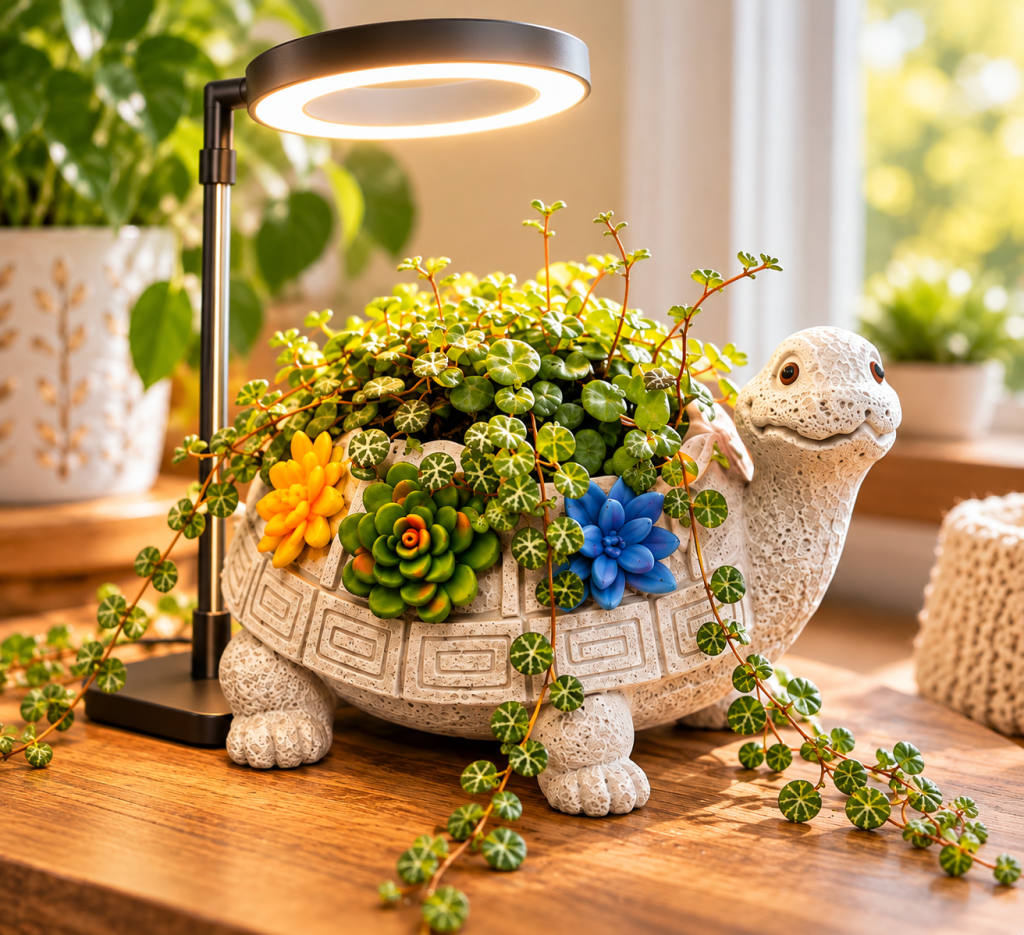
Gray stone-look turtle planter with colorful succulent accents and trailing String of Turtles vines, sitting beneath a small ring-shaped LED grow light on a wooden table.

Watering String of Turtles

This is another place where I’d rather teach you how to read the plant and soil than tell you to water every Tuesday.

Conditions inside our homes vary far too much for a rigid schedule.

Before watering, check the soil. I allow the potting mix to dry considerably rather than keeping it constantly damp.

Then I water thoroughly and allow the excess to drain away.

Tiny planters can be deceptive because they hold relatively little soil. Depending on the conditions in your home, they may dry faster than larger houseplants. But that doesn’t mean they need constant little sips of water.

Turn One Turtle Into More Turtles

String of Turtles can be propagated from healthy vines. Here’s the method I’ve used with mine.

  1. Choose a healthy, longer strand of String of Turtles.
  2. Carefully remove a few leaves along the section of vine you want to plant. This exposes the little nodes where new roots can develop.
  3. Gently tuck that bare section of vine into lightly moist, airy potting soil, keeping the remaining leaves above the surface.
  4. Make sure the nodes have good contact with the soil. You can use a small plant pin to hold the vine in place if needed.
  5. Place your planter somewhere warm with bright, indirect light and keep the soil lightly moist, not soggy, while roots develop.

And before you know it, you might have the beginnings of another little turtle plant! 🐢
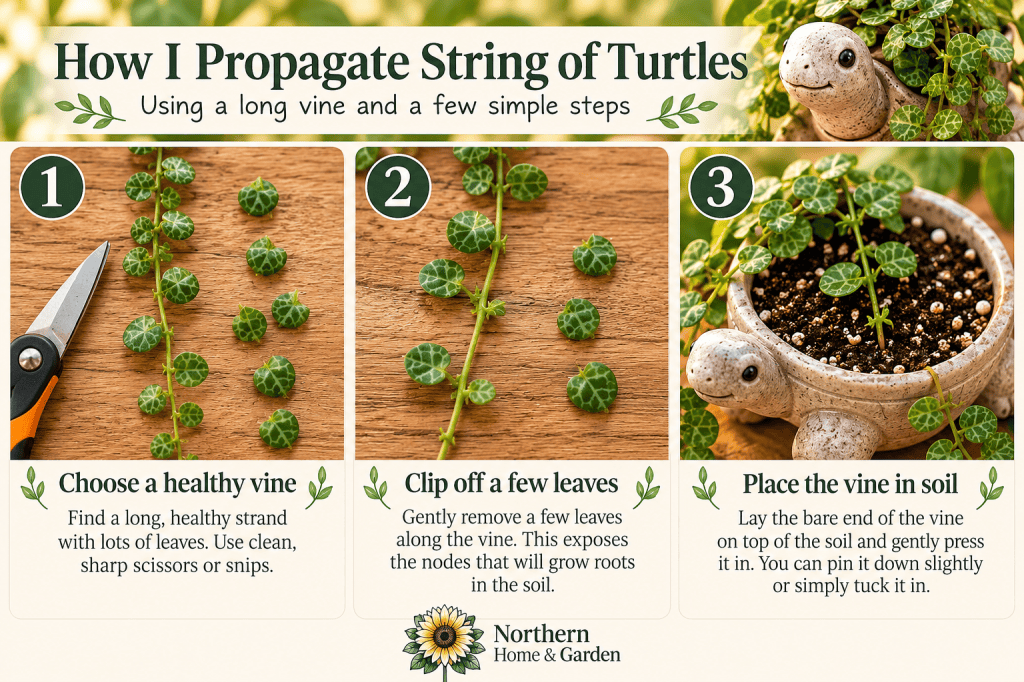
String of Turtles propagation tutorial showing how to choose a healthy vine, remove lower leaves to expose nodes, and plant the bare stem in soil using a turtle planter.

Sometimes Houseplants Should Just Be Fun

I love learning about plants.

I love figuring out what makes them grow well, experimenting with propagation, and watching a tiny cutting eventually become a full plant.

But I also think we can get so wrapped up in doing everything “right” that we forget one of the best things about growing houseplants:

They’re supposed to bring us joy.

Sometimes that means growing a beautiful specimen plant.

Sometimes it’s propagating something that belonged to someone you love.

And sometimes…

it’s putting String of Turtles inside a turtle because you absolutely cannot resist. 🐢🌿
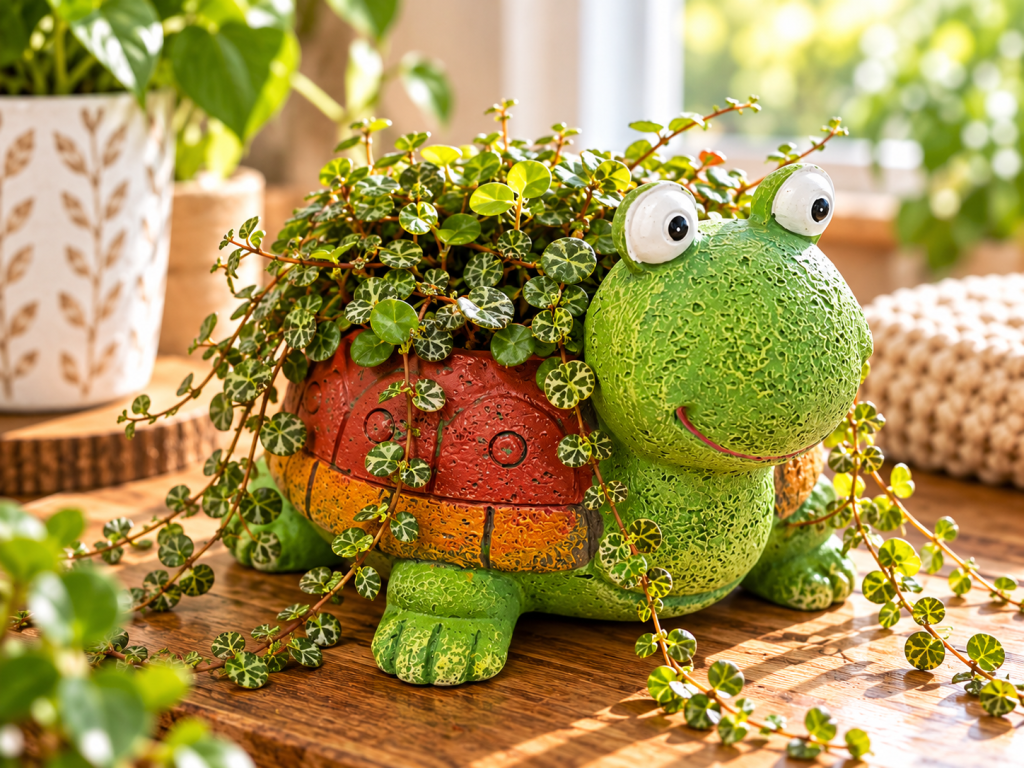
Bright green turtle planter filled with trailing String of Turtles vines, displayed on a wooden table in a sunny indoor setting.

A turtle planter with a String of Turtles inside would make an adorable gift for a plant lover. For more ideas, see our gift guide.

🌻 Northern Home & Garden

More Northern Tips, Straight to Your Inbox 🌻

Get practical gardening advice, seasonal ideas and new posts from Northern Home & Garden delivered to your inbox.

How to Bring Outdoor Plants Inside for Winter (Without Bringing the Bugs)

Want to save a favorite outdoor plant before winter arrives? Here’s how to bring outdoor plants inside safely, check for pests, make the transition easier, and avoid bringing unwanted little hitchhikers into your home.

Every fall, there comes a point when I look around outside and decide which plants I’m willing to let go… and which ones are getting rescued from the cold. Because after spending all summer growing a beautiful plant, I’m supposed to just calmly let the first hard freeze take it? Absolutely not!

Continue reading “How to Bring Outdoor Plants Inside for Winter (Without Bringing the Bugs)”

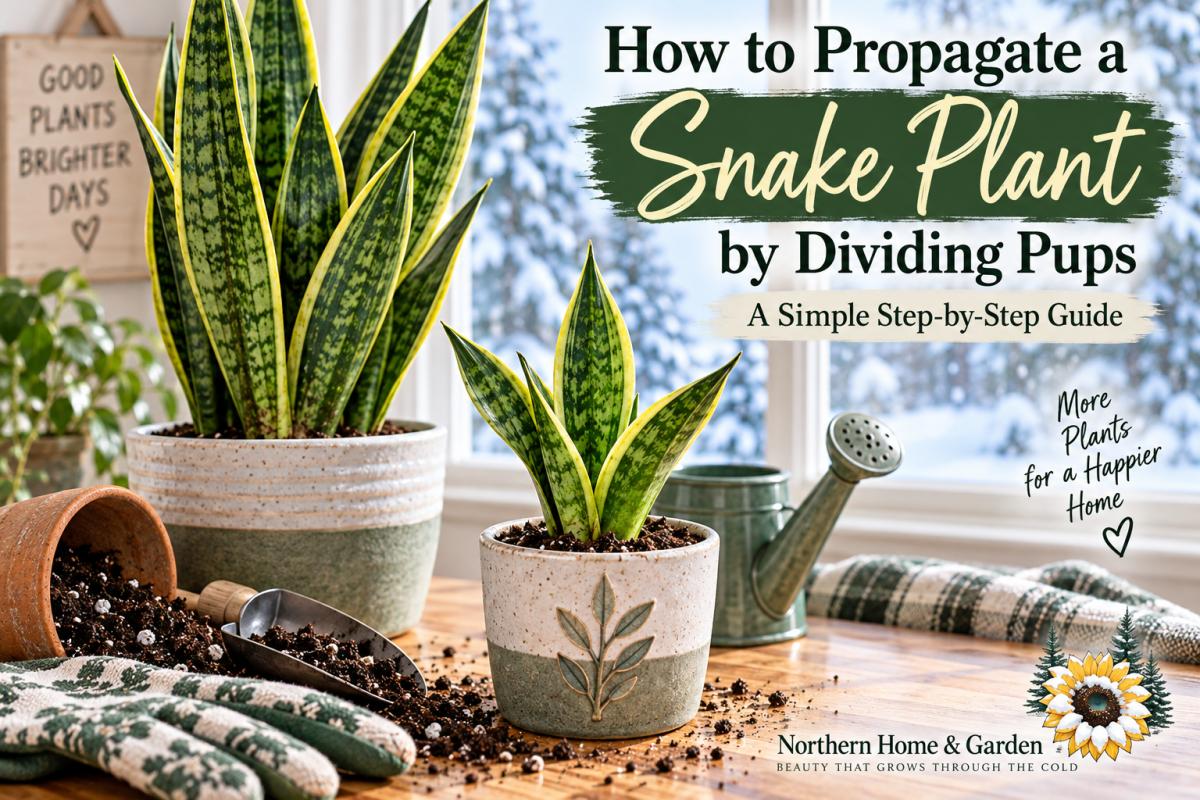
How to Propagate a Snake Plant by Dividing Pups

Learn how to propagate a snake plant by separating pups from the mother plant. This beginner-friendly guide walks you through dividing, repotting, and caring for your new snake plant.

Snake plants are pretty generous houseplants. Give them a decent spot, don’t drown them, and they’ll usually carry on without demanding much attention.

Then one day, you look down into the pot and realize…

You have babies. 🌿

Continue reading “How to Propagate a Snake Plant by Dividing Pups”

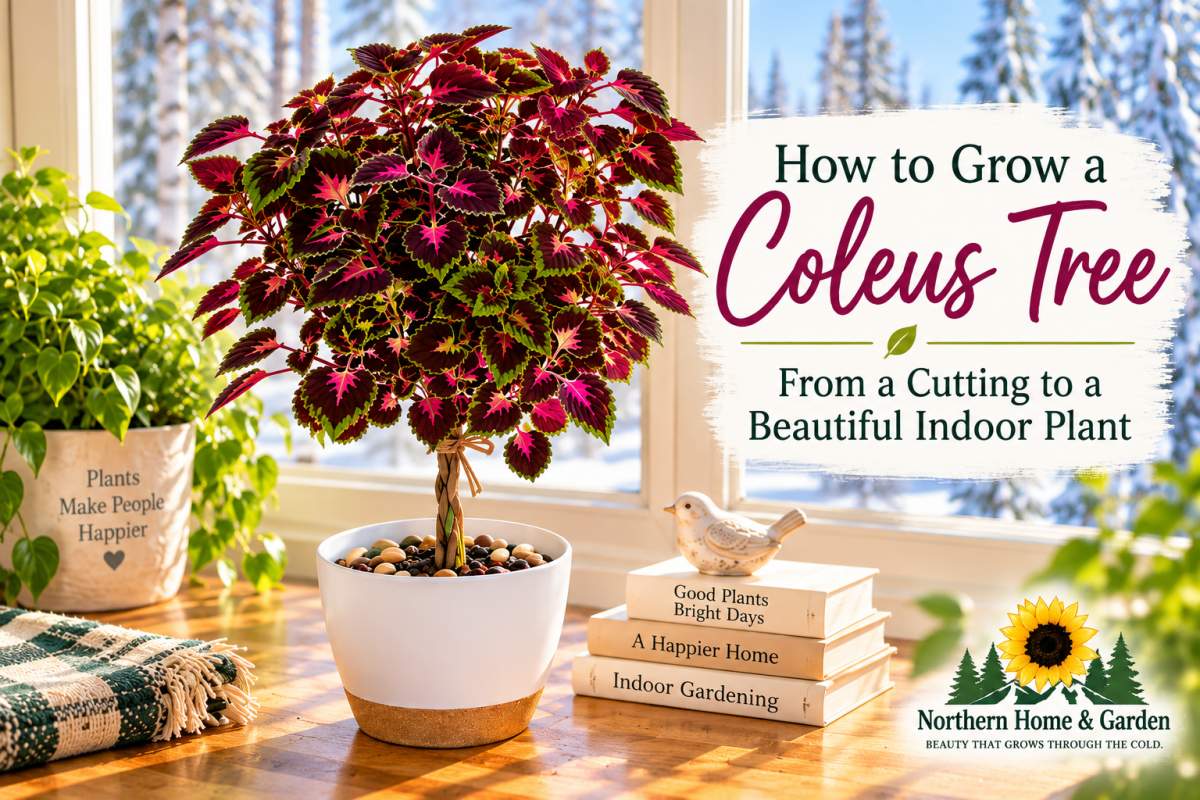
How to Grow a Coleus Tree: From a Cutting to a Beautiful Indoor Plant

Turn an ordinary coleus into a beautiful indoor tree with a little patience and plenty of pruning. Learn how to train the stems, shape a full canopy, and keep your coleus growing indoors through winter.

Most of us think of coleus as a bushy plant tucked into containers or garden beds. But with some strategic pruning, you can train a coleus into an entirely different shape, complete with a miniature trunk and a full canopy of colorful leaves.

And because coleus is so easy to propagate, you don’t need to buy a large plant to get started. All you need is a few cuttings.

Here’s how I grew mine.

Affiliate Disclosure: This post contains affiliate links. As an Amazon Associate I earn from qualifying purchases.

What Is a Coleus Tree?

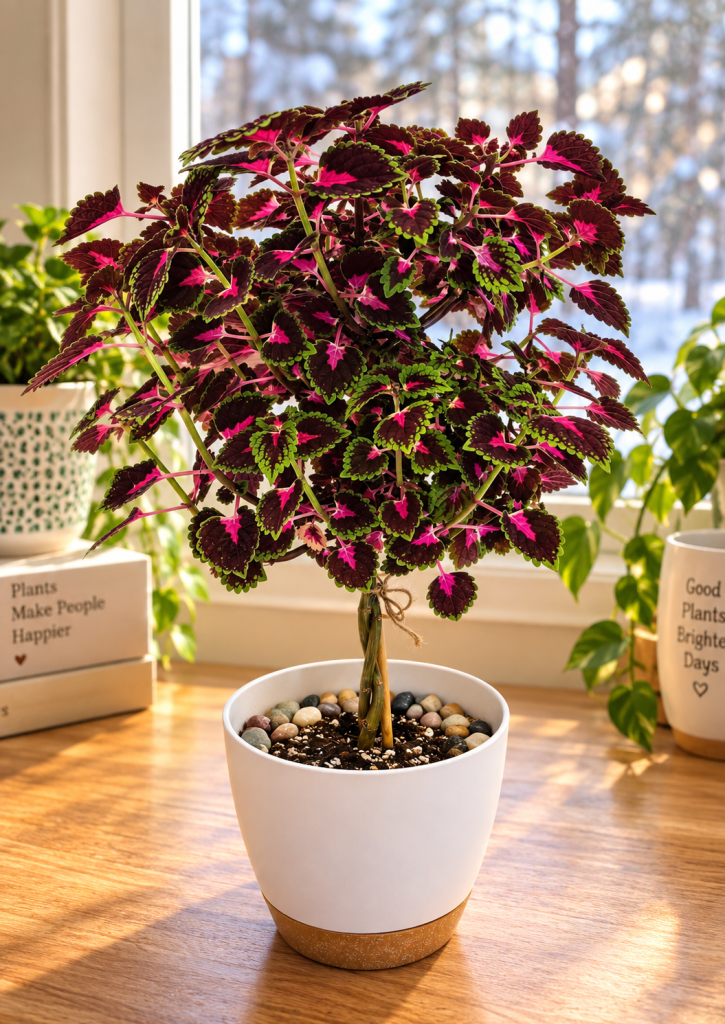
Coleus tree with a braided trunk and a full canopy of pink and burgundy leaves with green edges, in a white pot topped with pebbles on a sunny windowsill.

A coleus tree isn’t a special variety of coleus. It’s simply a coleus plant trained into a tree shape rather than allowed to grow naturally as a bush.

By encouraging one or two main stems to grow taller, removing lower growth, and pruning the top, you can create a miniature trunk with a full, rounded canopy.

And that little tree can have leaves in beautiful shades of pink, burgundy, green, purple, or just about any combination in between!

❄️ Northern Tip:

Coleus grows quickly under good conditions, making it a fun plant to experiment with. Don’t worry if your first attempt isn’t perfectly shaped. Coleus is forgiving and gives you plenty of new growth to work with!

Start With a Healthy Coleus Plant or Cutting

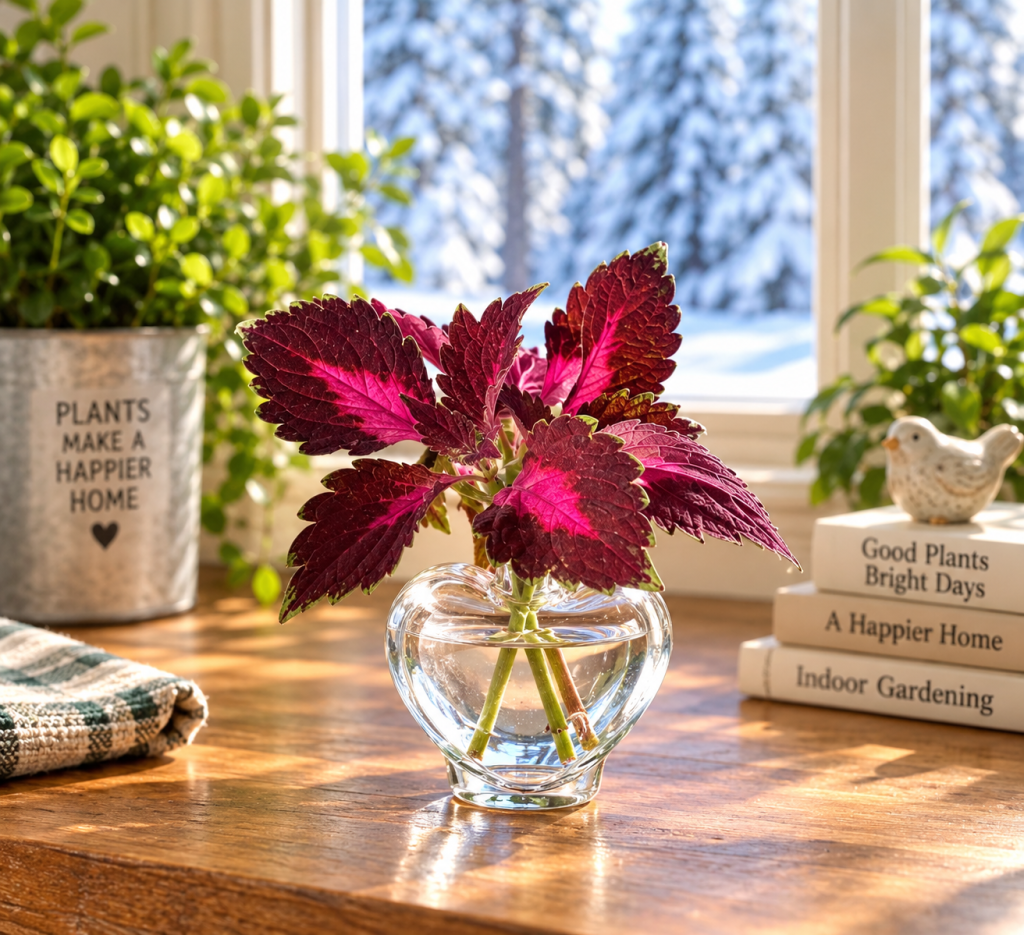
Coleus cuttings rooting in water in a small heart-shaped glass propagation vase.

You don’t need a large plant to grow a coleus tree. A healthy young plant or even a rooted cutting is enough to get started.

If you’re starting from a cutting, choose a healthy stem, remove the lower leaves, and place it in water until roots develop. Then transplant it into potting soil.

New to propagating coleus? Check out our Propagating Coleus: How to Turn One Plant Into a Whole Collection guide for step-by-step instructions.

Once your plant is established and actively growing, you’re ready to begin training it into a tree.

Choose Your Main Stems

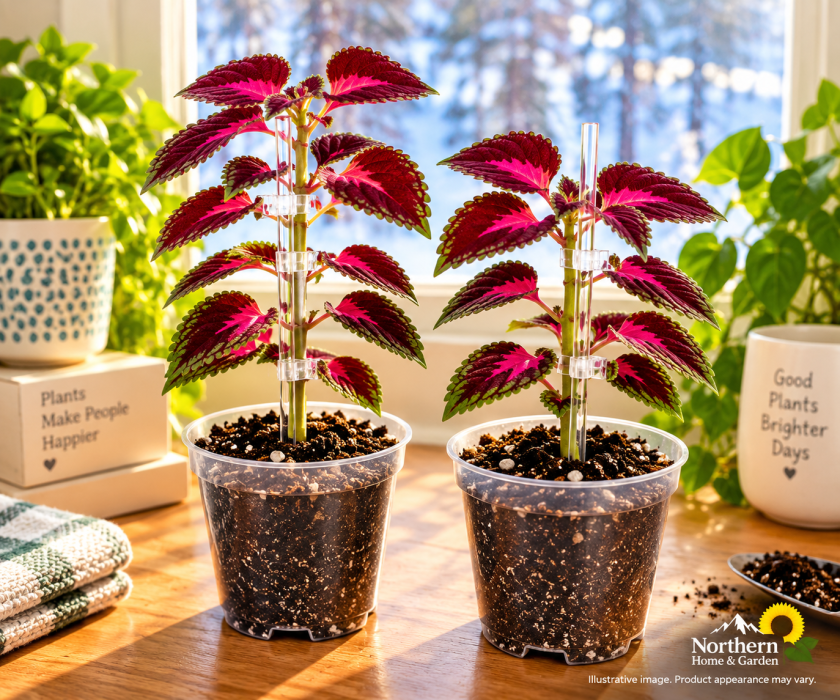
Two young pink and burgundy coleus plants in clear nursery pots supported by transparent acrylic plant stakes and clips on a sunny indoor windowsill.

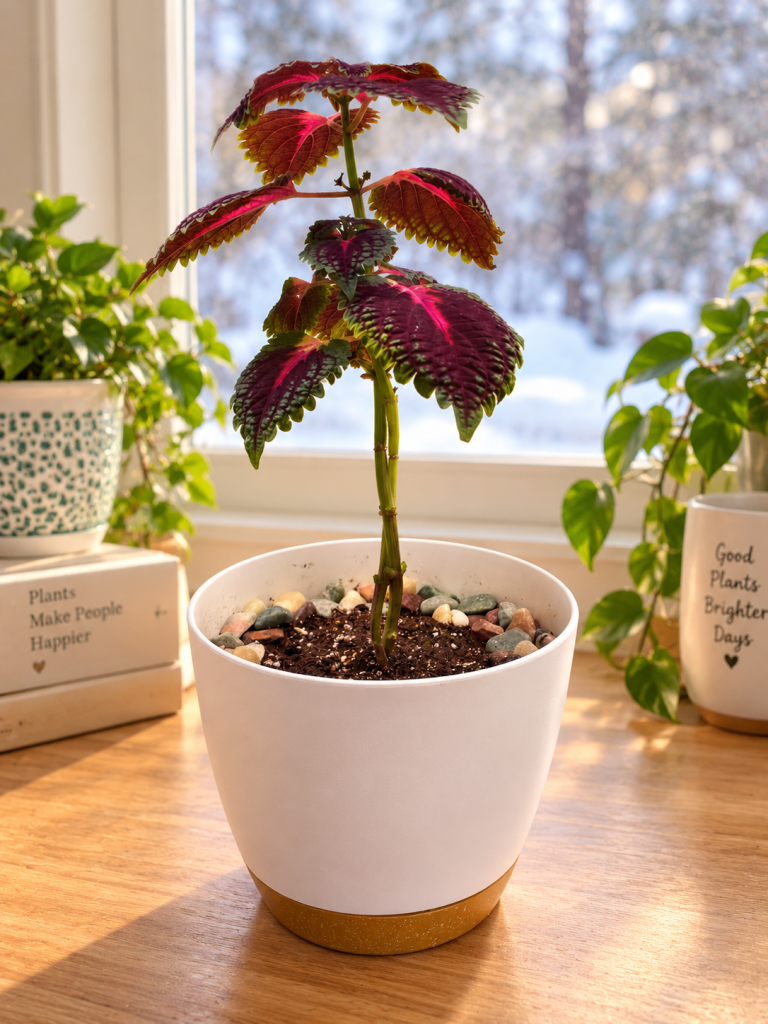
For my coleus trees, I started with two young plants growing together in the same pot.

As they grew, I gently wrapped the stems around each other, gradually removing the lower side growth. Over time, they created a thicker, more interesting-looking trunk that supported the leafy canopy above.

Don’t worry if the stems look skinny at first. They’ll thicken as the plants mature.

You can also grow a coleus tree using a single strong stem, but I really liked the look of growing two together!

❄️ Northern Tip:

If your young coleus leans, use a thin clear plant support stake beside the stem. I like clear acrylic stakes because they provide support without being very noticeable once the plant fills in.

Find the tools we use to keep our houseplants happy and growing!

Let It Grow Up Before You Let It Grow Out

This might be the hardest part, especially if you’re someone who wants to start shaping everything immediately!

For a coleus tree, we want height first and bushiness later.

Let the main stem grow upward, gradually removing lower side shoots as they appear. You can also remove lower leaves as the plant gets taller, but don’t strip the stem bare all at once. Those leaves are still helping your young plant grow.

As the plant gains height, you’ll start seeing that little trunk take shape. Rotate the pot a quarter turn every week or so, so your trunk grows straight instead of leaning toward the window. (In winter, our coleus would happily lean all the way to Hawaii if we let it.)

And yes, there will probably be an awkward phase.

That skinny stem with a handful of leaves at the top might not look impressive yet, but don’t give up on it.

That’s the beginning of your tree!

Young coleus tree trained with two intertwined stems growing in a white pot.

Decide How Tall You Want Your Coleus Tree

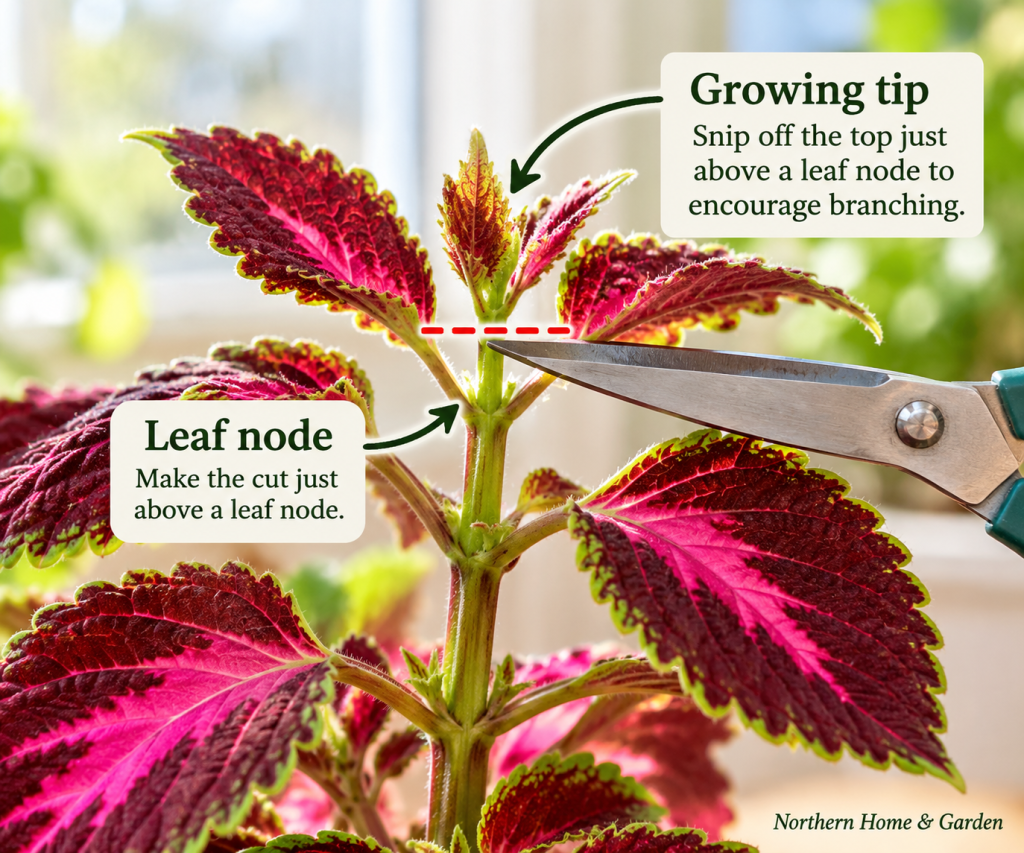
When you’re happy with the height of your main stem, pinch or prune off the growing tip just above a leaf node. This encourages new branches to develop below the cut.

It might feel wrong to cut the top after spending all that time encouraging it to grow taller.

Do it anyway!

This is when the fun really starts.

Close-up of a colorful pink and burgundy coleus plant showing where to snip the growing tip just above a leaf node to encourage branching and create a fuller coleus tree.

Pinch and Prune to Build the Canopy

Once your coleus begins branching at the top, it’s time to focus on creating a full, rounded canopy.

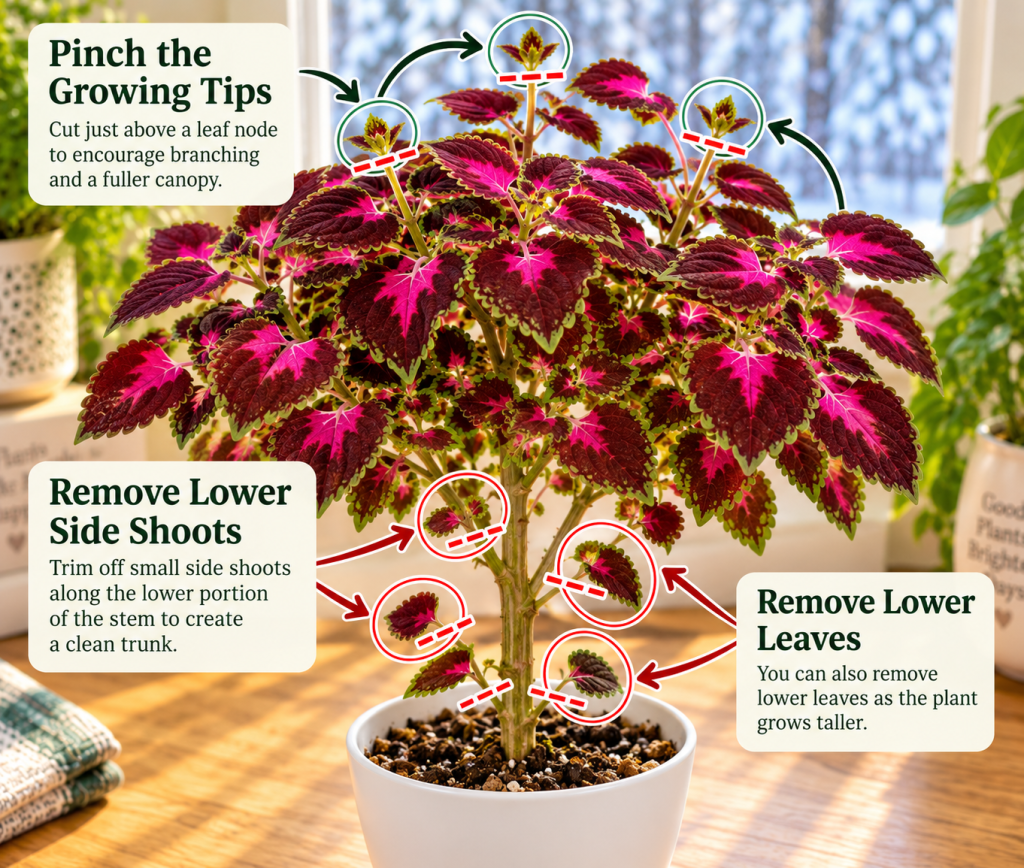
Allow several branches to develop, then pinch their growing tips just above a leaf node. Use clean, sharp pruning snips (my micro-tip snips are perfect for this) to make your cuts.

Each time you pinch a growing tip, you encourage additional branching below the cut. Repeat as needed to gradually create a fuller canopy.

You may also notice new shoots growing along the lower trunk.

Simply remove those shoots as they appear and continue shaping the canopy to keep your little tree looking full and balanced.

Coleus tree pruning guide showing where to pinch growing tips above leaf nodes and remove lower side shoots to encourage a full, rounded canopy and clean trunk.

Water Without Keeping the Soil Soggy

Coleus prefers consistently moist soil, but not soggy roots.

Use a pot with drainage holes and water thoroughly when the top inch of soil begins to dry. A soil moisture meter takes the guesswork out of it. Let any excess water drain away.

Coleus can be a little dramatic when it’s thirsty! A wilted plant may perk up quickly after watering, but repeated wilting can stress it.

From a Little Plant to a Coleus Tree

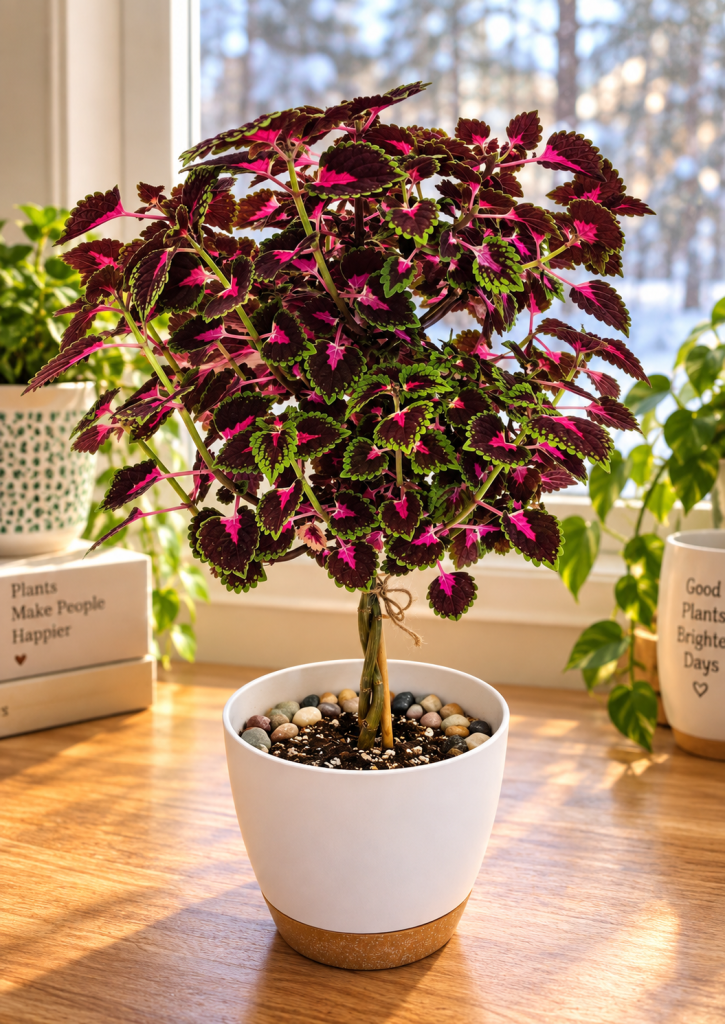
Mature coleus tree with a full rounded canopy and two intertwined stems growing in a white pot beside a snowy window.

Watching this little plant grow into a coleus tree was half the fun! 🌿

It started as a couple of small plants, went through a rather awkward tall-and-skinny stage, and eventually became a colorful little indoor tree.

If you already have a coleus growing at home, give this project a try! It’s a fun way to enjoy your coleus indoors, especially when the outdoor gardening season is on hold for, oh, about seven months.

And if you’re keeping coleus going through the winter, see Love Coleus? Here’s How to Keep It Growing Indoors All Winter.

You Might Also Like 🌿

Coleus cuttings rooting in water beside young coleus plants growing in soil on a sunny windowsill with snow outside.

Propagating Coleus: How to Turn One Plant Into a Whole Collection

Coleus propagation supplies including heart-shaped glass vases, indoor potting mix, nursery pots, and an LED grow light, with a Shop Our Houseplant Favorites invitation from Northern Home & Garden.

Shopping for a fellow plant lover? Our gift guide has some fun ideas.

🌻 Northern Home & Garden

More Northern Tips, Straight to Your Inbox 🌻

Get practical gardening advice, seasonal ideas and new posts from Northern Home & Garden delivered to your inbox.