Christmas vs. Thanksgiving vs. Easter Cactus: How to Tell Them Apart

Christmas, Thanksgiving, or Easter cactus? Learn how to tell these holiday favorites apart by their stem shapes, colorful flowers, and blooming seasons.

Have you ever bought a Christmas cactus, only to have it bloom before Thanksgiving? You might actually have a Thanksgiving cactus. It’s not confused, just a little eager.

Christmas, Thanksgiving, and Easter cacti look so similar that they’re easy to mix up. They’re all beautiful flowering houseplants, but each has a few features that make it unique.

You don’t have to wait for flowers to figure out which one you have, either. A quick look at the leaves tells you most of what you need to know.

Affiliate Disclosure: This post contains affiliate links. As an Amazon Associate I earn from qualifying purchases.

Meet the Three Holiday Cacti
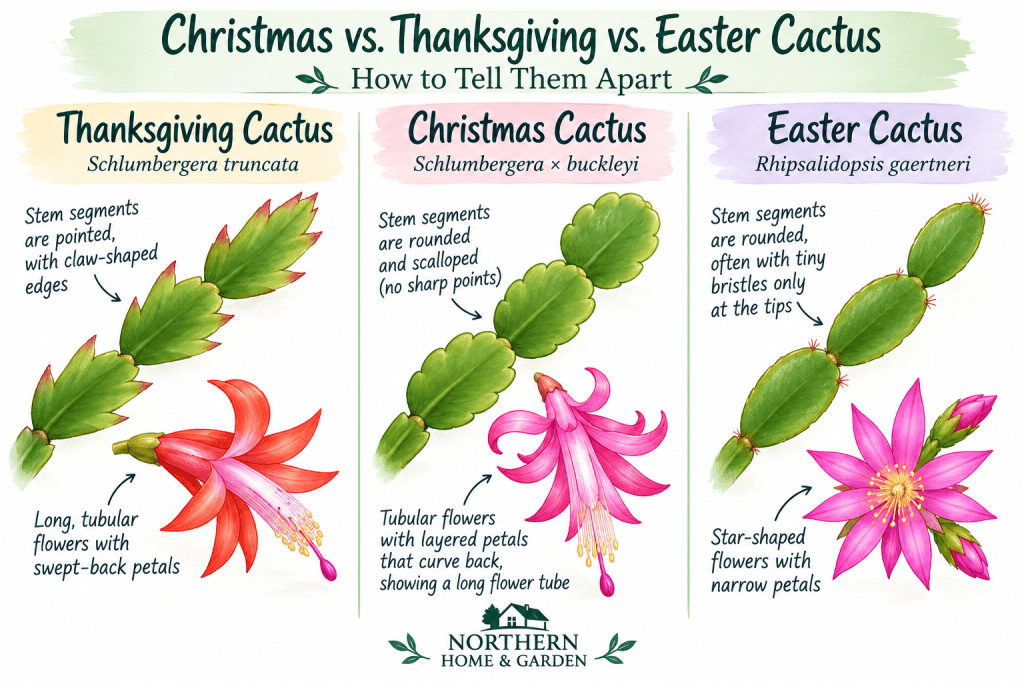
Watercolor comparison of Thanksgiving, Christmas, and Easter cacti showing pointed, rounded, and gently curved stem segments alongside their distinctive flowers.

Although these holiday cacti look similar, each has its own distinctive features. The easiest way to tell them apart is by looking at the shape of their stem segments and flowers.

Thanksgiving Cactus
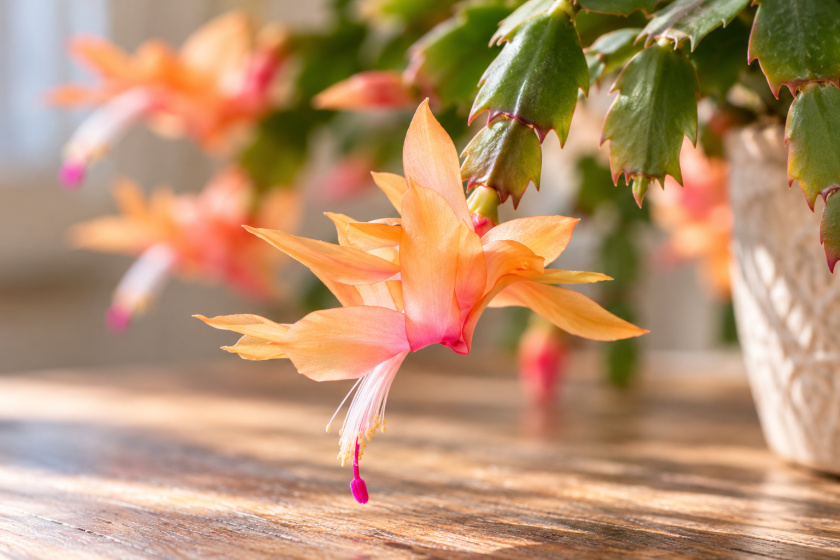
Close-up of a peach-orange Thanksgiving cactus flower with pink accents, hanging from green stem segments with pointed, claw-shaped edges.

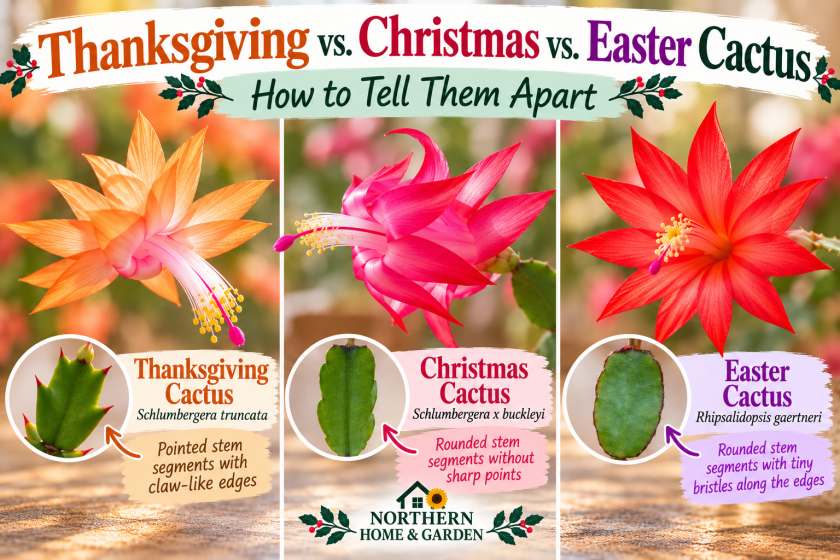
Thanksgiving cactus (Schlumbergera truncata) has pointed, claw-shaped edges along its stem segments. It’s usually the first of the three to bloom, often producing colorful flowers in the fall.

Its flowers come in shades of pink, red, purple, orange, and white. Thanksgiving cacti are also commonly sold as Christmas cacti in garden centers, which explains some of the confusion!

Christmas Cactus
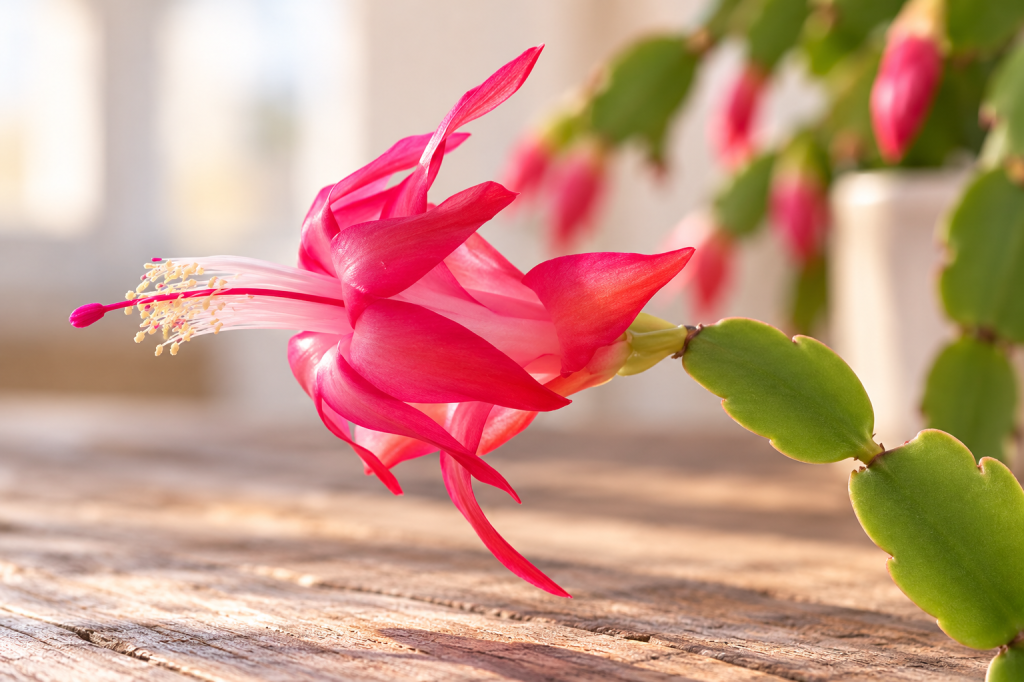
Close-up of a pink Christmas cactus flower with delicate stamens and rounded, scalloped green stem segments against a softly blurred background.

True Christmas cactus (Schlumbergera × buckleyi) has rounded, scalloped stem segments without the sharp points found on Thanksgiving cactus.

Its flowers are typically pink or reddish-pink and hang gracefully from the ends of its stems. Christmas cactus generally blooms in early winter, closer to its namesake holiday.

Easter Cactus
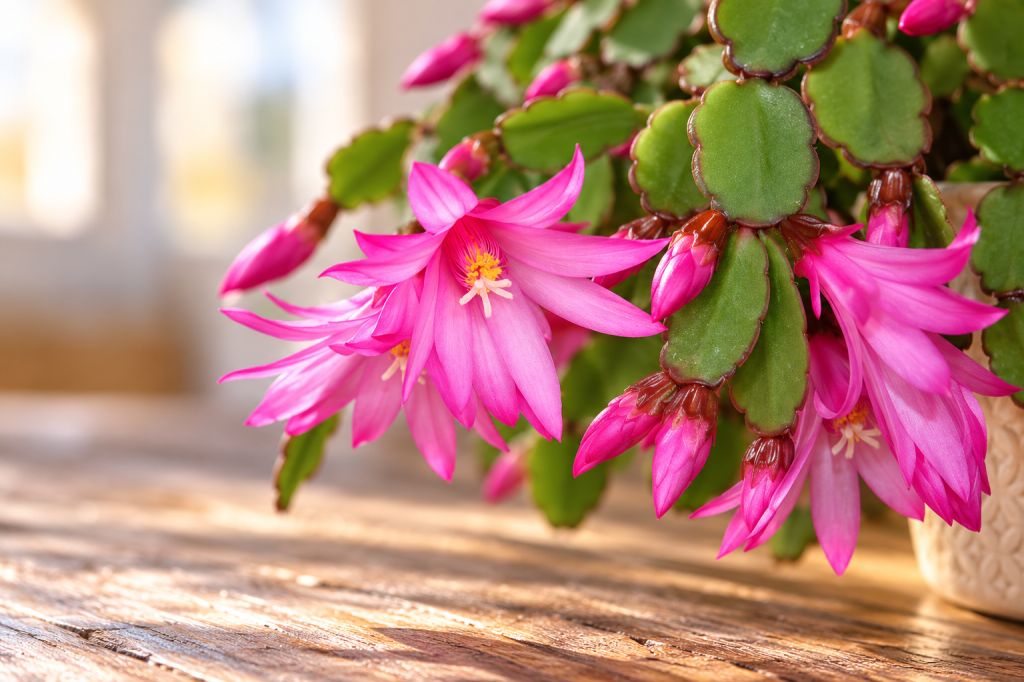
Bright pink Easter cactus flowers and buds surrounded by rounded green leaf segments, cascading from a pot on a sunlit wooden table.

Easter cactus (Schlumbergera gaertneri, formerly Rhipsalidopsis gaertneri) has rounded stem segments, sometimes with tiny bristles along the edges and tips.

Unlike its fall- and winter-blooming relatives, Easter cactus typically flowers in spring. Its cheerful, star-shaped blooms come in shades of pink, red, orange, and white.

How to Care for Holiday Cacti

Although Thanksgiving, Christmas, and Easter cacti bloom at different times, their basic care needs are fairly similar. A little attention to light, water, and soil will help keep them healthy throughout the year.

  • Light: Place your cactus in bright, indirect sunlight. Too much direct sun can scorch the stems.
  • Water: Allow the top inch or so of soil to dry before watering thoroughly. Let excess water drain away, and never leave the pot sitting in water. A soil moisture meter takes the guesswork out of this. I use one for all my houseplants.
  • Soil: Use a well-draining potting mix. Adding perlite or orchid bark can help prevent soggy roots. If it’s time for a bigger pot, a repotting mat keeps the mess off your table. I love mine.
  • Temperature: Average indoor temperatures between 60 and 75°F work well for everyday care.
  • Humidity: Holiday cacti appreciate moderate humidity, especially during the dry winter months.

Unlike many desert cacti, these plants are native to humid environments and prefer a little more moisture. The trick is keeping the soil lightly moist when needed without leaving the roots waterlogged.

Want Your Holiday Cactus to Bloom?

Healthy green stems are lovely, but those colorful flowers are what make holiday cacti so special! Holiday cacti set buds when the nights get long, which is one thing we have no shortage of up here.

If your Christmas or Thanksgiving cactus hasn’t bloomed in a while, visit our guide on How to Get Your Holiday Cactus to Bloom for tips on encouraging flowers, including the importance of temperature, light, and seasonal rest.

Pink holiday cactus blooming in a decorative cream pot beside a snowy window, with the text “How to Get Your Holiday Cactus to Bloom! And Keep It Blooming!”

Final Thoughts

Whether your holiday cactus blooms in November, December, or spring, each one brings a little color into the house when we need it most.

And now that you know what to look for, you’ll have a much easier time figuring out which holiday cactus is sitting on your windowsill!

Shopping for a fellow houseplant lover this season? Our gift guide for cold-climate gardeners has plenty of ideas.

🌻 Northern Home & Garden

More Northern Tips, Straight to Your Inbox 🌻

Get practical gardening advice, seasonal ideas and new posts from Northern Home & Garden delivered to your inbox.

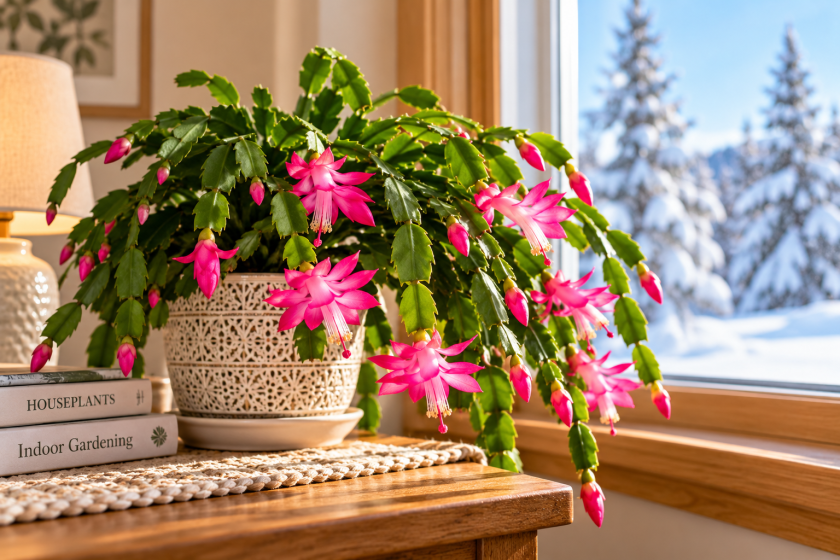
How to Get Your Holiday Cactus to Bloom (And Keep It Blooming!)

Wondering why your holiday cactus won’t bloom? Learn four simple steps to encourage beautiful flowers on Christmas and Thanksgiving cactus, prevent bud drop, and keep your plant healthy year after year.

Few things brighten a dark winter afternoon like a holiday cactus covered in flowers. When it’s cold and snowy outside, those cheerful pink, red, or white blooms are a very welcome splash of color.

But what if your Christmas or Thanksgiving cactus refuses to bloom? Or worse, it develops flower buds only to drop them before they open?

Getting your holiday cactus to bloom isn’t complicated, I promise. With the right combination of light, temperature, and watering, you can encourage beautiful flowers year after year.

Affiliate Disclosure: This post contains affiliate links. As an Amazon Associate I earn from qualifying purchases.

4 Simple Steps to Encourage Holiday Cactus Blooms

Christmas and Thanksgiving cacti respond to changes in daylight and temperature. As fall approaches, longer nights and cooler conditions signal that it’s time to produce flower buds.

Christmas cactus covered in bright pink flowers and unopened buds beside a sunny window overlooking snow-covered trees.

1. Give It Longer, Uninterrupted Nights

For about six to eight weeks in the fall, give your holiday cactus approximately 13 to 14 hours of uninterrupted darkness each night.

Up here, fall nights get long fast, so nature does most of the work for us. The real troublemakers are lamps and TVs. If your cactus lives in the living room, every evening of Netflix counts as daytime to your plant, so a spare room that stays dark after sunset works best.

During the day, keep your cactus in bright, indirect light.

2. Keep Temperatures on the Cooler Side

Cooler temperatures can encourage flower buds, even when the plant receives fewer hours of darkness. Aim for nighttime temperatures around 55 to 60°F, if possible.

There’s no need to turn your house into a refrigerator! A naturally cooler room may be all your plant needs.

3. Water Carefully

Christmas and Thanksgiving cacti aren’t quite like the desert cacti we’re used to seeing. They’re tropical plants that prefer a little more moisture.

Water when the upper inch of soil feels dry. Allow excess water to drain away, and avoid leaving the pot sitting in water.

During the fall blooming preparation period, avoid keeping the soil constantly wet, but don’t let the plant become severely dried out either.

I like to use a soil moisture meter to help check when my houseplants need water. It’s especially handy for larger plants when it’s hard to tell how damp the soil is beneath all that foliage.

4. Give It a Little Time

Flower buds don’t appear overnight.

After several weeks of favorable conditions, you may begin noticing tiny buds forming at the tips of the stem segments. It can take several more weeks for those buds to open.

Once buds appear, continue providing bright, indirect light and consistent temperatures as the flowers develop.

What to Do When Flower Buds Appear

Christmas cactus with vibrant pink flowers and unopened flower buds hanging from green stems beside a sunlit window.

You’ve waited patiently, and your holiday cactus finally has flower buds! Now the goal is to keep those little buds happy until they open.

Christmas and Thanksgiving cacti can be sensitive to sudden changes in their environment, especially while they’re developing flowers.

A few simple precautions can help prevent bud drop:

  • Keep temperatures consistent. Avoid placing your plant near heating vents, drafty doors, or cold windows.
  • Maintain steady watering. Don’t let the soil become completely dry for long periods, but avoid overwatering.
  • Provide bright, indirect light. Once buds appear, you can return to a normal day and night lighting schedule. Your cactus no longer needs the long nights used to encourage bud formation.
  • Avoid sudden changes in location. Moving your plant isn’t necessarily harmful, but changes in light, temperature, or humidity can cause buds to drop.
  • Hold off on repotting. Wait until after flowering to avoid disturbing the roots unnecessarily.

Why Isn’t My Holiday Cactus Blooming?

If your Christmas or Thanksgiving cactus looks healthy but refuses to flower, don’t give up on it just yet!

Usually, the problem comes down to lighting, temperature, or watering. A few small adjustments may be all it needs.

Possible ProblemWhat to Try
Too much artificial light at nightProvide 13 to 14 hours of uninterrupted darkness for several weeks during fall.
Temperatures are too warmTry a cooler location, ideally around 55 to 60°F at night during bud formation.
Not enough daytime lightMove your cactus to a spot with bright, indirect sunlight. During our dark northern winters, a grow light can help too.
Improper wateringWater when the upper inch of soil feels dry, and avoid soggy soil.
Recent repotting or other stressGive your plant time to settle into a stable environment.

Can a Holiday Cactus Bloom More Than Once a Year?

Close-up of a vibrant pink Christmas cactus flower with delicate stamens and unopened buds beside a snowy window.

Absolutely! Although Christmas and Thanksgiving cacti are known for their beautiful flowers during the colder months, both can bloom more than once a year when growing conditions are right.

Changes in daylight hours and temperature may encourage another round of flower buds, even outside the usual blooming season.

I’ve experienced this with my own holiday cactus. Not only has it surprised me with beautiful pink flowers in April, but it’s even bloomed in July! And the funny thing is, I haven’t done anything differently to encourage those extra blooms.

Apparently, my cactus has decided that blooming season is more of a suggestion than a rule!

While you can’t count on flowers appearing throughout the year, keeping your plant healthy with proper light, watering, and consistent care gives it the best chance to bloom again when conditions are favorable.

Caring for Your Holiday Cactus After Blooming

Healthy Christmas cactus with cascading green stems in a decorative cream pot beside a sunny window overlooking a snowy landscape.

Once the last flowers have faded, a little routine care will help keep your holiday cactus healthy and ready for its next blooming season. Fortunately, it doesn’t take much!

  • Keep it in bright, indirect light. Avoid harsh afternoon sunshine that can scorch the stems.
  • Water when needed. Allow the upper inch of soil to dry before watering, and never leave the pot sitting in water.
  • Fertilize during active growth. A balanced houseplant fertilizer, diluted according to the label, can help support healthy growth in spring and summer.
  • Repot only when necessary. Holiday cacti can bloom well when slightly rootbound. If your plant needs a larger pot, spring is a good time to repot.
  • Prune after flowering. Removing a few stem segments can encourage branching and fuller growth. And don’t throw those cuttings away! They’re perfect for propagating new plants.

With a little consistent care, Christmas and Thanksgiving cacti can thrive for many years, becoming beautiful houseplants that you can enjoy long after the decorations are packed away.

Looking for a gift for the plant lover in your life? Check out our gift guide for cold-climate gardeners for houseplant tools and other winter favorites.

Not sure which holiday cactus you have?

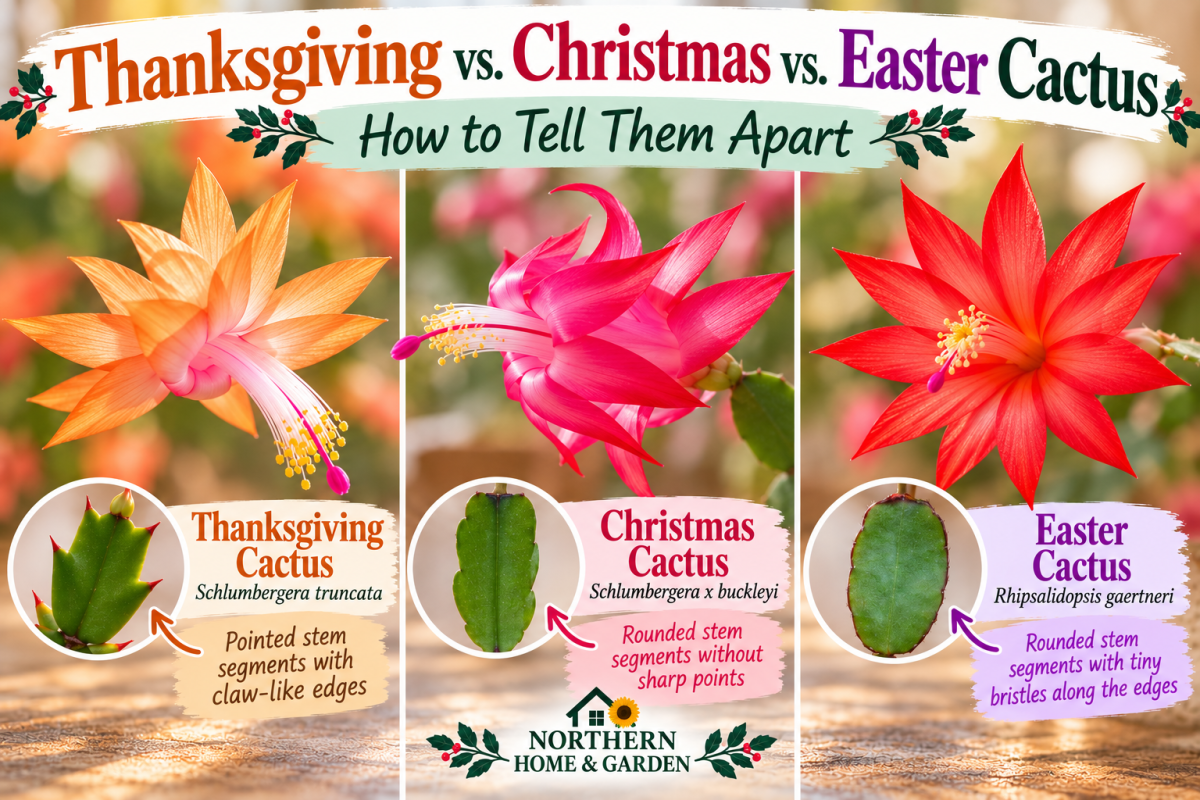
Comparison of Thanksgiving, Christmas, and Easter cactus flowers with close-ups showing their different stem shapes, including pointed, rounded, and finely bristled edges.

Christmas, Thanksgiving, and Easter cacti may look similar, but their stem shapes and blooming seasons can help you tell them apart. Check out our guide Christmas vs. Thanksgiving vs. Easter Cactus to identify yours!

🌻 Northern Home & Garden

More Northern Tips, Straight to Your Inbox 🌻

Get practical gardening advice, seasonal ideas and new posts from Northern Home & Garden delivered to your inbox.
Love Coleus? Here’s How to Keep It Growing Indoors All Winter

Don’t let the first frost take your beautiful coleus! Learn two easy ways to keep it growing indoors all winter, whether you bring the whole plant inside or start fresh with cuttings.

Coleus is one of those plants that’s really hard to say goodbye to at the end of summer.

Thankfully, coleus can grow indoors through winter with the right light, watering, and a little pruning.

Here’s how to keep your coleus growing indoors until spring.

Affiliate Disclosure: This post contains affiliate links. As an Amazon Associate I earn from qualifying purchases.

Can Coleus Really Grow Indoors?

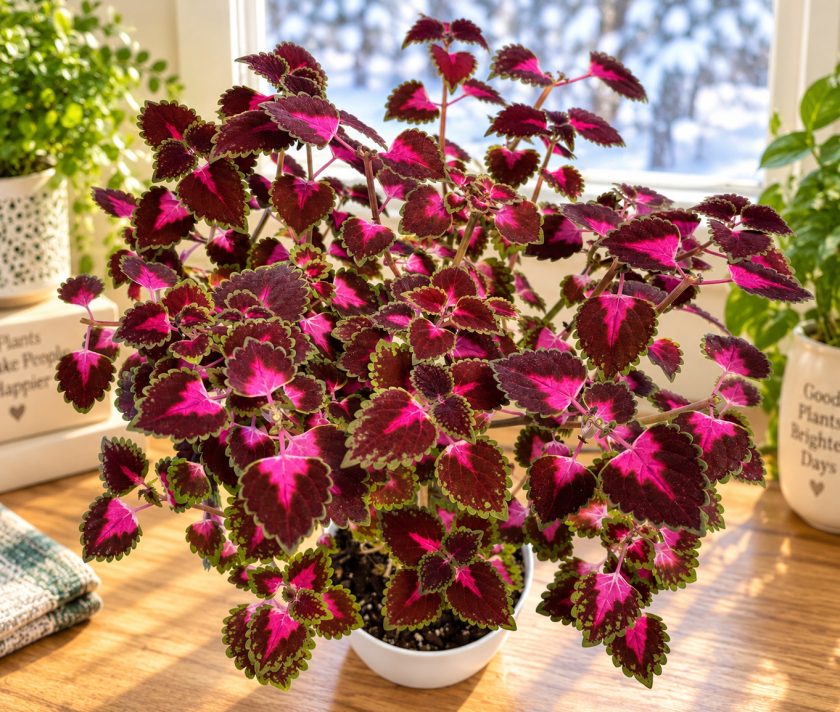
Large colorful coleus plant growing indoors near a sunny window during winter.

Absolutely!

Coleus is a tender perennial that can’t survive our freezing northern winters outdoors, but it can continue growing indoors with the right care.

It may slow down during the shorter winter days, but give it plenty of light, protect it from cold drafts, and adjust your watering to keep it happy until spring.

Two Easy Ways to Save Your Coleus

  • Bring the whole plant indoors. Perfect if your coleus is a manageable size and you have a bright spot for it.
  • Take a few cuttings. My personal favorite! Cuttings take up very little space and are incredibly easy to propagate.

If your coleus has grown into a giant bush over summer, I’d definitely consider the second option.

Option 1: Bringing the Whole Coleus Plant Inside

Just give it a little attention before moving it in!

  1. Inspect for pests. Check the leaves, stems, soil, and pot for aphids, spider mites, fungus gnats, and other unwanted visitors.
  2. Clean it up. Remove dead or damaged leaves and prune back any overgrown stems.
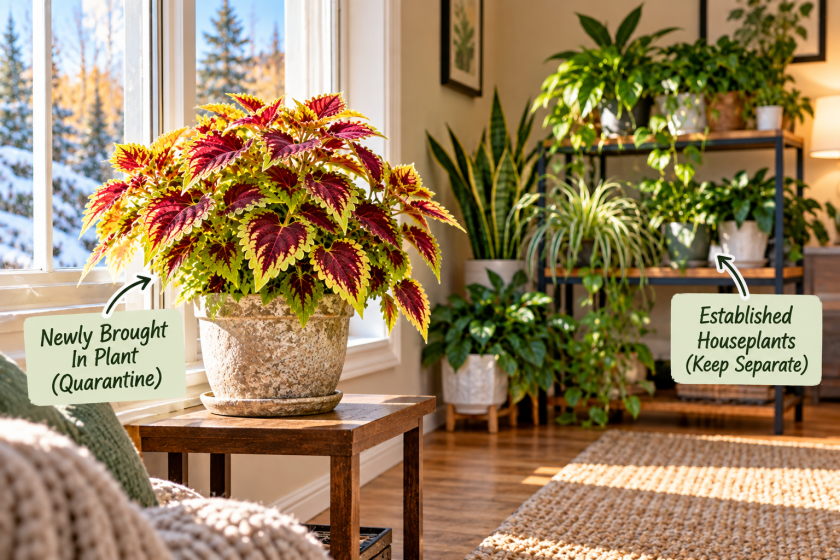
  3. Keep it separate. Quarantine your coleus away from your other houseplants for a couple of weeks, checking regularly for pests.

Nobody wants to bring a beautiful coleus indoors only to discover it brought a few hundred friends along with it.

Newly brought indoor coleus plant kept separate from established houseplants during quarantine.

For more tips, check out our How to Bring Outdoor Plants Inside for Winter guide. It covers inspecting, cleaning, and transitioning outdoor plants into your home.

Option 2: Take Coleus Cuttings Instead

Cuttings take up very little space, and they’re incredibly easy to grow indoors.

Here’s how:

  1. Take a cutting. Choose a healthy stem about 4 to 6 inches long and cut just below a leaf node.
  2. Remove the lower leaves. Strip off any leaves that would sit underwater.
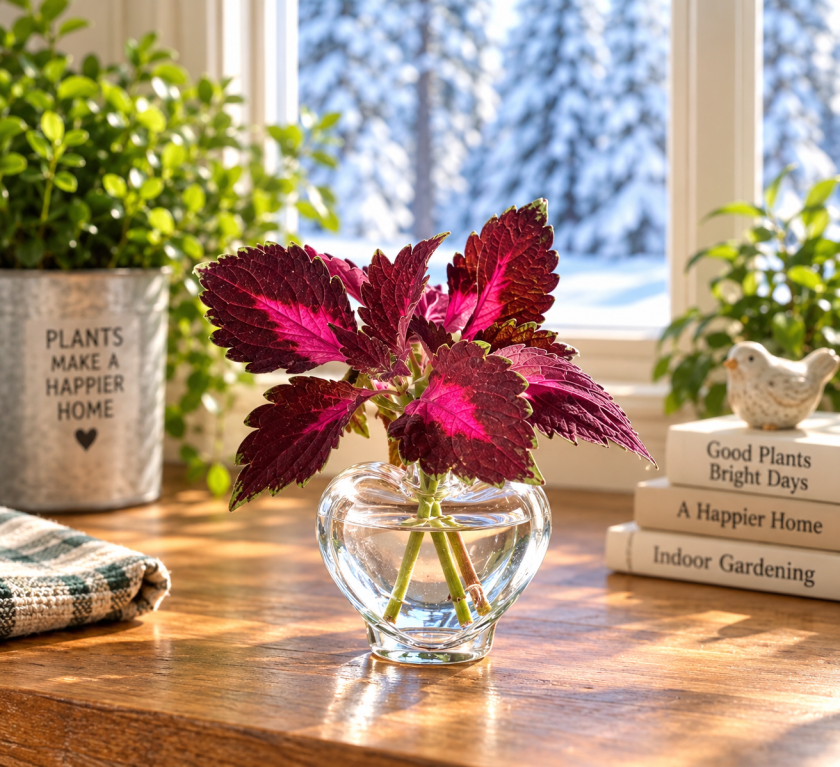
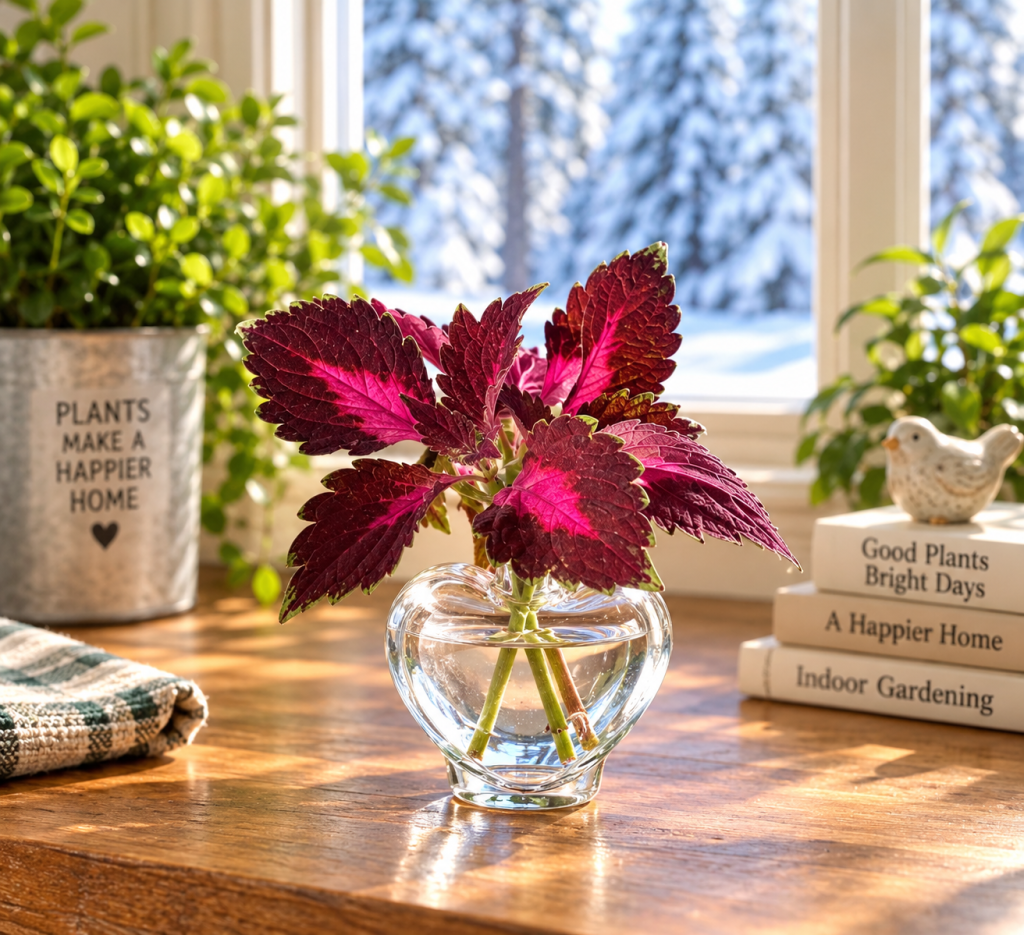
  3. Place in water. Put the cutting in a small glass or propagation vase (I love my heart-shaped one!), keeping the lower nodes submerged and the leaves above water.
  4. Find a bright spot. Keep your cutting in bright, indirect light and refresh the water regularly.

Under good conditions, you may see little white roots developing within a week or two.

Coleus cuttings rooting in water in a heart-shaped glass vase near a sunny winter window.

When Should You Move Coleus Cuttings Into Soil?

Once your cutting has several healthy roots about 1 to 2 inches long, it’s ready for soil!

  1. Choose a small pot with drainage holes and fill it with well-draining potting mix.
  2. Plant your cutting gently, covering the roots with soil, and water thoroughly.
  3. Keep the soil lightly moist while your coleus adjusts to its new home.

Water-grown roots need a little time to adjust to soil. Once you see healthy new growth, gradually return to a normal watering routine.

Two rooted coleus cuttings planted in clear pots after being propagated in water.

Light Is Probably Your Biggest Winter Challenge

Coleus LOVES light! And during our short northern winter days, getting enough can be tricky. Up here, a December “day” is shorter than most movies, so your sunniest south-facing window is prime real estate.

Place your coleus near a bright window, away from cold drafts.

Signs your coleus needs more light:

  • Long, leggy stems
  • Smaller leaves
  • Fading colors
  • Growth leaning toward the window

Rotate your pot occasionally to encourage even growth.

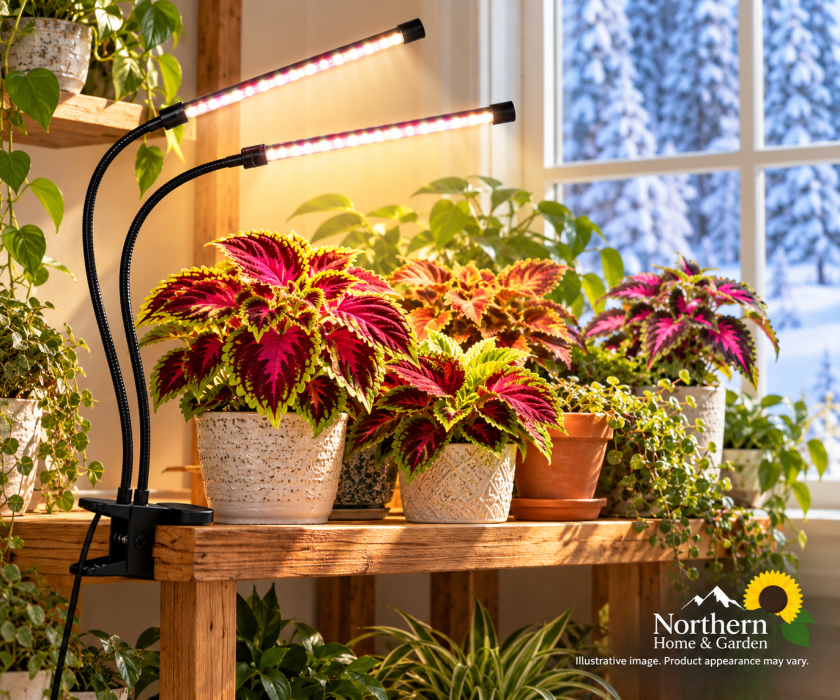
If natural light isn’t enough, a simple clip-on full-spectrum grow light with a timer can make a big difference. For help choosing one, see Grow Lights for Northern Winters.

Colorful coleus plants growing indoors beneath a clip-on LED grow light beside a snowy winter window.

Change the Way You Water

Coleus needs less water during winter when growth slows down. Don’t follow the same watering schedule you used outdoors in summer!

  • Check the soil before watering.
  • Let the top inch of soil begin to dry between waterings.
  • Water thoroughly, allowing excess water to drain from the pot.
  • Avoid letting your coleus stay soggy or become severely wilted.

The goal is lightly moist soil, not constantly wet soil.

❄️ Northern Tip

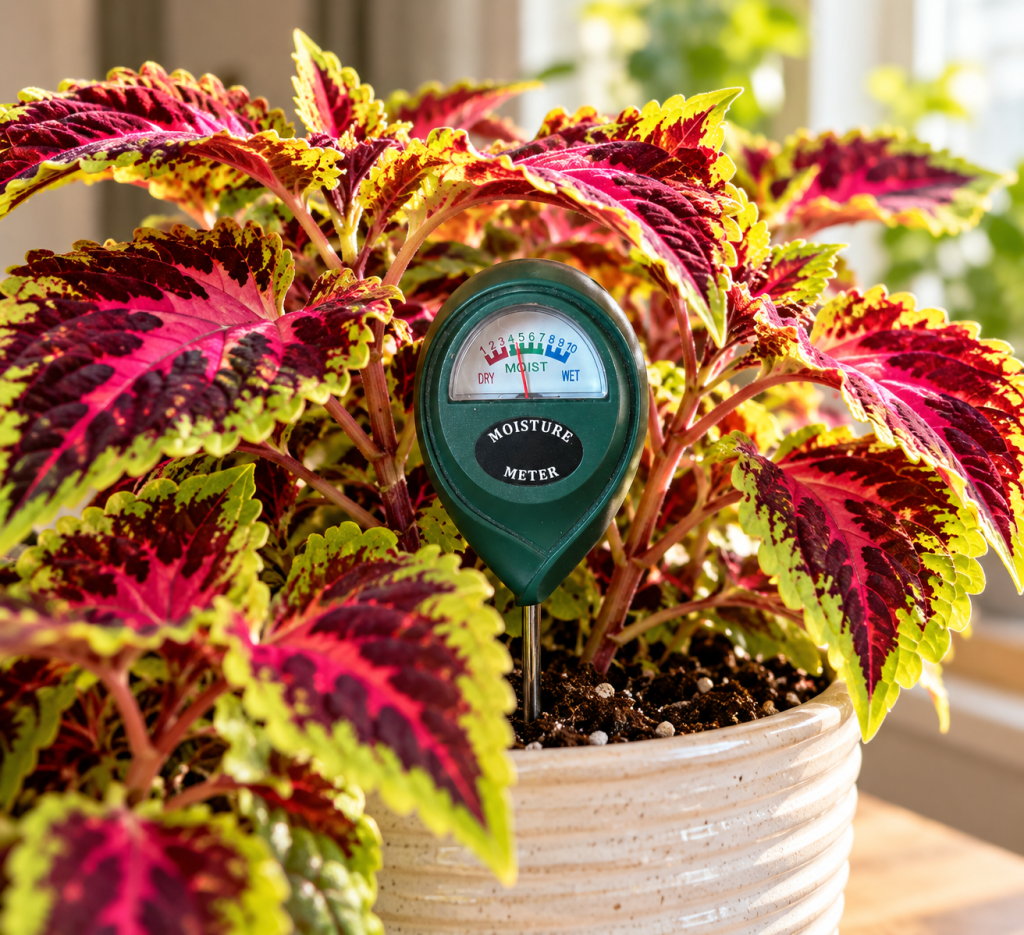
Not sure when to water? A simple moisture meter can help you check below the surface. I use one for all my houseplants!

Find the tools we use to keep our houseplants happy and growing!

Soil moisture meter checking the moisture level of a potted coleus plant.

Pinching and Pruning Keeps Coleus Bushy

Coleus can get tall and leggy without regular pruning, but a little trimming encourages fuller, bushier growth.

Simply pinch off the growing tips or use a pair of sharp micro-tip snips (my go-to for all my houseplants) to cut just above a leaf node. This encourages new branches to grow below the cut.

Don’t Say Goodbye Just Yet

The first frost doesn’t have to mean goodbye to your favorite coleus!

Bring the whole plant indoors or take a few cuttings to grow through winter. With enough light, careful watering, and occasional pruning, you can enjoy those colorful leaves until spring.

And don’t be surprised if one little cutting turns into an entire collection!

Want to Try Something REALLY Fun?

This is where my coleus experiments took an unexpected turn.

You can actually train coleus into a little tree. And yes, it is every bit as cute as it sounds.

Indoor coleus trained into a small tree shape with a full colorful canopy.

Here’s how: How to Grow a Coleus Tree: From a Cutting to a Beautiful Indoor Plant.

You Might Also Like 🌿

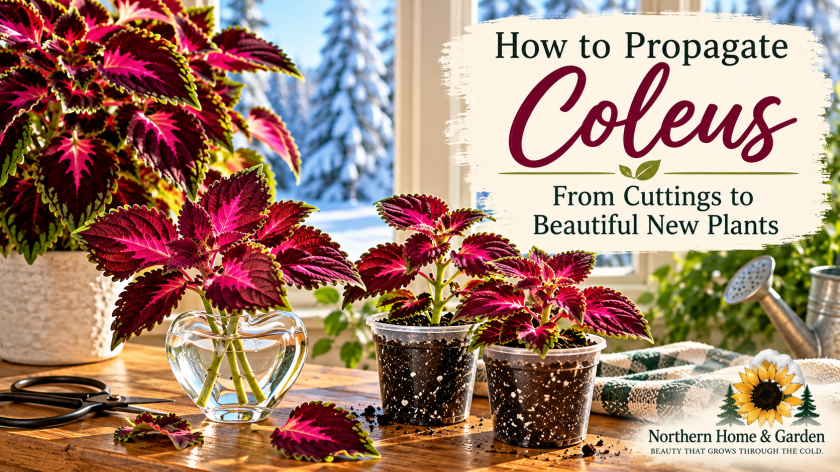
Coleus cuttings rooting in water beside young coleus plants growing in soil on a sunny windowsill with snow outside.

Propagating Coleus: How to Turn One Plant Into a Whole Collection

Shopping for a fellow plant lover? Our gift guide has some fun ideas.

🌻 Northern Home & Garden

More Northern Tips, Straight to Your Inbox 🌻

Get practical gardening advice, seasonal ideas and new posts from Northern Home & Garden delivered to your inbox.
Propagating Coleus: How to Turn One Plant Into a Whole Collection

Learn how to take coleus cuttings, root them in water, transplant them into soil, and keep your new plants growing happily indoors through winter.

Coleus might be one of the most dangerously easy plants to propagate.

You start with one plant. You snip off a little cutting, stick it in a glass of water, and suddenly you’re looking around the house wondering where you’re going to put the other 14 coleus plants you somehow acquired.

Ask me how I know. 😂

Continue reading “Propagating Coleus: How to Turn One Plant Into a Whole Collection”

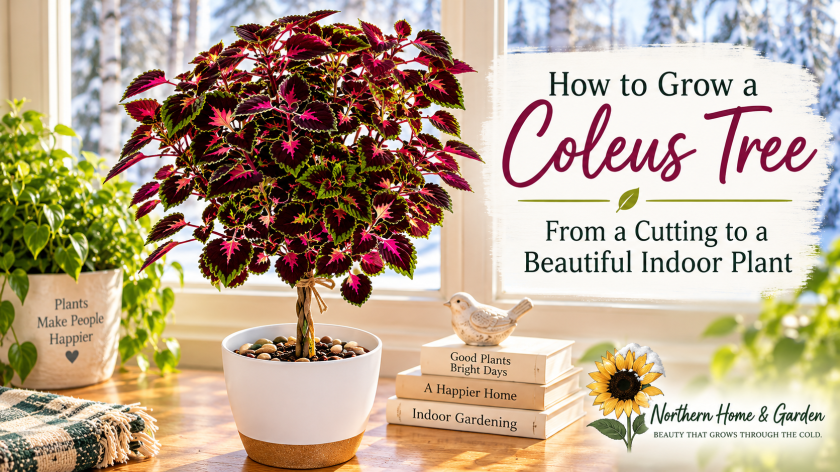
How to Grow a Coleus Tree: From a Cutting to a Beautiful Indoor Plant

Turn an ordinary coleus into a beautiful indoor tree with a little patience and plenty of pruning. Learn how to train the stems, shape a full canopy, and keep your coleus growing indoors through winter.

Most of us think of coleus as a bushy plant tucked into containers or garden beds. But with some strategic pruning, you can train a coleus into an entirely different shape, complete with a miniature trunk and a full canopy of colorful leaves.

And because coleus is so easy to propagate, you don’t need to buy a large plant to get started. All you need is a few cuttings.

Here’s how I grew mine.

Affiliate Disclosure: This post contains affiliate links. As an Amazon Associate I earn from qualifying purchases.

What Is a Coleus Tree?

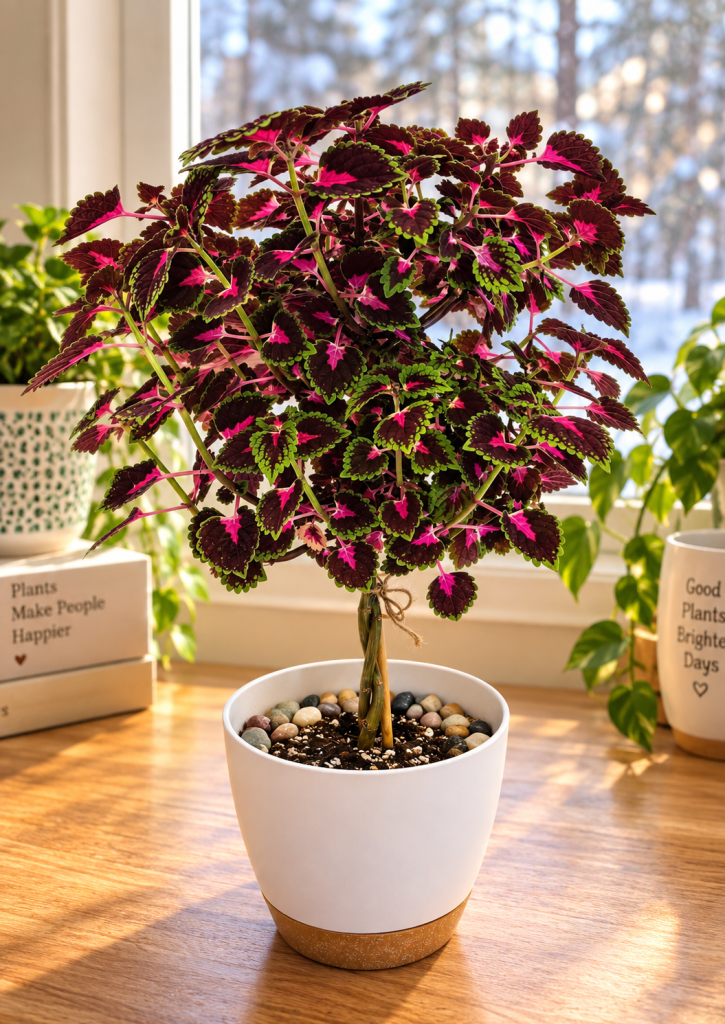
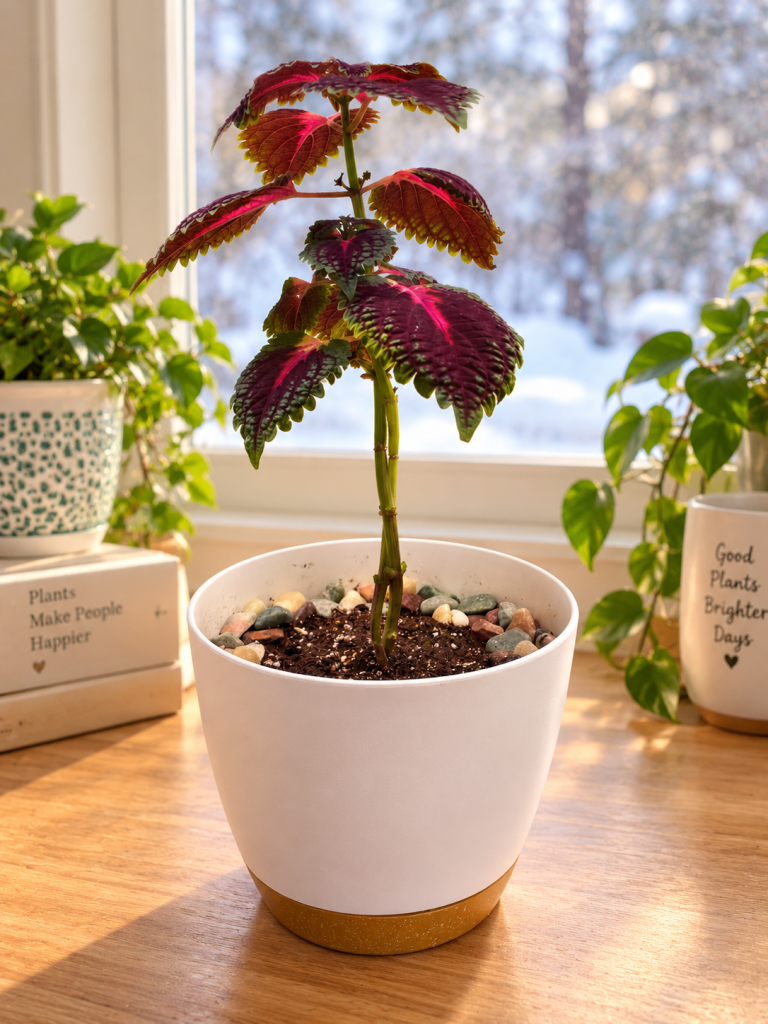
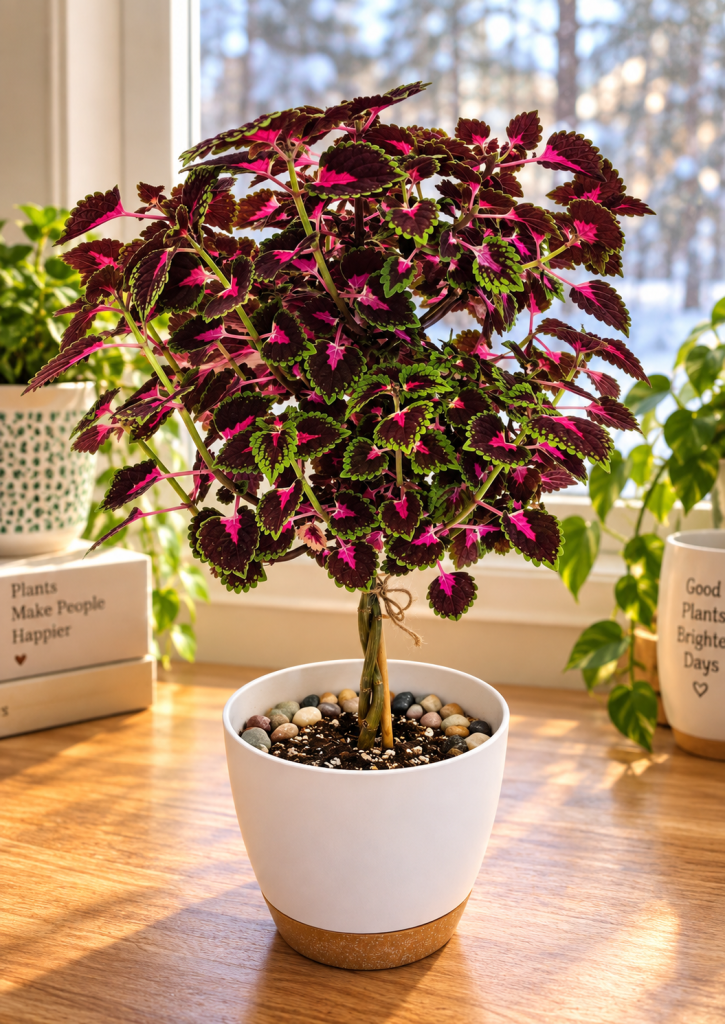
Coleus tree with a braided trunk and a full canopy of pink and burgundy leaves with green edges, in a white pot topped with pebbles on a sunny windowsill.

A coleus tree isn’t a special variety of coleus. It’s simply a coleus plant trained into a tree shape rather than allowed to grow naturally as a bush.

By encouraging one or two main stems to grow taller, removing lower growth, and pruning the top, you can create a miniature trunk with a full, rounded canopy.

And that little tree can have leaves in beautiful shades of pink, burgundy, green, purple, or just about any combination in between!

❄️ Northern Tip:

Coleus grows quickly under good conditions, making it a fun plant to experiment with. Don’t worry if your first attempt isn’t perfectly shaped. Coleus is forgiving and gives you plenty of new growth to work with!

Start With a Healthy Coleus Plant or Cutting

Coleus cuttings rooting in water in a small heart-shaped glass propagation vase.

You don’t need a large plant to grow a coleus tree. A healthy young plant or even a rooted cutting is enough to get started.

If you’re starting from a cutting, choose a healthy stem, remove the lower leaves, and place it in water until roots develop. Then transplant it into potting soil.

New to propagating coleus? Check out our Propagating Coleus: How to Turn One Plant Into a Whole Collection guide for step-by-step instructions.

Once your plant is established and actively growing, you’re ready to begin training it into a tree.

Choose Your Main Stems

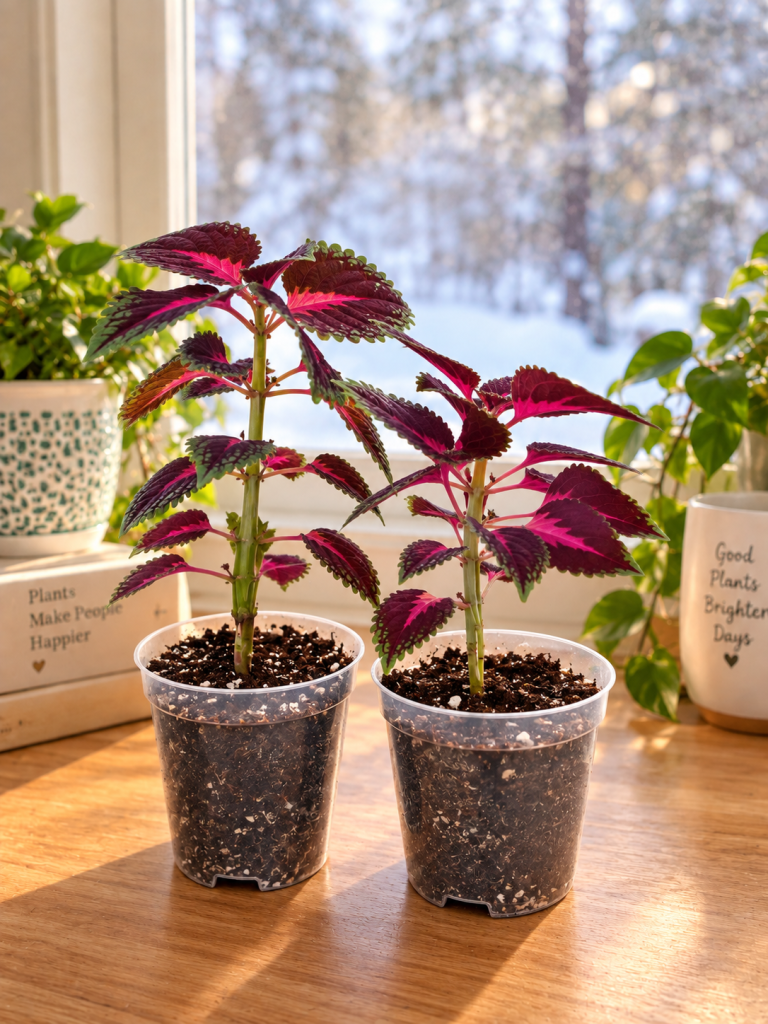
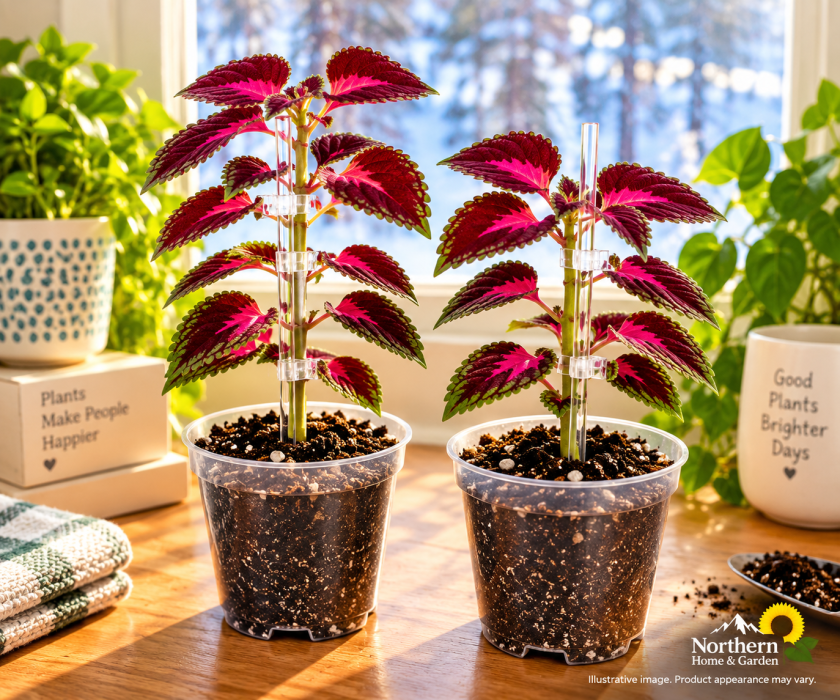
Two young pink and burgundy coleus plants in clear nursery pots supported by transparent acrylic plant stakes and clips on a sunny indoor windowsill.

For my coleus trees, I started with two young plants growing together in the same pot.

As they grew, I gently wrapped the stems around each other, gradually removing the lower side growth. Over time, they created a thicker, more interesting-looking trunk that supported the leafy canopy above.

Don’t worry if the stems look skinny at first. They’ll thicken as the plants mature.

You can also grow a coleus tree using a single strong stem, but I really liked the look of growing two together!

❄️ Northern Tip:

If your young coleus leans, use a thin clear plant support stake beside the stem. I like clear acrylic stakes because they provide support without being very noticeable once the plant fills in.

Find the tools we use to keep our houseplants happy and growing!

Let It Grow Up Before You Let It Grow Out

This might be the hardest part, especially if you’re someone who wants to start shaping everything immediately!

For a coleus tree, we want height first and bushiness later.

Let the main stem grow upward, gradually removing lower side shoots as they appear. You can also remove lower leaves as the plant gets taller, but don’t strip the stem bare all at once. Those leaves are still helping your young plant grow.

As the plant gains height, you’ll start seeing that little trunk take shape. Rotate the pot a quarter turn every week or so, so your trunk grows straight instead of leaning toward the window. (In winter, our coleus would happily lean all the way to Hawaii if we let it.)

And yes, there will probably be an awkward phase.

That skinny stem with a handful of leaves at the top might not look impressive yet, but don’t give up on it.

That’s the beginning of your tree!

Young coleus tree trained with two intertwined stems growing in a white pot.

Decide How Tall You Want Your Coleus Tree

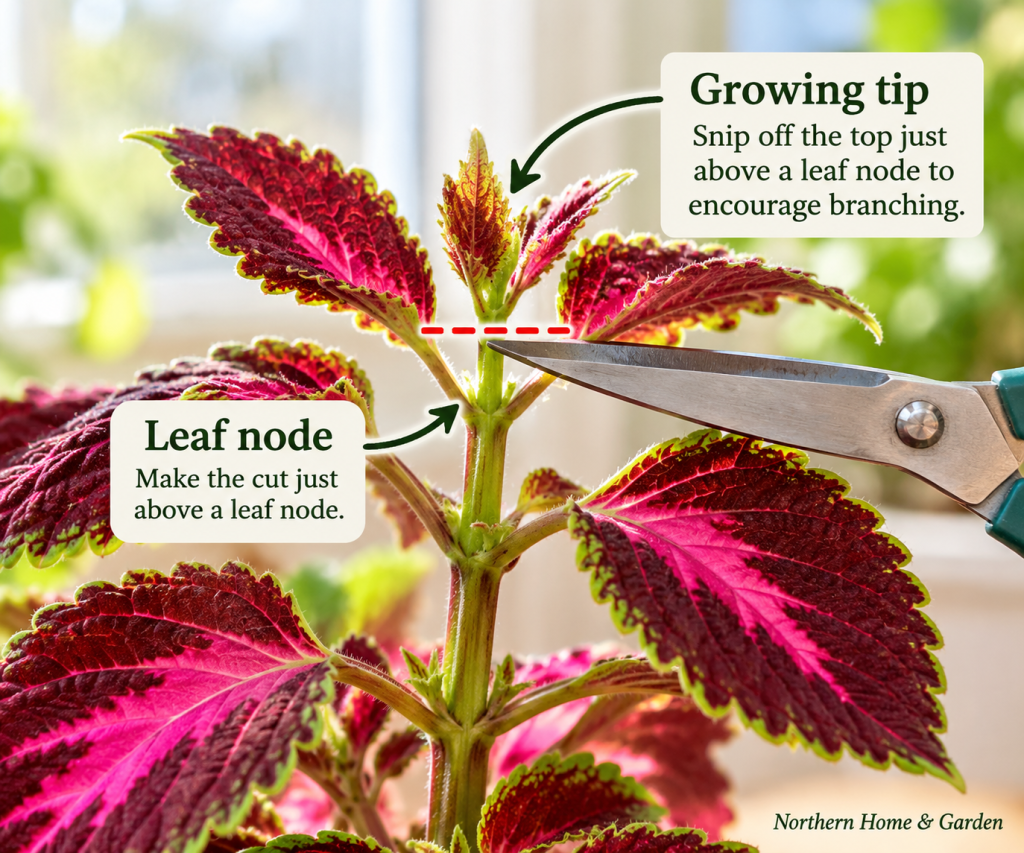
When you’re happy with the height of your main stem, pinch or prune off the growing tip just above a leaf node. This encourages new branches to develop below the cut.

It might feel wrong to cut the top after spending all that time encouraging it to grow taller.

Do it anyway!

This is when the fun really starts.

Close-up of a colorful pink and burgundy coleus plant showing where to snip the growing tip just above a leaf node to encourage branching and create a fuller coleus tree.

Pinch and Prune to Build the Canopy

Once your coleus begins branching at the top, it’s time to focus on creating a full, rounded canopy.

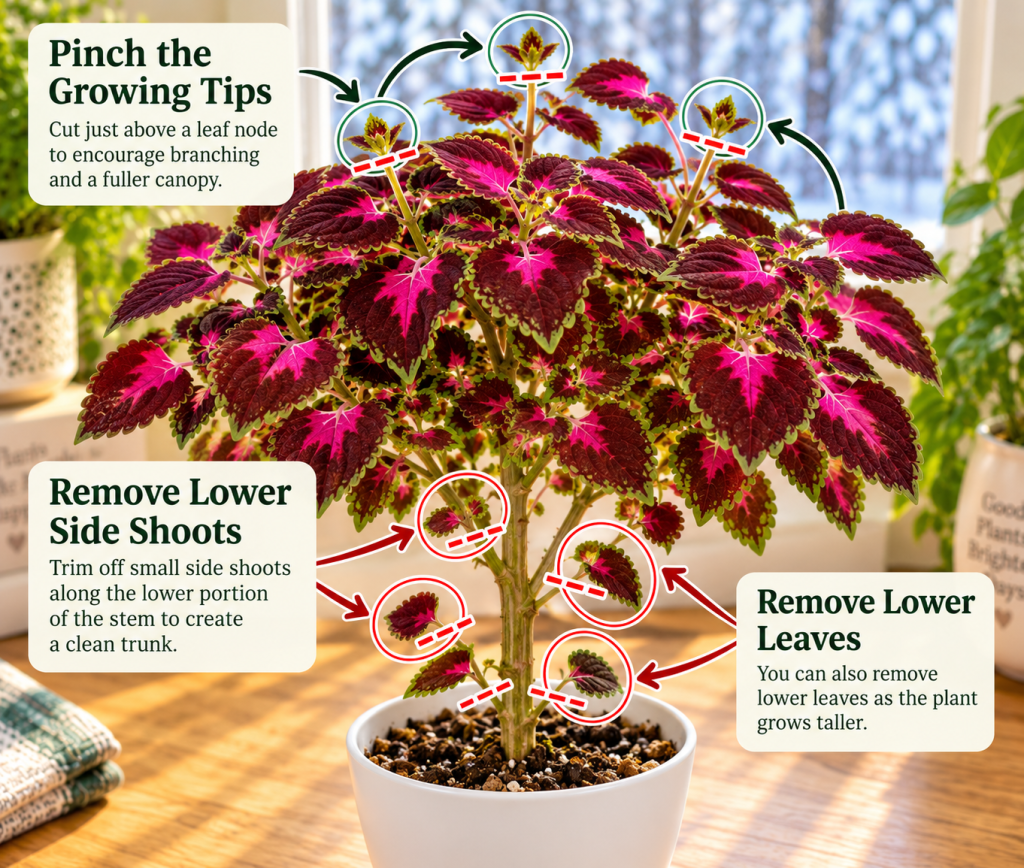
Allow several branches to develop, then pinch their growing tips just above a leaf node. Use clean, sharp pruning snips (my micro-tip snips are perfect for this) to make your cuts.

Each time you pinch a growing tip, you encourage additional branching below the cut. Repeat as needed to gradually create a fuller canopy.

You may also notice new shoots growing along the lower trunk.

Simply remove those shoots as they appear and continue shaping the canopy to keep your little tree looking full and balanced.

Coleus tree pruning guide showing where to pinch growing tips above leaf nodes and remove lower side shoots to encourage a full, rounded canopy and clean trunk.

Water Without Keeping the Soil Soggy

Coleus prefers consistently moist soil, but not soggy roots.

Use a pot with drainage holes and water thoroughly when the top inch of soil begins to dry. A soil moisture meter takes the guesswork out of it. Let any excess water drain away.

Coleus can be a little dramatic when it’s thirsty! A wilted plant may perk up quickly after watering, but repeated wilting can stress it.

From a Little Plant to a Coleus Tree

Mature coleus tree with a full rounded canopy and two intertwined stems growing in a white pot beside a snowy window.

Watching this little plant grow into a coleus tree was half the fun! 🌿

It started as a couple of small plants, went through a rather awkward tall-and-skinny stage, and eventually became a colorful little indoor tree.

If you already have a coleus growing at home, give this project a try! It’s a fun way to enjoy your coleus indoors, especially when the outdoor gardening season is on hold for, oh, about seven months.

And if you’re keeping coleus going through the winter, see Love Coleus? Here’s How to Keep It Growing Indoors All Winter.

You Might Also Like 🌿

Coleus cuttings rooting in water beside young coleus plants growing in soil on a sunny windowsill with snow outside.

Propagating Coleus: How to Turn One Plant Into a Whole Collection

Coleus propagation supplies including heart-shaped glass vases, indoor potting mix, nursery pots, and an LED grow light, with a Shop Our Houseplant Favorites invitation from Northern Home & Garden.

Shopping for a fellow plant lover? Our gift guide has some fun ideas.

🌻 Northern Home & Garden

More Northern Tips, Straight to Your Inbox 🌻

Get practical gardening advice, seasonal ideas and new posts from Northern Home & Garden delivered to your inbox.
How to Grow an Indoor Herb Garden in Mason Jars

Grow fresh herbs indoors all winter with a simple mason jar herb garden. Learn how to plant, water, and care for herbs during the darkest northern months.

When the outdoor gardening season is short, growing a few herbs indoors is an easy way to keep something green going all year long. And you don’t need a fancy indoor garden system to do it!

Continue reading “How to Grow an Indoor Herb Garden in Mason Jars”

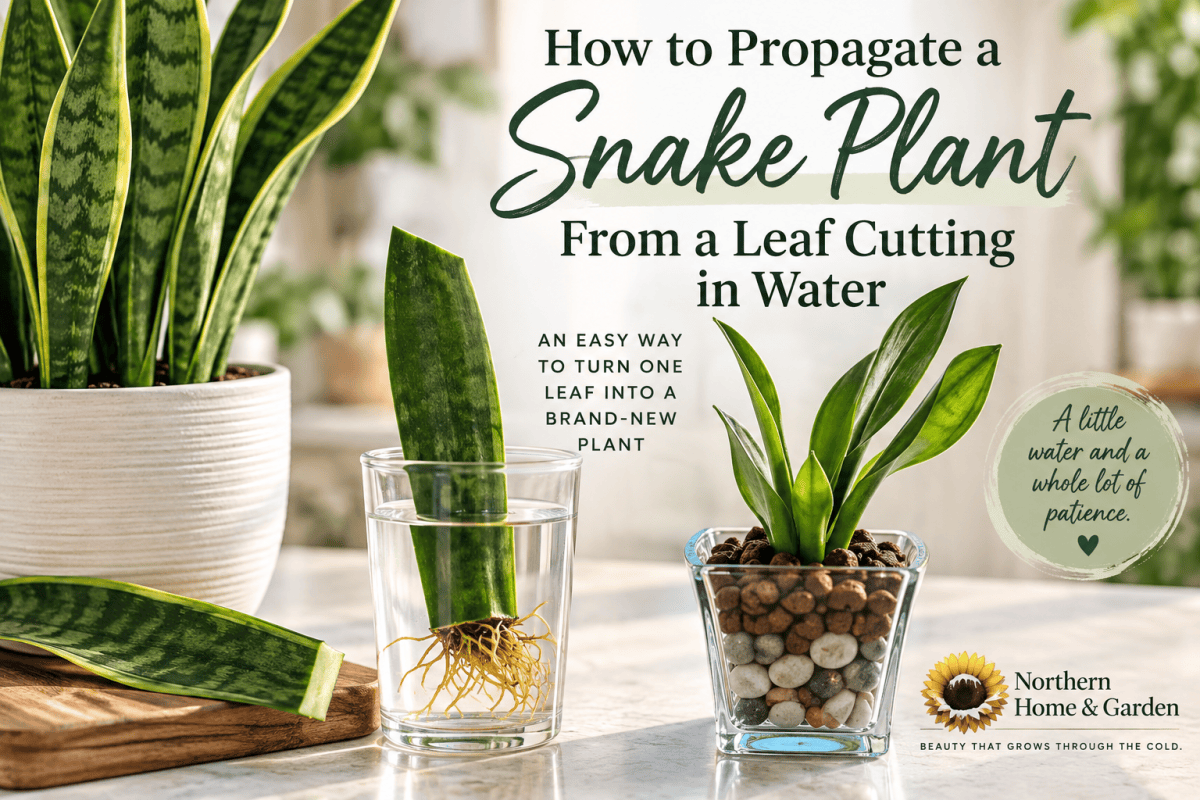
How to Propagate a Snake Plant From a Leaf Cutting in Water

Learn how to propagate a snake plant from a leaf cutting in water, from making the first cut to growing roots and new shoots.

Snake plants are tough, low-maintenance houseplants, but one of my favorite things about them is how easily you can grow a new plant from a single leaf cutting. 🌿

Continue reading “How to Propagate a Snake Plant From a Leaf Cutting in Water”

How to Train a String of Hearts Into a Heart Shape

Turn an overgrown string of hearts into a beautiful living display! Learn how to gently train long, trailing vines around a heart-shaped support while keeping plenty of that gorgeous cascading growth.

String of hearts is one of those houseplants that starts out looking sweet and innocent. A few delicate vines. Tiny heart-shaped leaves. Nothing suspicious happening here.

And then one day you realize those vines have somehow traveled halfway across the room.

Continue reading “How to Train a String of Hearts Into a Heart Shape”