Grow Lights for Northern Winters: Keeping Houseplants Happy Through 4-Hour Days

Fairbanks gets less than 4 hours of daylight in December. Here’s how to choose a grow light, how close and how long to run it, and which houseplants need one most.

Affiliate Disclosure: This post contains affiliate links. As an Amazon Associate I earn from qualifying purchases.

On the shortest day of the year, Fairbanks gets about 3 hours and 40 minutes of daylight. The sun pops up around 11 in the morning, skims along the treetops, and calls it a day before 3. We’ve learned to live with that (mostly). Our houseplants, on the other hand, did not sign up for this.

If your plants spend the winter leaning toward the window like they’re waiting for someone to come home, they’re not being dramatic. They’re hungry for light. A grow light is one of the easiest fixes I know, and it doesn’t have to be complicated, expensive, or purple.

Signs Your Plants Need More Light
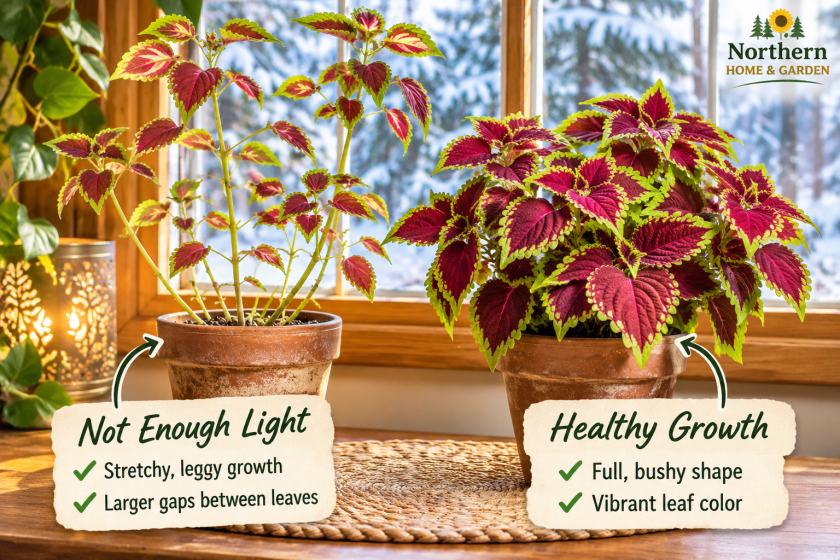
Side-by-side comparison of coleus plants showing tall, leggy growth with widely spaced leaves from insufficient light versus healthy, bushy growth with vibrant foliage.

Not sure if your plants are getting enough light? Here are a few signs to watch for:

  • Stretching: Long, skinny stems with larger gaps than usual between the leaves. Seedlings especially get tall and floppy.
  • Leaning: Everything bends hard toward the window.
  • Smaller, paler new leaves: New growth may be smaller or lighter in color than usual.
  • Faded color: Colorful plants like coleus may lose their vibrant patterns and become greener when they aren’t getting enough light.

If you’re nodding along, your plants might be ready for a little extra light.

Choosing a Grow Light (The Simple Version)

Grow light shopping can feel like reading a science textbook, but for houseplants, you really only need to know a few things.

Choose a full-spectrum LED. They’re energy-efficient, produce relatively little heat, and can last for years. Look for a white full-spectrum light rather than the purple ones. Both can grow plants, but white light is easier on your eyes and lets you enjoy your plants’ natural colors. Just remember that brightness matters too: not every light labeled “full-spectrum” is equally powerful.

Pick a Style That Fits Your Space
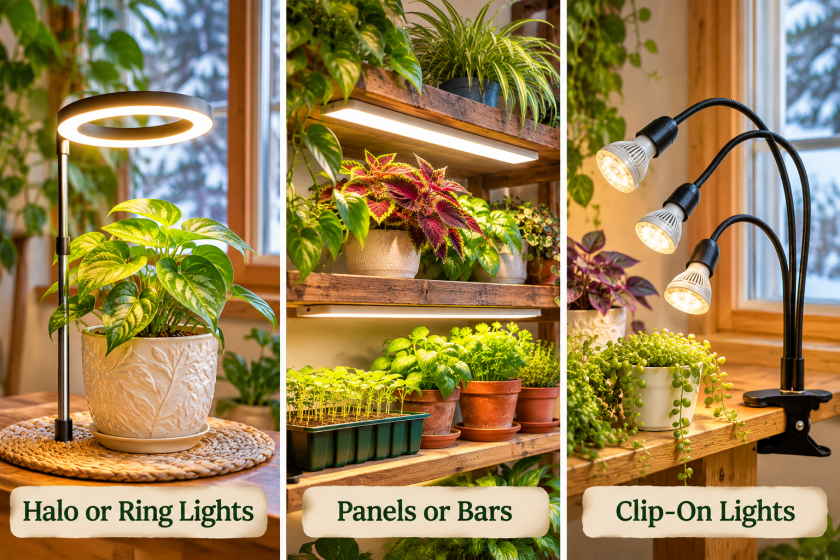
Three types of indoor LED grow lights: a halo light over a potted houseplant, LED bars mounted beneath wooden plant shelves, and a three-headed clip-on light illuminating plants.
  • Halo or ring lights on a stake: Handy for one small plant or a single pot. They’re adjustable and don’t take up much room, although some aren’t bright enough for plants that need lots of light.
  • Panels or bars: Great for shelves full of houseplants or seedlings. My setup uses slim LED panels, one per shelf. I liked them so much I’ve bought them four times! Unfortunately, they’re no longer sold, but there are plenty of similar options.
  • Clip-on lights: A simple option for a desk or windowsill plant that needs a little extra light.

Look for a built-in timer. It’s one of the most useful features, especially during our long northern winters. If your light doesn’t have one, a separate outlet timer works just as well.

You’ll find more grow light options on my Houseplant Favorites page.

How Close and How Long?

Distance: Light gets weaker quickly as you move away from it, so placement matters. Start with the distance the manufacturer recommends, then watch how your plants respond:

  • Still stretching? Move the light a little closer.
  • Bleached spots or crispy leaf edges? The light may be too intense. Try moving it farther away.

Hours: When grow lights are doing most of the work, here’s a good starting point:

  • Houseplants: Around 12 to 14 hours a day.
  • Seedlings: Around 14 to 16 hours a day.

Adjust based on how much natural light your plants receive and how they respond. Plants need darkness too, so don’t leave grow lights on around the clock.

A quick safety note: Keep lights and cords away from water and spray bottles. Don’t connect more lights than the manufacturer allows, and make sure your power strip or timer is rated for everything plugged into it.

Let a Timer Do the Remembering

In December, it’s dark when you get up and dark again by mid-afternoon. It’s easy to forget whether the grow lights are on or off, and plants do best with a consistent daily schedule.

If your lights have a built-in timer, you’re all set. Otherwise, a simple outlet timer can turn them on and off automatically. It’s one less thing to remember during our long northern winters, and honestly, I’ll take all the help I can get!

Which Plants Need It Most?
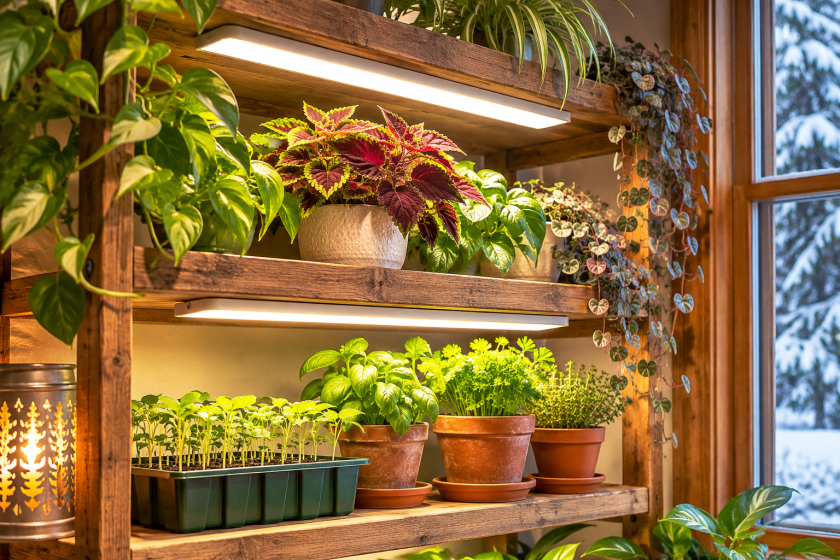
Wooden indoor plant shelf with LED grow lights illuminating colorful coleus, potted herbs, and young seedlings beside a snowy winter window.

Not every houseplant needs a grow light, but some really appreciate the extra help during our northern winters:

  • Coleus: Without enough light, coleus fades and gets leggy fast. A grow light helps keep those beautiful colors bright and the plant growing fuller.
  • Herbs: Basil, parsley, and other kitchen herbs need plenty of light to stay healthy. A small grow light can make a big difference, especially when you’re growing herbs on a winter windowsill.
  • Seedlings: If you’re starting seeds indoors in February or March, a grow light is one of the best ways to keep seedlings short and sturdy. Our northern winter daylight usually isn’t enough on its own.

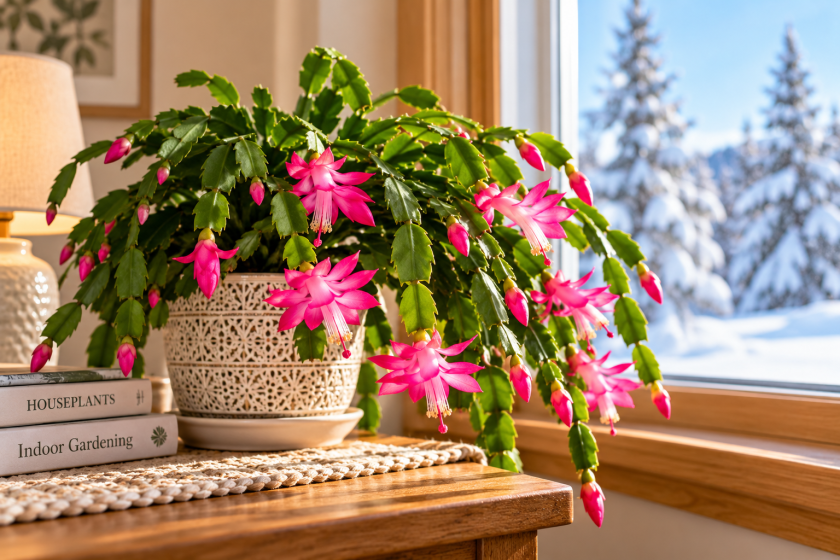
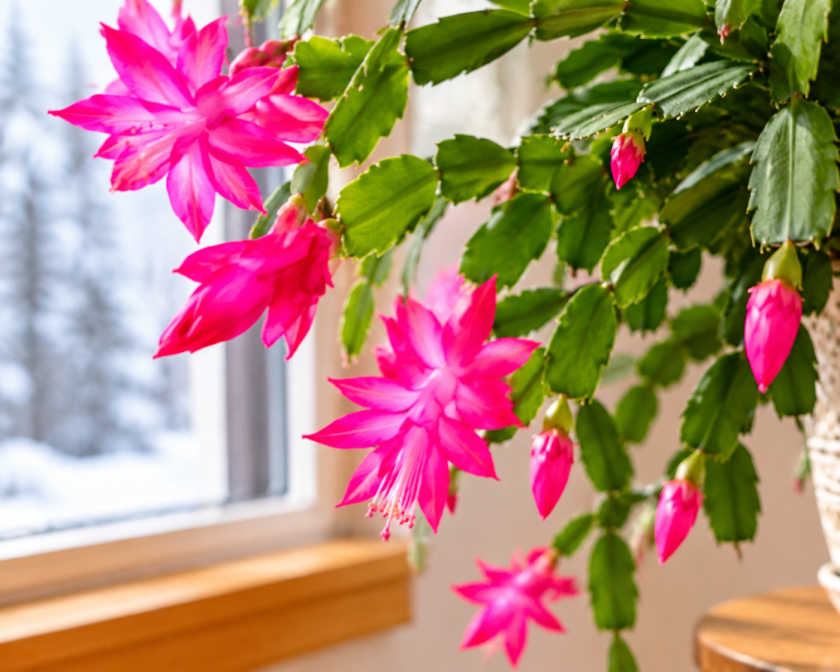
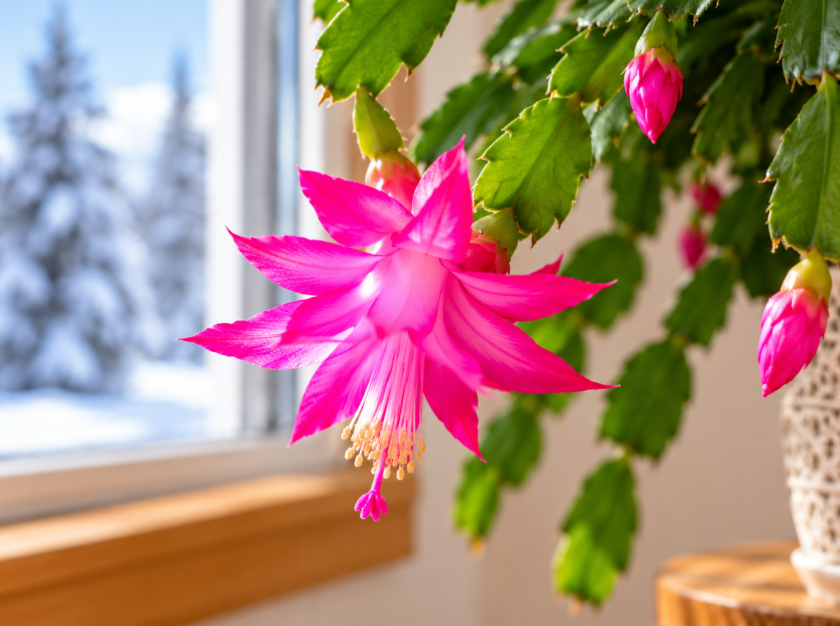
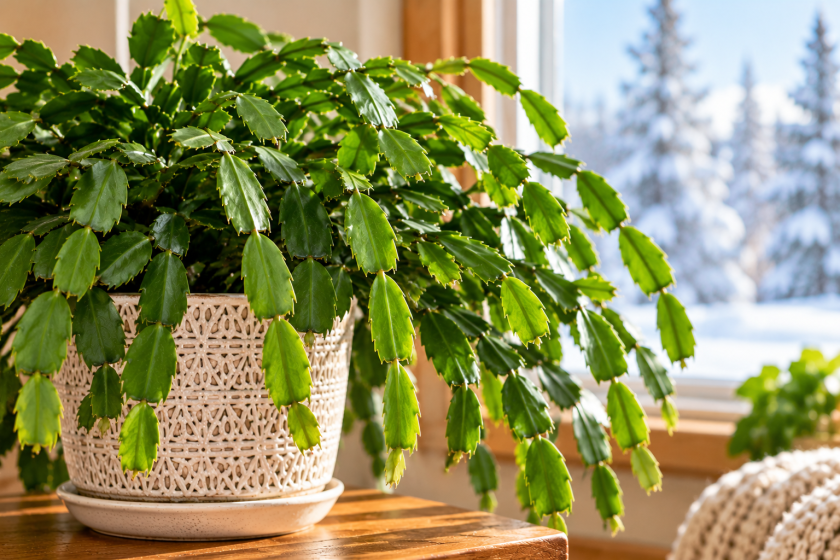
One plant to be careful with in fall: holiday cactus. Thanksgiving and Christmas cacti generally need long, uninterrupted nights and cooler conditions to encourage flower buds. Keeping them under a grow light for 14 hours a day during bud formation can interfere with blooming. After blooming, a little supplemental light can help keep them healthy through the darker months.

❄️ Northern Tip

Set your timer to run during the hours you’re home and awake, like 7 AM to 9 PM. Your plants get their light, and you get a bright, green corner of the house during the darkest weeks of the year. Honestly, I think the grow lights help me as much as the plants.

A Little Light Goes a Long Way

You don’t need a fancy setup to help your houseplants through a northern winter. A good LED grow light, a timer, and a little attention to how your plants respond can make a big difference.

And by the time the sun starts sticking around past dinner again, your plants will hopefully be looking just as ready for spring as you are.

🌻 Northern Home & Garden


You May Also Like

If you’re keeping plants growing through a northern winter, these guides might come in handy:

More Northern Tips, Straight to Your Inbox 🌻

Get practical gardening advice, seasonal ideas and new posts from Northern Home & Garden delivered to your inbox.

Gifts for Cold-Climate Gardeners (and People Who Just Hate Winter)

Practical gift ideas for northern gardeners, from seed-starting supplies and tools that last for years to cozy picks for anyone who just hates winter.

Affiliate Disclosure: This post contains affiliate links. As an Amazon Associate I earn from qualifying purchases.
About Our Images: AI-generated for inspiration. Linked products may differ from those pictured.

Here in the North, the holiday season lands right in the middle of the longest stretch of the year without gardening. The beds are frozen, the seed catalogs are piling up, and spring feels a very long way off.

That’s what makes gardeners so fun to shop for this time of year. The best gifts help them plan for spring, keep their hands warm and dry through the in-between seasons, or make the dark months a little cozier while they wait.

Below you’ll find a few things I use myself, along with well-loved finds that northern gardeners tend to appreciate. And if the person on your list doesn’t garden at all but just really, really dislikes winter, there’s a section for them too.

Quick Picks

Jump to: Counting Down to Spring · Tools for Years · Houseplant Lovers · People Who Hate Winter

For the Gardener Counting Down to Spring

With a short growing season, many northern gardeners start seeds indoors weeks before the ground thaws. That means a seed-starting gift gets put to use long before spring actually arrives.

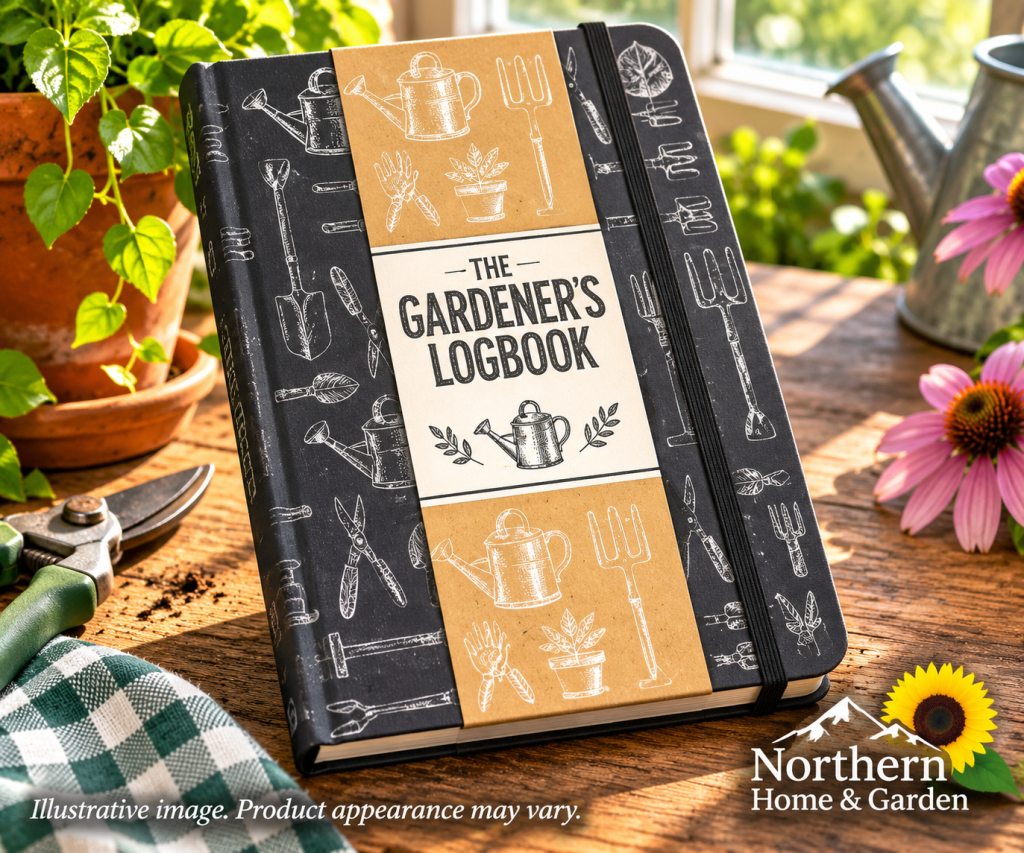
The Gardener’s Logbook

The Gardener's Logbook, a black hardcover journal with a kraft cover band and elastic closure, on a wooden potting table with pruners, a terracotta pot, pink coneflowers, and a watering can.

Winter is when gardens get planned on paper. This hardcover logbook has pages for tracking what was planted, where it went, and how it did, plus a pocket inside the back cover for tucking away seed packets and garden center receipts. In a short season, notes on which varieties actually ripened in time are worth their weight in gold.

Shop The Gardener’s Logbook on Amazon →

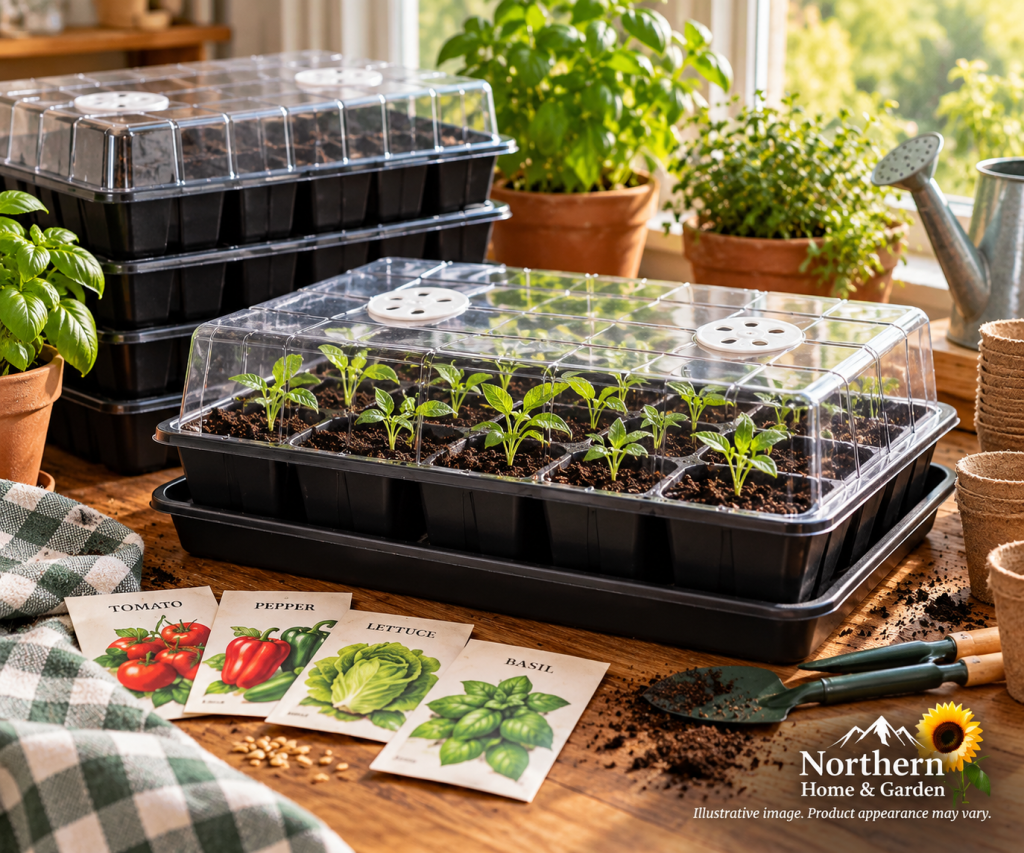
Seed Starting Trays

Seed starting tray with a clear humidity dome over black cells of young seedlings, surrounded by seed packets, loose soil, and potted herbs on a sunlit wooden table.

Trays with clear humidity domes give seeds a warm, moist place to sprout. They’re a practical gift for anyone who grows tomatoes, peppers, or flowers that need a head start indoors.

Shop Seed Starting Trays on Amazon →

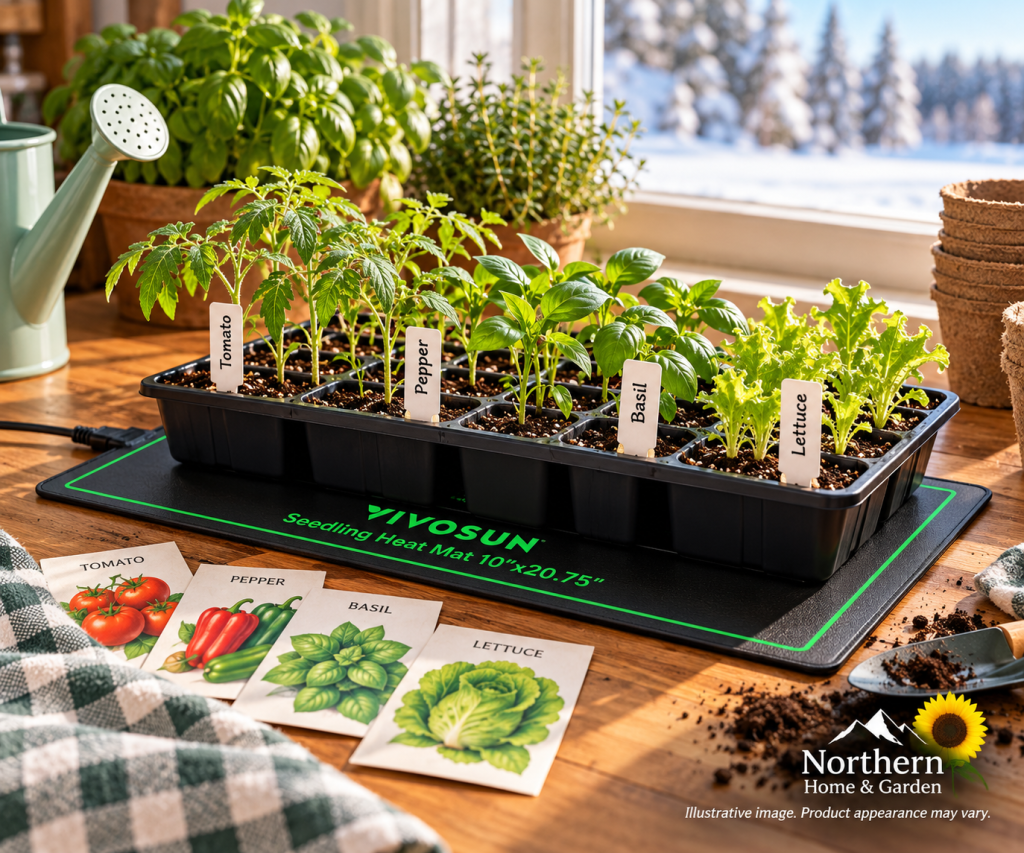
Seedling Heat Mat

Seedling heat mat under a black tray of young seedlings with plant labels, beside seed packets, a watering can, and a snowy window in the background.

Northern homes can run cool in late winter, and many seeds are slow to sprout in cold soil. A heat mat under the tray gently warms the soil from below, which is especially helpful for heat-loving crops like peppers and tomatoes.

Shop Seedling Heat Mats on Amazon →

LED Grow Light Stand

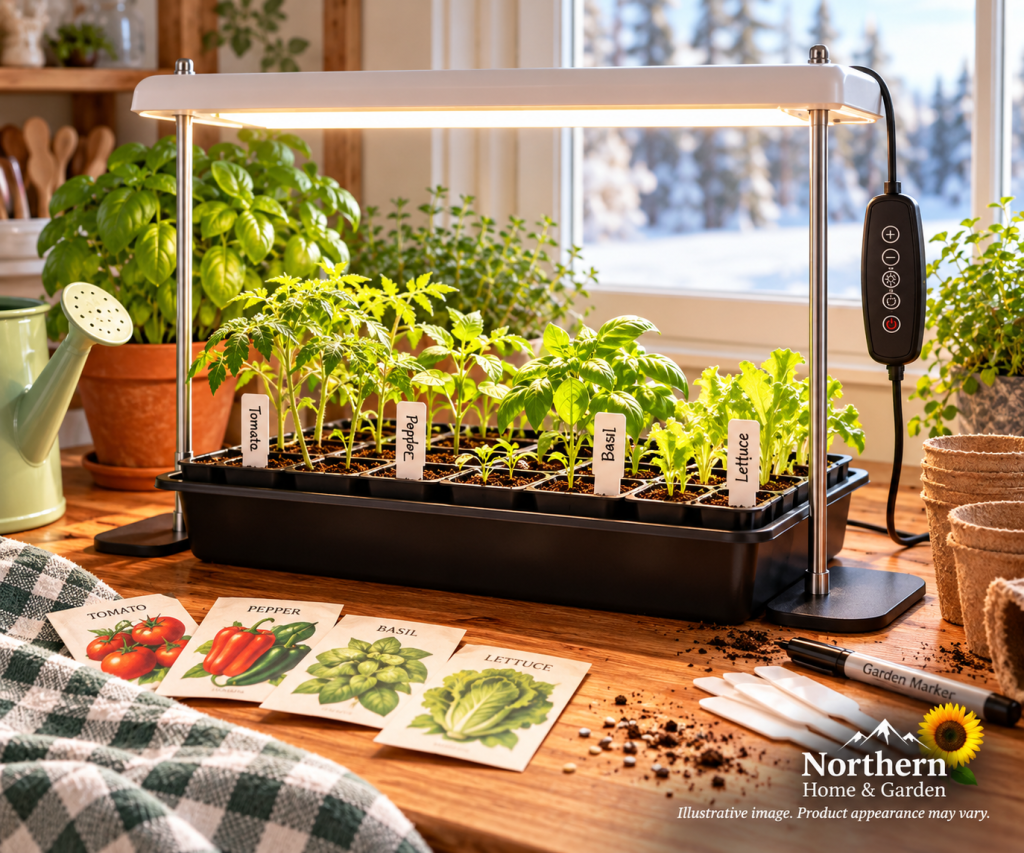
Adjustable LED grow light stand illuminating tomato, pepper, basil, and lettuce seedlings in a seed-starting tray on a wooden table, with gardening supplies and a snowy window in the background.

Even a sunny windowsill doesn’t provide enough light during a northern winter. A grow light keeps seedlings from stretching tall and leggy as they reach for the light, so they grow strong and sturdy until it’s time to plant out.

Shop LED Grow Light Stands on Amazon →

Seed Saving Envelopes

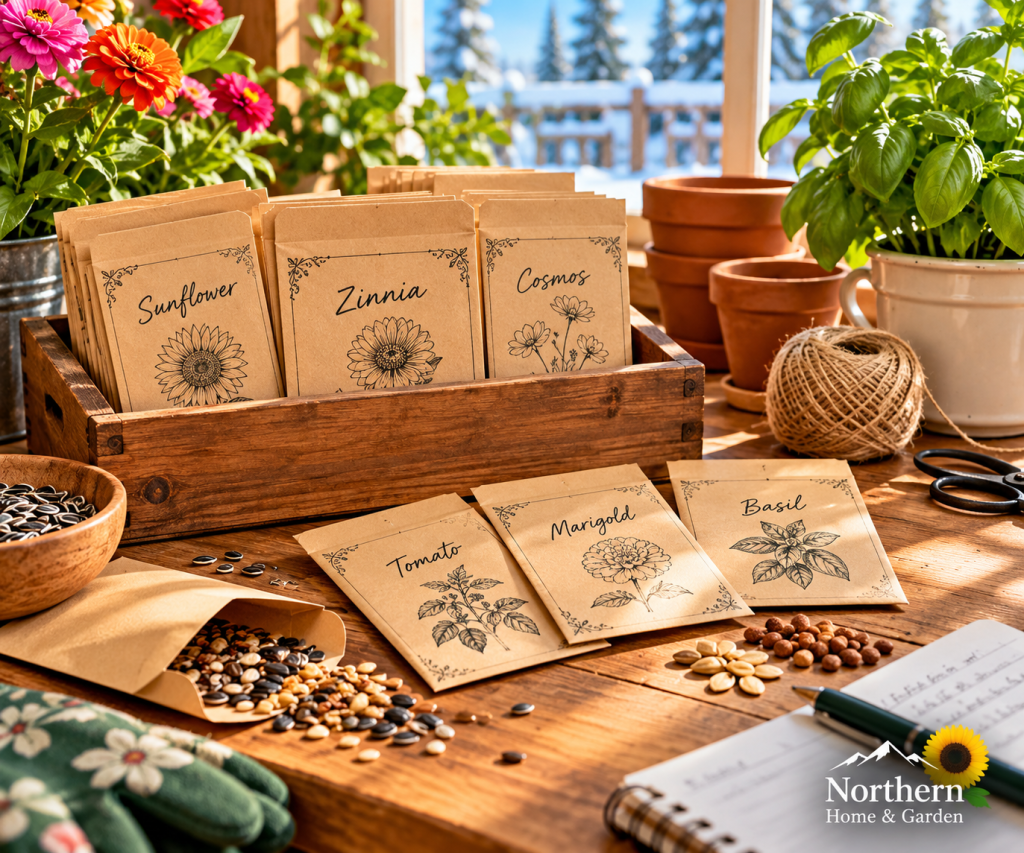
AI-generated gardening scene with kraft seed-saving envelopes labeled with flower and vegetable varieties, scattered seeds, and gardening supplies on a sunlit wooden table beside a snowy window.

A small, thoughtful gift for the gardener who saves seeds from favorite plants. Labeled envelopes keep varieties organized and ready for next season, and they fit easily into a stocking.

Shop Seed Saving Envelopes on Amazon →

Tools They’ll Use for Years

A well-made tool is the kind of gift a gardener remembers every time they pick it up. These three are ready to go the moment the snow melts.

Felco F-2 Bypass Pruners

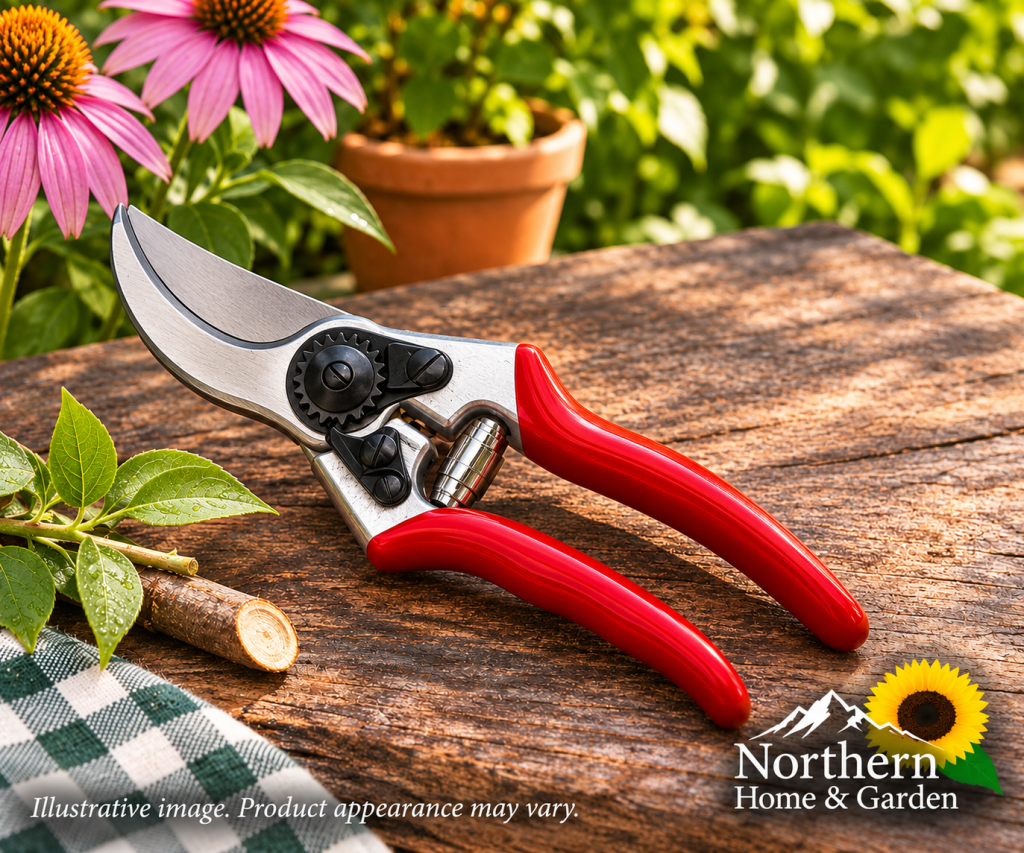
Red-handled bypass pruners resting on a rustic wooden table beside a freshly cut branch, a green gingham cloth, pink coneflowers, and a terracotta pot in a sunny garden.

If you want one gift that feels special, this is it. Swiss-made Felco F-2 pruners are a longtime favorite among serious gardeners, and they’re built to be maintained rather than replaced, with blades and springs that can be swapped out as they wear.

Shop Felco F-2 Pruners on Amazon →

Hori Hori Garden Knife

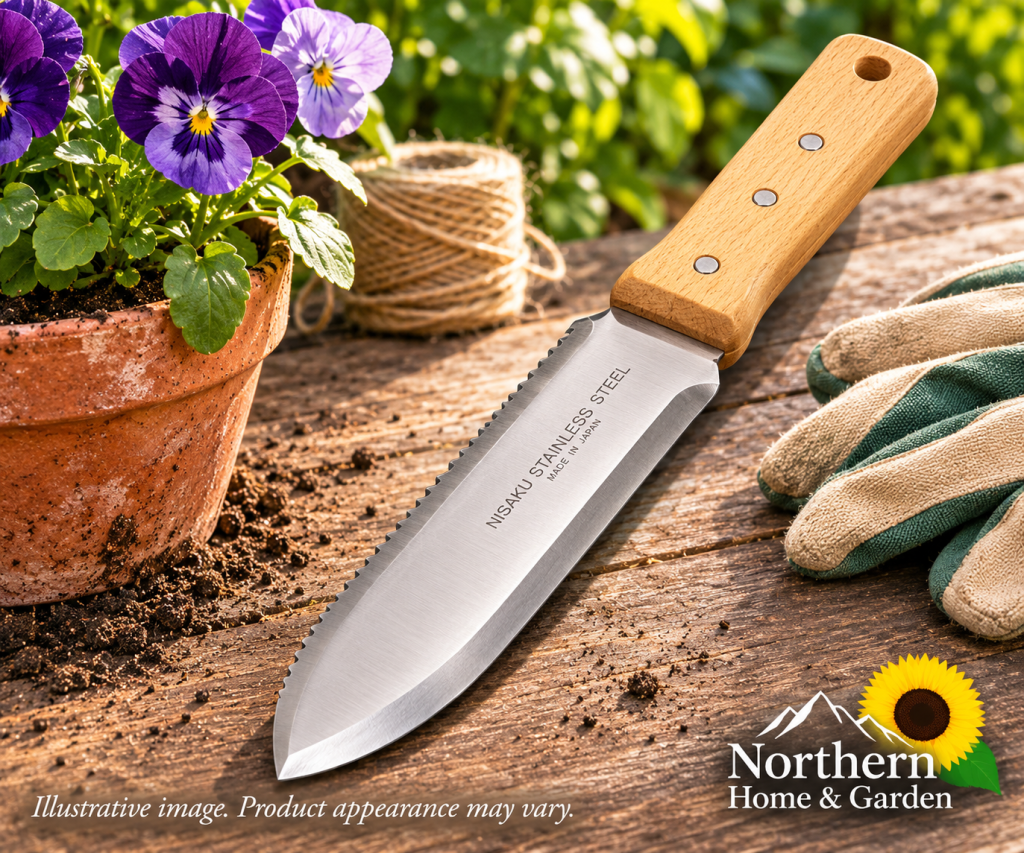
Hori hori garden knife with a stainless steel blade, serrated edge, and wooden handle on a potting bench beside purple pansies in a terracotta pot, twine, and gardening gloves.

Many gardeners have never owned one, which makes it a fun gift to give. This Japanese-made soil knife has a straight edge on one side and a serrated edge on the other, so it can dig, weed, cut through roots, divide perennials, and plant bulbs. Inch markings on the blade help with planting depth.

Shop Hori Hori Garden Knives on Amazon →

Folding Garden Kneeler & Seat

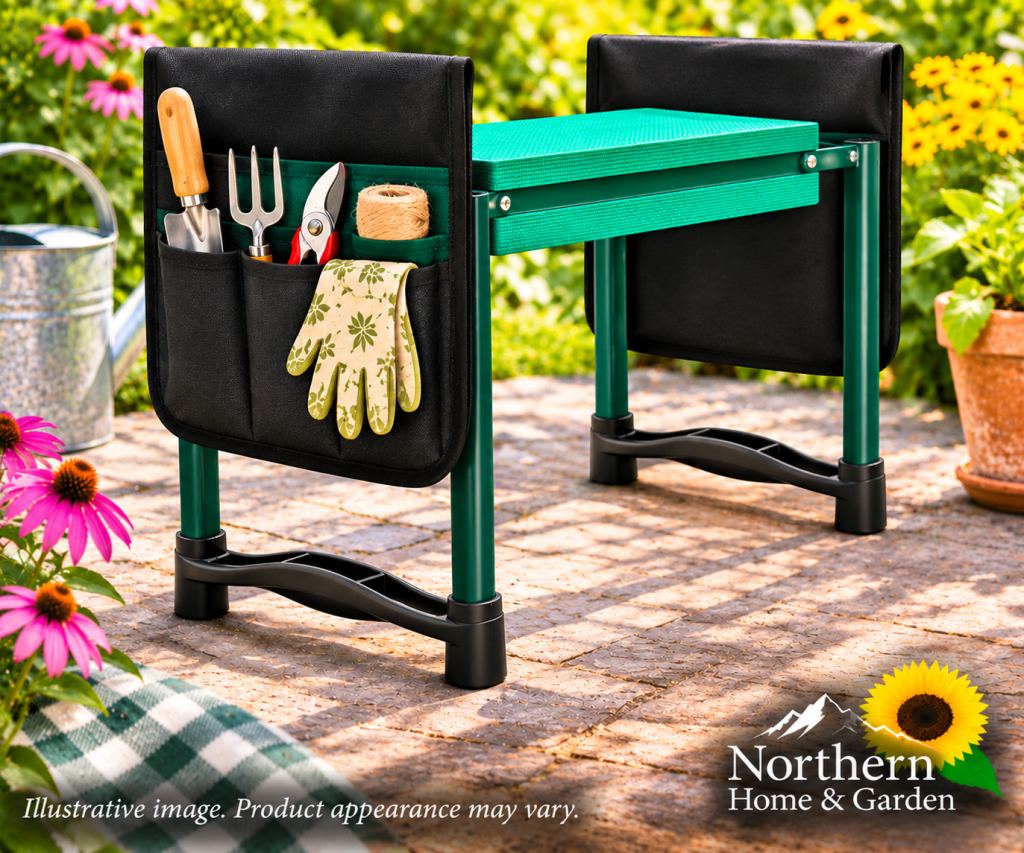
Folding garden kneeler and seat with a green cushioned pad and side pouches holding a trowel, hand fork, pruners, twine, and gloves on a sunny brick patio surrounded by flowers.

Use it one way to kneel on a padded surface while planting and weeding, then flip it over for a sturdy little seat. Side pouches keep hand tools within reach, and it folds flat for storage over winter. It’s a thoughtful gift for anyone whose knees or back complain after a day in the garden.

Shop Garden Kneelers & Seats on Amazon →

Waterproof Winter Work Gloves

Orange and black insulated waterproof work gloves standing on a snowy wooden deck beside a birch log, a red lantern, stacked firewood, and a snow shovel.

These are the gloves I use myself. They’re insulated and waterproof with a grippy coated palm, so my hands stay warm and dry during chilly spring cleanup and late fall garden chores. They’re handy well beyond the garden, too, for jobs like shoveling snow or hauling firewood.

Shop Waterproof Winter Work Gloves on Amazon →

Moisturizing Hand Balm

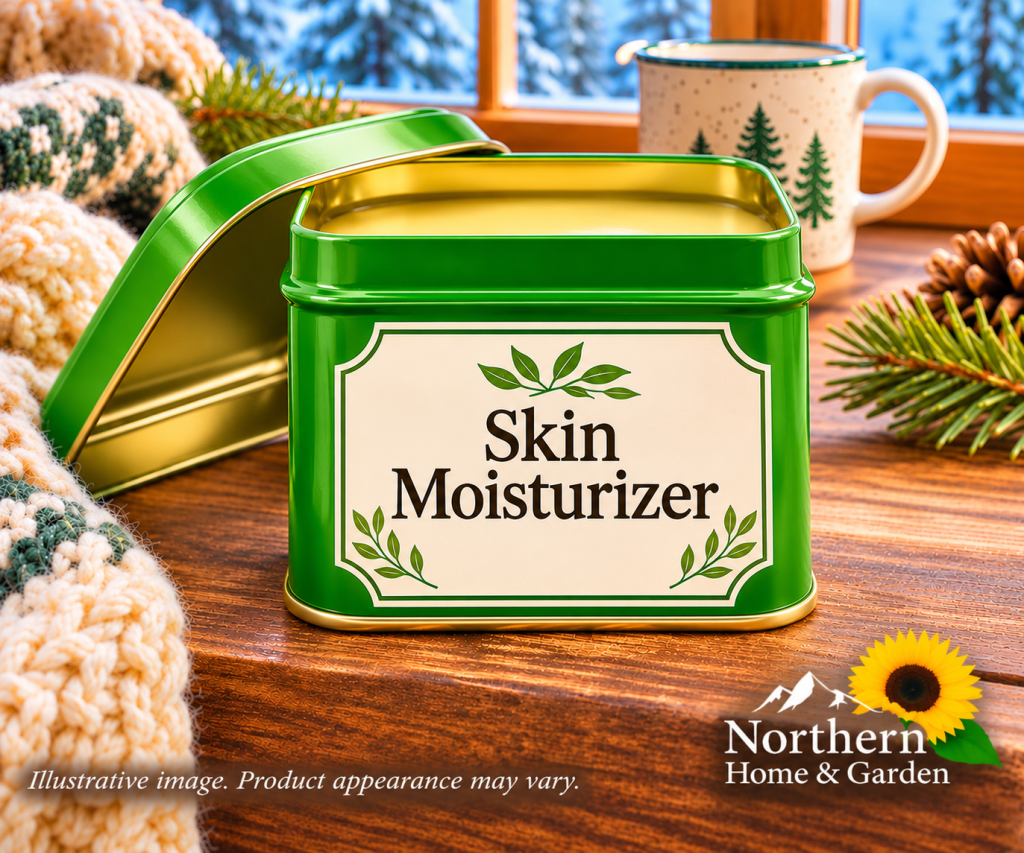
Green tin of skin moisturizer with its lid open on a wooden windowsill beside a cream knit blanket, a pine-tree mug, pine boughs, and a pinecone, with snowy evergreens outside.

Cold, dry air and garden work are both hard on hands. A tin of moisturizing balm is a small, practical gift that gets used all winter long, and it tucks easily into a stocking.

Shop Moisturizing Hand Balm on Amazon →

For the Houseplant Lover

When the outdoor garden is buried under snow, many northern gardeners turn their attention indoors. These picks are for the friend with a windowsill full of plants and cuttings.

Long-Spout Watering Can

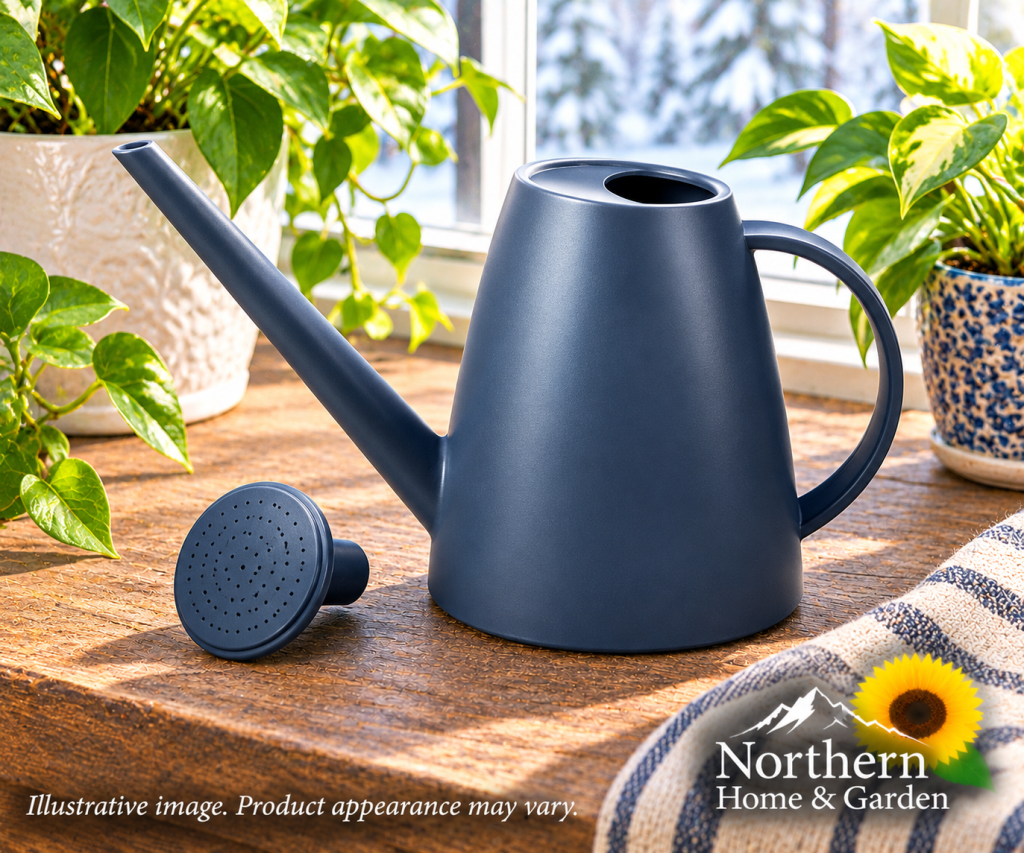
Navy blue long-spout watering can with its detachable sprinkler head on a sunny wooden windowsill between pothos plants, with snow outside the window.

A long, narrow spout makes it easy to water right at the soil line without splashing leaves or knocking over seedlings. The detachable sprinkler head gives a gentle shower for seed trays.

Shop Long-Spout Watering Cans on Amazon →

Soil Moisture Meter

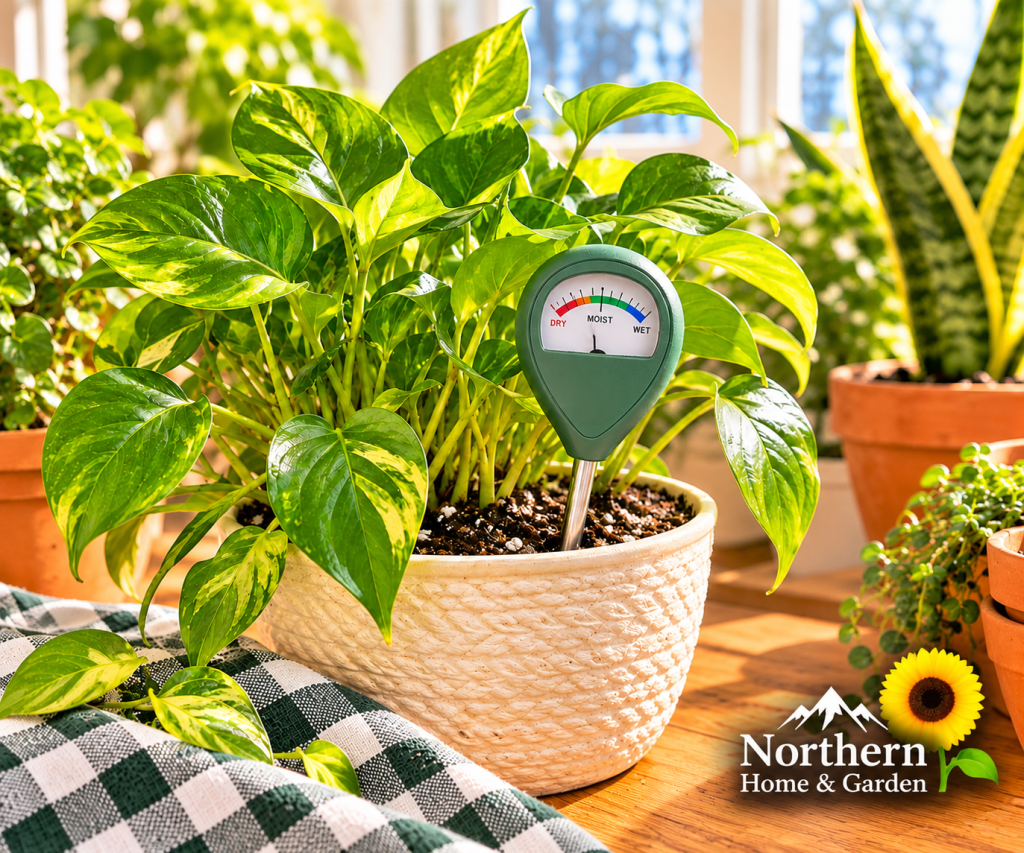
Round green soil moisture meter with a dial inserted into the soil of a leafy houseplant in a white textured pot, with snake plants and terracotta pots on a sunny wooden table.

I use a moisture meter for my own houseplants, and it takes a lot of the guesswork out of watering. Just push the probe into the soil and check the dial to see whether it’s time to water. That’s especially helpful in winter, when plants grow slowly and overwatering is easy to do.

Shop Soil Moisture Meters on Amazon →

Micro-Tip Pruning Scissors

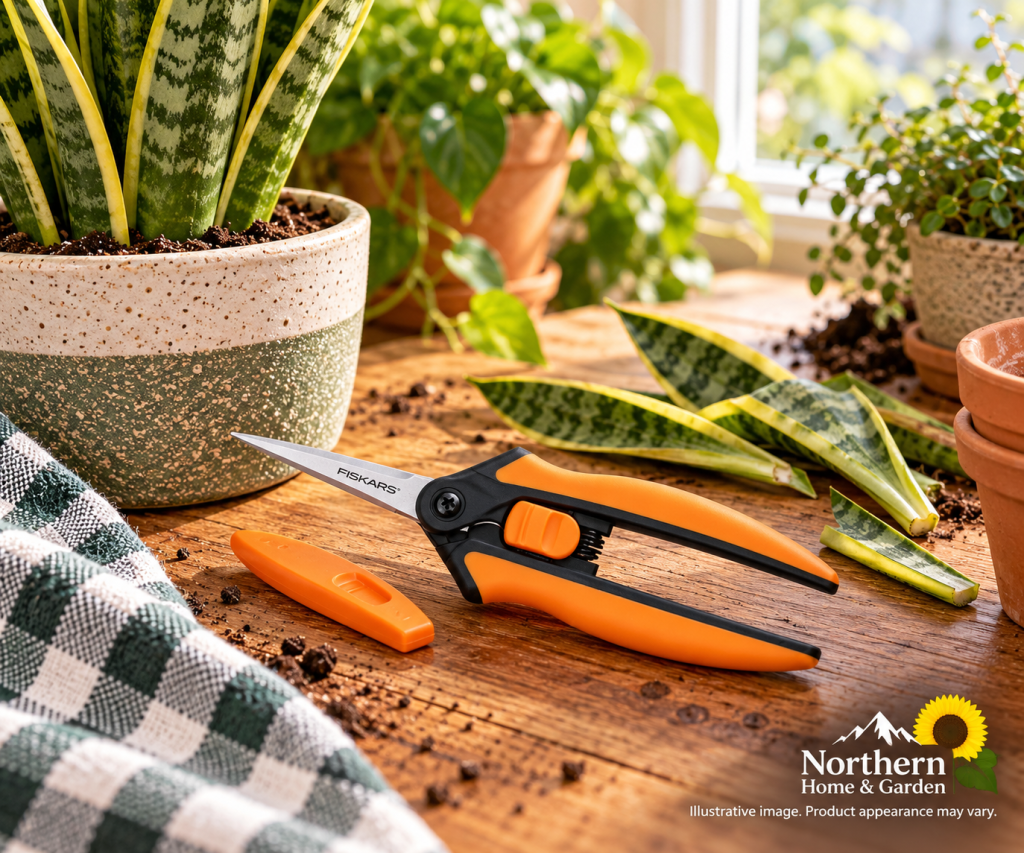
Fiskars Micro-Tip Pruning Scissors with orange and black handles resting on a rustic wooden table beside a potted snake plant, trimmed leaves, and indoor gardening supplies.

These are my go-to scissors for indoor plants. The small, sharp tips make precise cuts for trimming leaves and taking cuttings, which makes them a great match for anyone who loves propagating houseplants.

Shop Pruning Scissors on Amazon →

Plant Propagation Vase

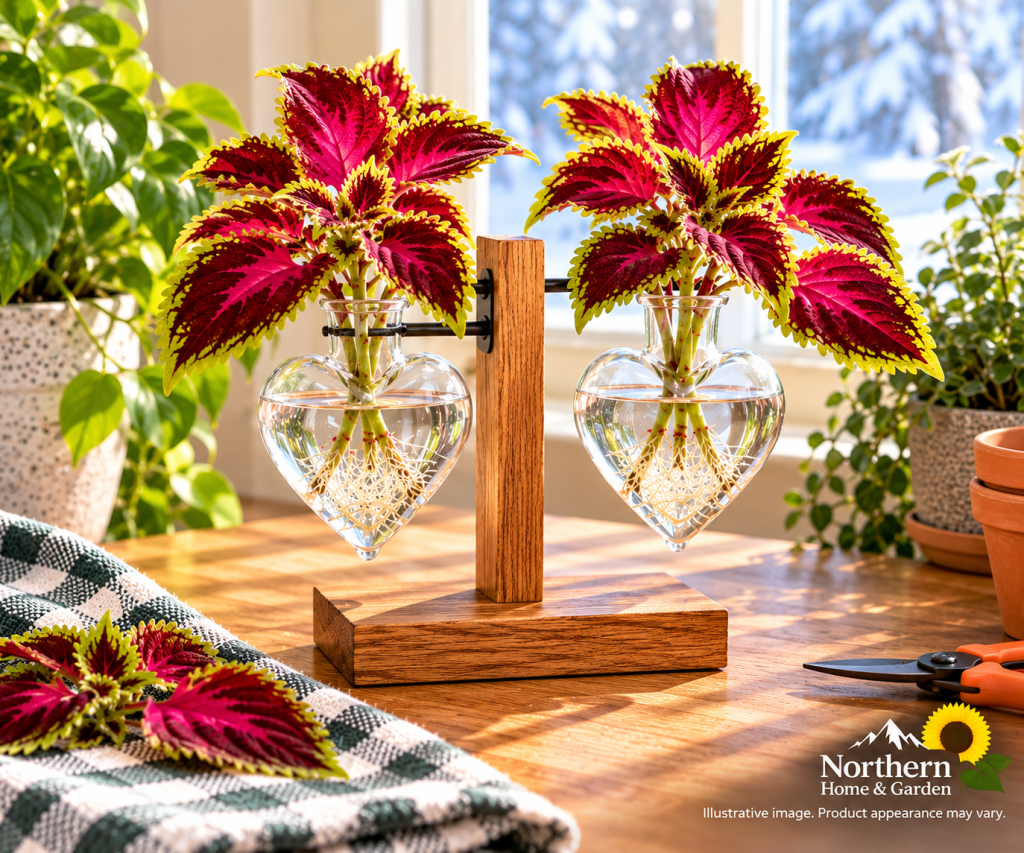
Heart-shaped glass propagation vases on a wooden stand holding colorful coleus cuttings with visible roots, displayed on a sunny windowsill.

I use mine for rooting cuttings in water, and it’s fun to watch the roots grow through the glass. It’s a pretty gift that doubles as windowsill decor, and it’s a lovely way to share a cutting from your own plants.

Shop Plant Propagation Vases on Amazon →

Repotting Mat

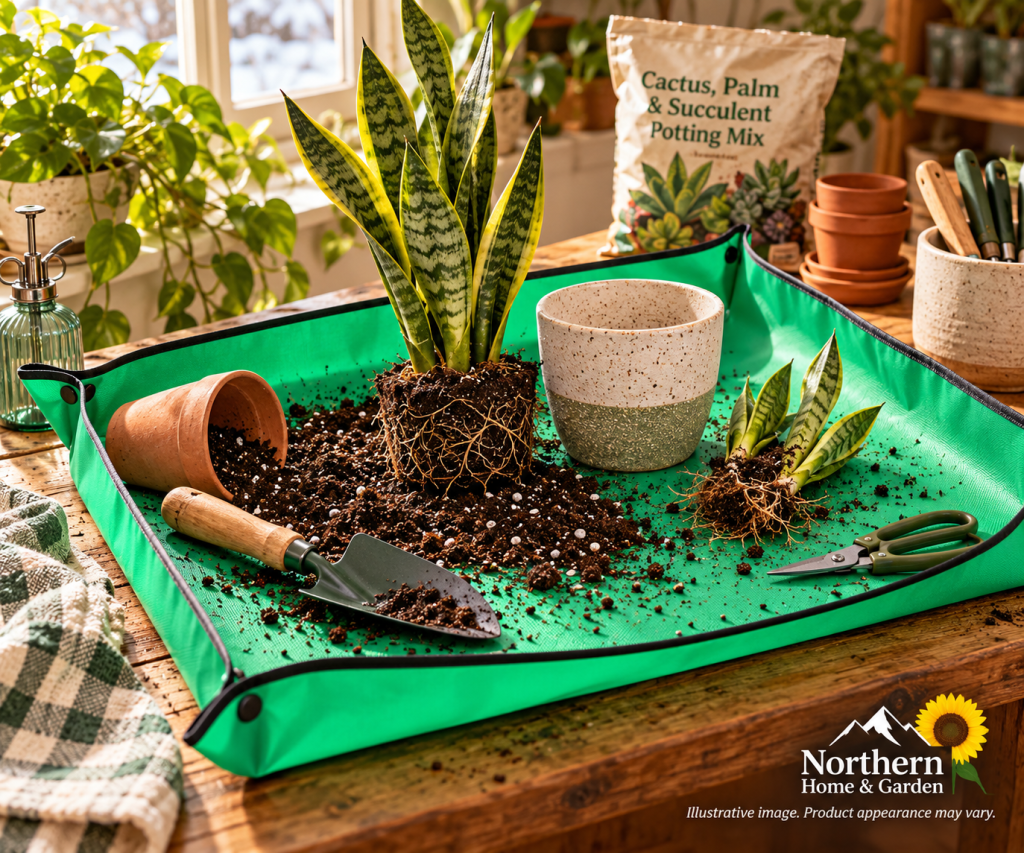
Waterproof green repotting mat with raised edges holding a snake plant, newly divided pups, potting soil, gardening tools, and a ceramic planter on a cozy indoor gardening table.

A repotting mat keeps the soil contained when I’m repotting indoors, and it’s easy to clean up afterward. It’s a simple gift that any houseplant lover will put to use.

Shop Repotting Mats on Amazon →

For the Person Who Just Hates Winter

Not everyone on your list gardens. For the friends and family who would rather hibernate until spring, cozy gifts help the long, dark months feel a little more inviting.

Chunky Knit Throw Blanket

Cream chunky knit throw blanket draped over a cozy sofa with plaid pillows, a warm fireplace, and snow-covered evergreens outside the window.

A soft, chunky knit throw adds warmth and texture to the couch, and it’s perfect for curling up on a chilly northern evening.

Shop Chunky Knit Throw Blankets on Amazon →

Flannel Sheet Set

Cozy rustic bedroom with beige flannel sheets, a chunky cream knit blanket, warm bedside lamps, and a ceramic coffee mug, with snow-covered evergreens outside the window.

Flannel sheets feel warm the moment you climb into bed, which makes them one of the best small upgrades for cold winter nights.

Shop Flannel Bed Sheet Sets on Amazon →

Large Ceramic Coffee Mugs

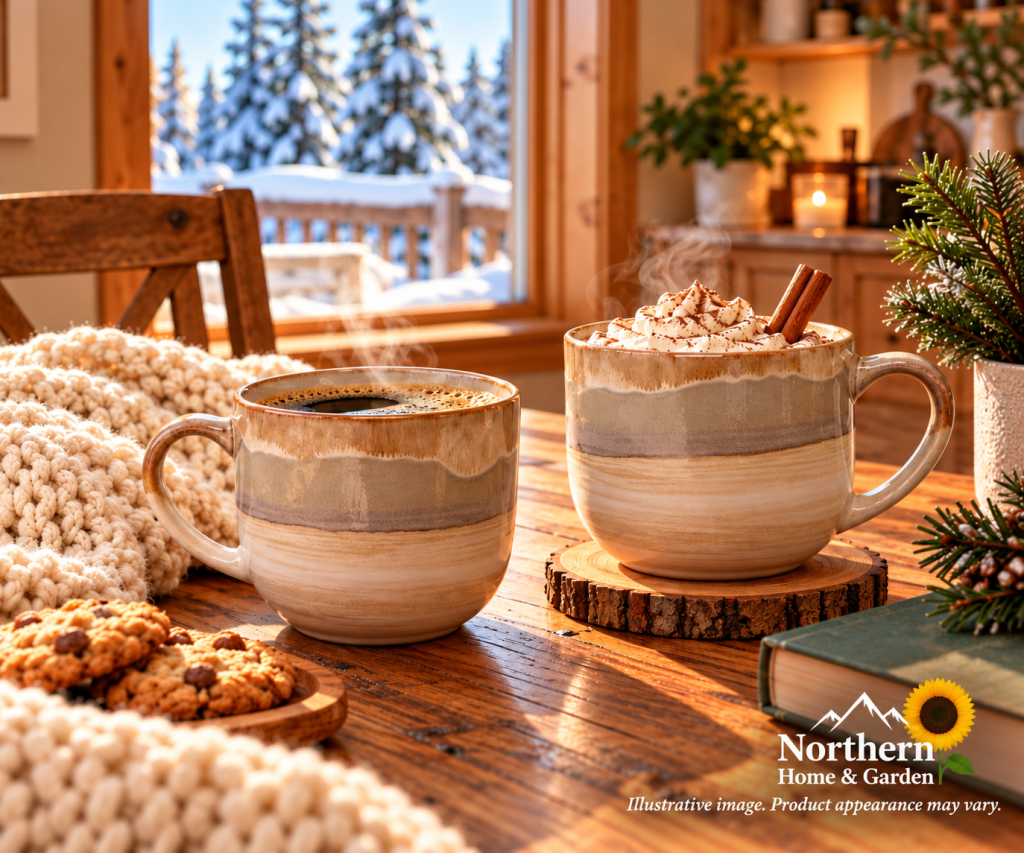
Two large brown and grey ceramic mugs filled with coffee and hot chocolate on a rustic wooden table, surrounded by cozy blankets with snow-covered evergreens outside the window.

A big mug made for coffee, tea, or hot chocolate turns slow winter mornings into something to look forward to. Pair one with a favorite drink mix for an easy gift.

Shop Large Ceramic Coffee Mugs on Amazon →

Cordless Table Lamp

Rechargeable cordless table lamp with a glowing fabric shade and wood-grain base on a rustic side table beside a cozy armchair overlooking snowy evergreens.

When it’s dark by mid-afternoon, warm lamplight makes a big difference. A cordless lamp can go anywhere it’s needed, from a bookshelf to a dinner table, with no cords to hide.

Shop Cordless Table Lamps on Amazon →

Heated Throw Blanket

Cream sherpa heated throw blanket with a small white controller draped over a leather armchair beside a plaid pillow, a glowing wood stove, and snowy evergreens outside.

On a forty-below evening, a regular blanket only goes so far. A heated sherpa throw warms up at the push of a button, and this one has adjustable heat settings and an automatic shut-off for peace of mind.

Shop Heated Throw Blankets on Amazon →

Light Therapy Lamp

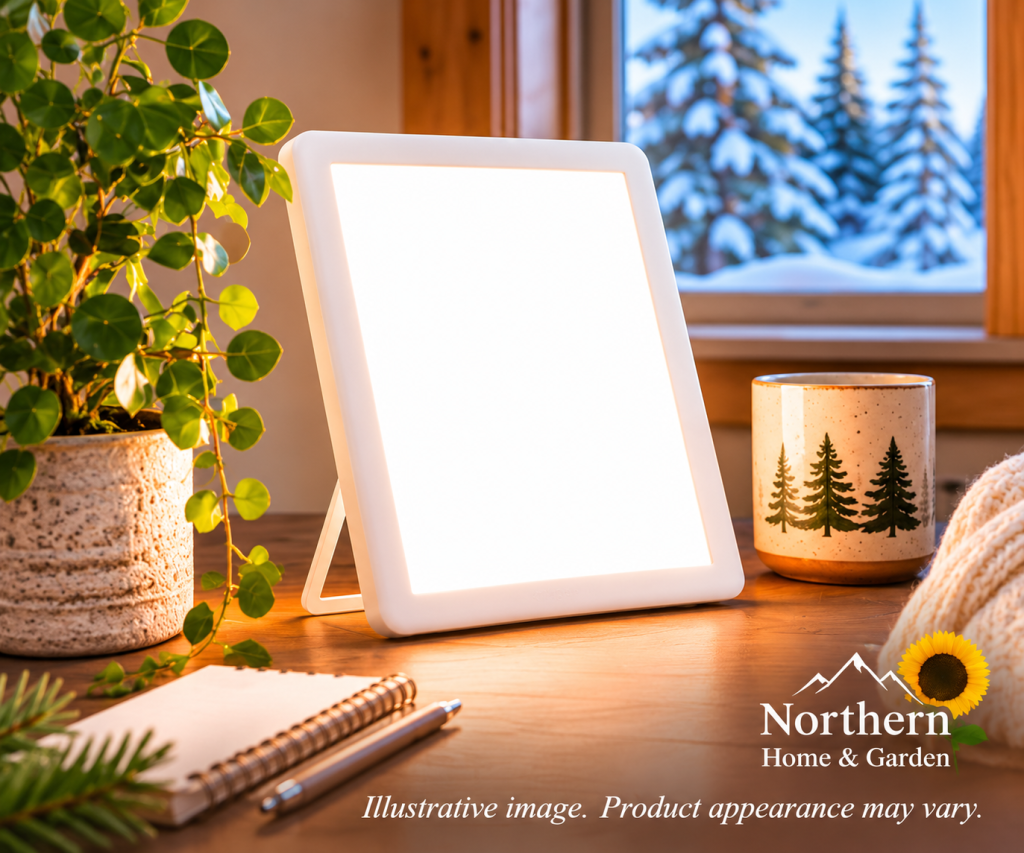
A white light therapy lamp glowing on a wooden desk beside a houseplant, a pine-tree mug, and a window with snowy spruce trees.

In Fairbanks, the December sun barely clears the hills before it sets again. A light therapy lamp gives off bright, white light that makes a dark morning at the kitchen table feel a little more like daytime. This one is a slim panel with one-button controls and a detachable stand.

Shop Light Therapy Lamps on Amazon →

Sunrise Alarm Clock

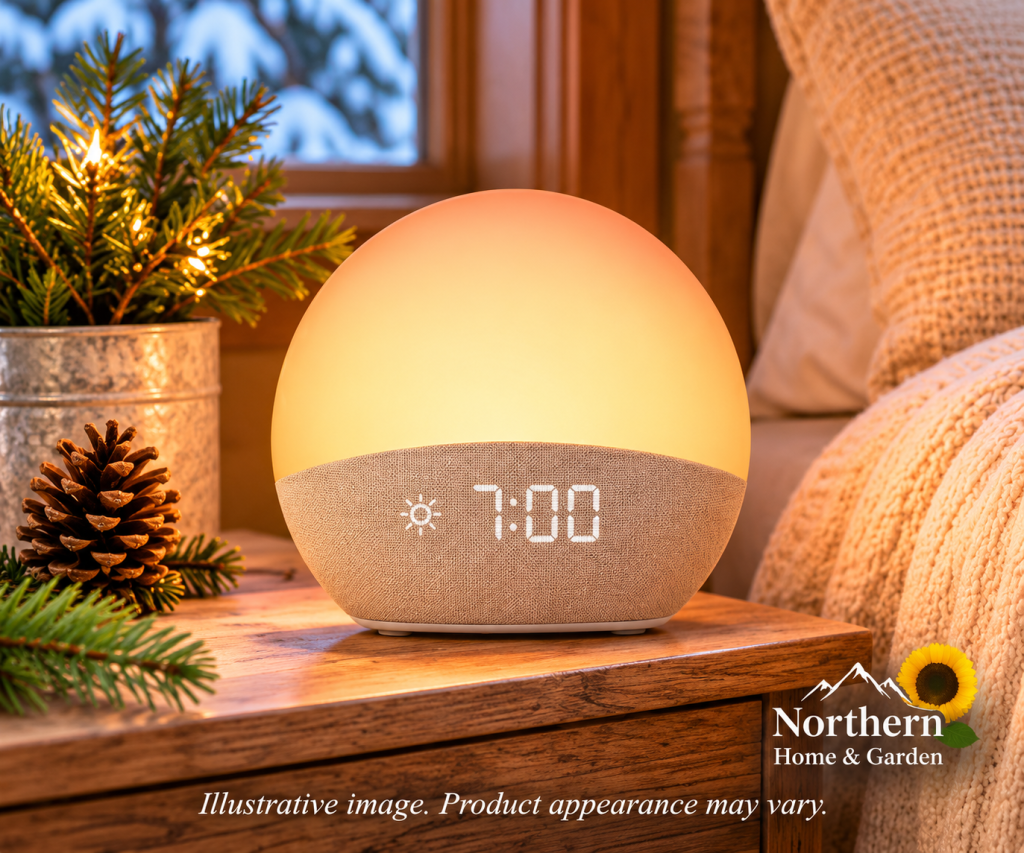
Round sunrise alarm clock glowing soft orange on a wooden nightstand beside pine boughs, a pinecone, and a knit blanket, with snowy trees outside the window.

Waking up in the pitch dark is one of the hardest parts of a northern winter. A sunrise alarm clock slowly brightens before the alarm goes off, so the day starts with a soft glow instead of a jolt. This one also plays soothing sounds and comes in several colors.

Shop Sunrise Alarm Clocks on Amazon →

Humidifier

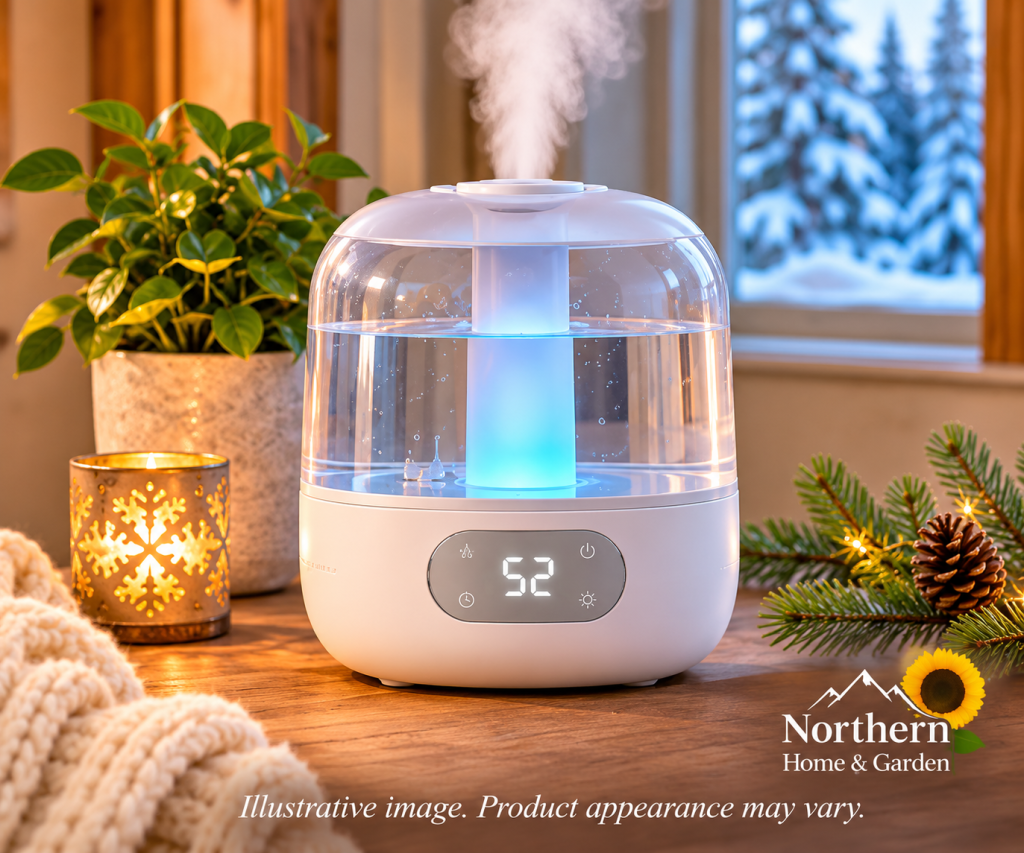
Small clear and white humidifier releasing a gentle mist on a wooden table beside a houseplant, a snowflake candle holder, and pine boughs, with snowy evergreens outside.

A heated house gets very dry over a long northern winter, and so do the people and houseplants living in it. A small humidifier puts some moisture back into the air, and this one runs quietly and is easy to refill and clean.

Shop Humidifiers on Amazon →

Mug Warmer

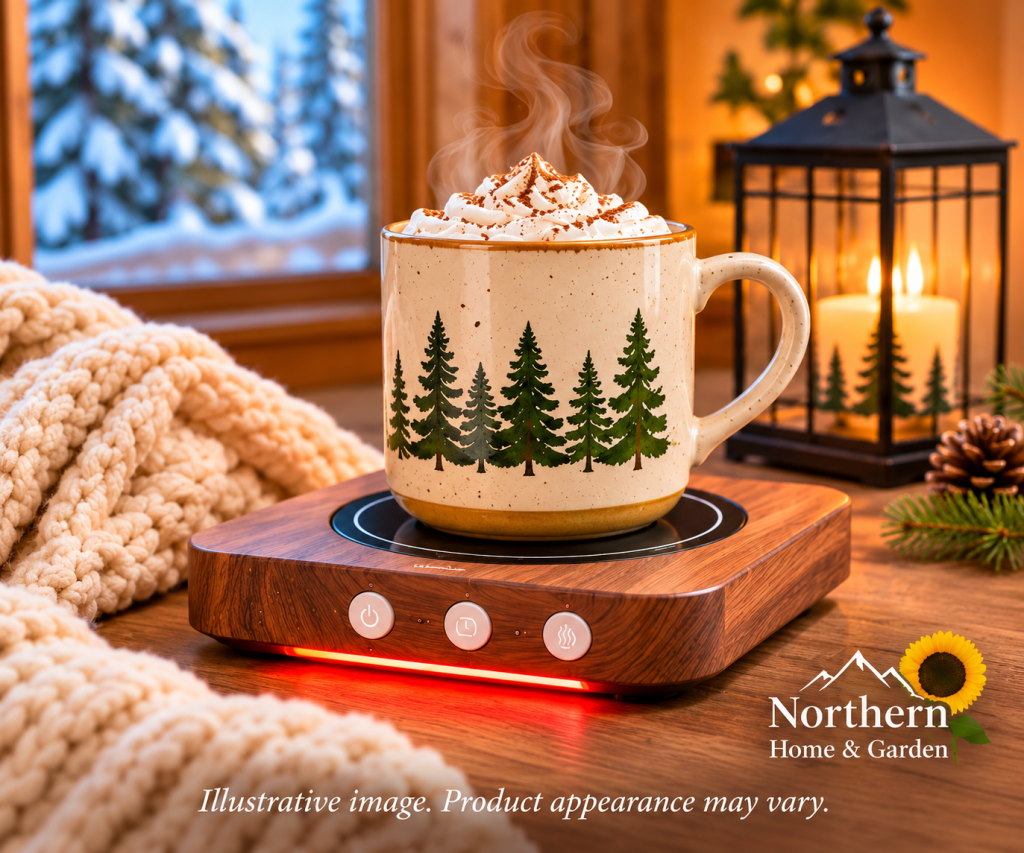
Wood-look mug warmer holding a pine-tree mug of cocoa topped with whipped cream, beside a chunky knit blanket and a candle lantern, with snowy evergreens outside.

For the person whose coffee is always cold by the time they remember it. Set a mug on top and it stays warm, and a built-in timer shuts it off automatically. Pair it with one of the big mugs above for an easy gift.

Shop Mug Warmers on Amazon →

Candle Warmer Lamp

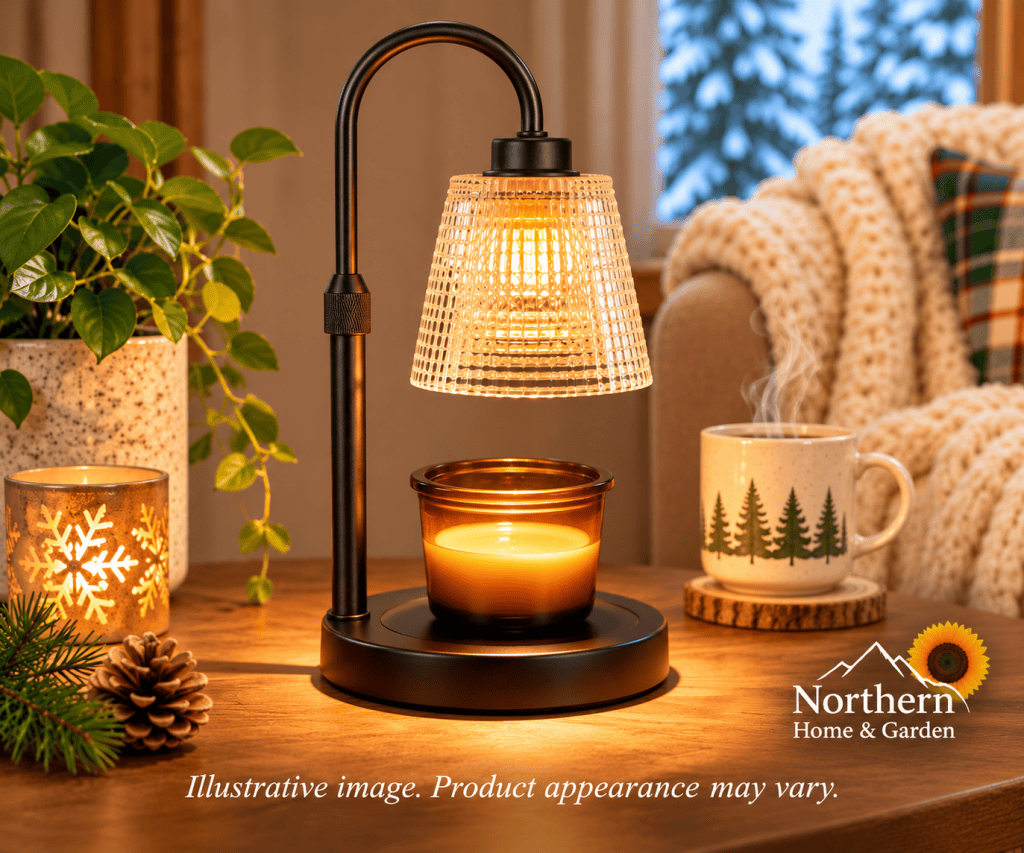
Black candle warmer lamp with a ribbed glass shade melting an unlit amber jar candle on a wooden side table beside a pothos plant, a pine-tree mug, and a cozy knit-draped armchair.

When it’s dark by three o’clock, a little candlelight goes a long way. A candle warmer lamp melts a jar candle from above with a warm bulb, so the room fills with soft light and scent without an open flame. It’s a nice pick for homes with pets, kids, or anyone who tends to forget a candle is burning.

Shop Candle Warmer Lamps on Amazon →

Moisturizing Lip Balm

Three lip balm tubes in green, pink, and blue tucked into a red and cream knit stocking, surrounded by pine boughs, pinecones, and string lights.

Dry winter air is hard on lips, too. A multi-pack of moisturizing lip balm makes an easy stocking stuffer, with enough to keep one in every coat pocket.

Shop Moisturizing Lip Balm on Amazon →

Find More Northern Favorites

Looking for more ideas? Browse our Garden Essentials, Houseplant Favorites, and Cozy Home Favorites pages. And for anyone who drives through a northern winter, our Winter Car Essentials page has practical picks for cold-weather driving.

Wishing you a warm and happy holiday season, and a garden full of plans for spring!

🌻 Northern Home & Garden

More Northern Tips, Straight to Your Inbox 🌻

Get practical gardening advice, seasonal ideas and new posts from Northern Home & Garden delivered to your inbox.
Christmas vs. Thanksgiving vs. Easter Cactus: How to Tell Them Apart

Christmas, Thanksgiving, or Easter cactus? Learn how to tell these holiday favorites apart by their stem shapes, colorful flowers, and blooming seasons.

Have you ever bought a Christmas cactus, only to have it bloom before Thanksgiving? You might actually have a Thanksgiving cactus. It’s not confused, just a little eager.

Christmas, Thanksgiving, and Easter cacti look so similar that they’re easy to mix up. They’re all beautiful flowering houseplants, but each has a few features that make it unique.

You don’t have to wait for flowers to figure out which one you have, either. A quick look at the leaves tells you most of what you need to know.

Affiliate Disclosure: This post contains affiliate links. As an Amazon Associate I earn from qualifying purchases.

Meet the Three Holiday Cacti

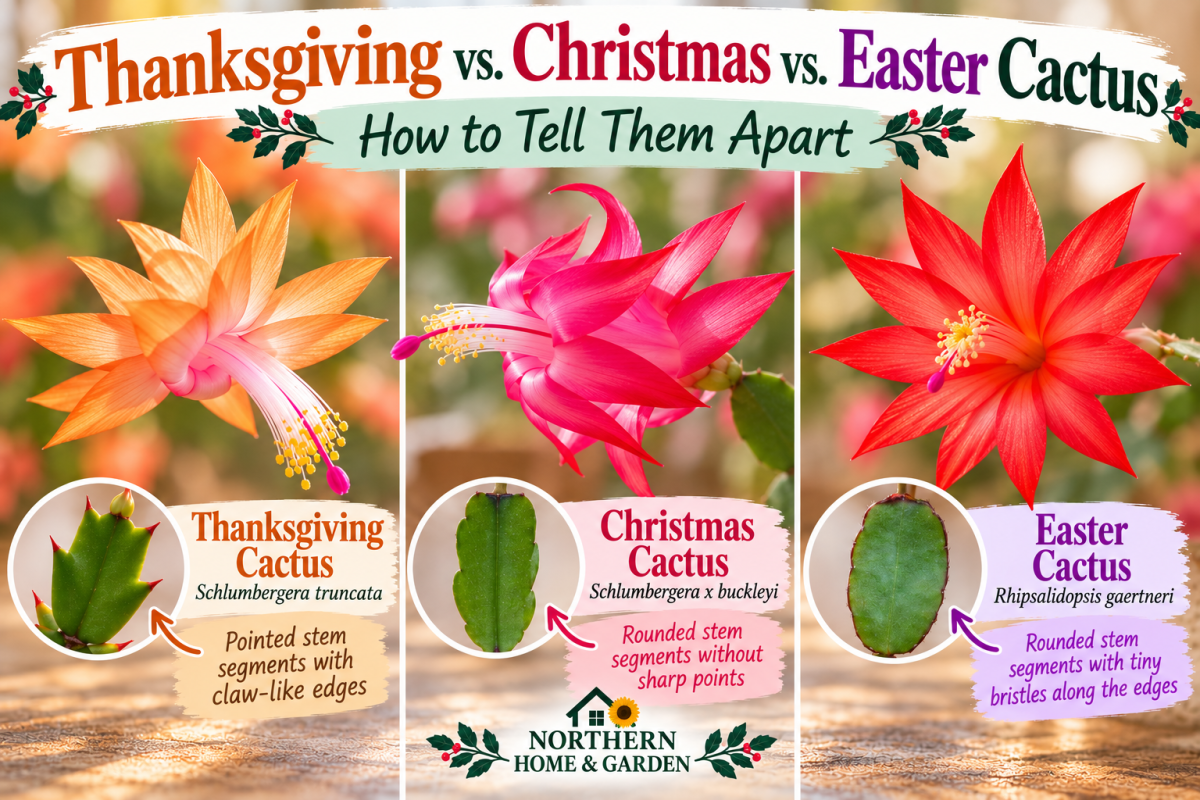
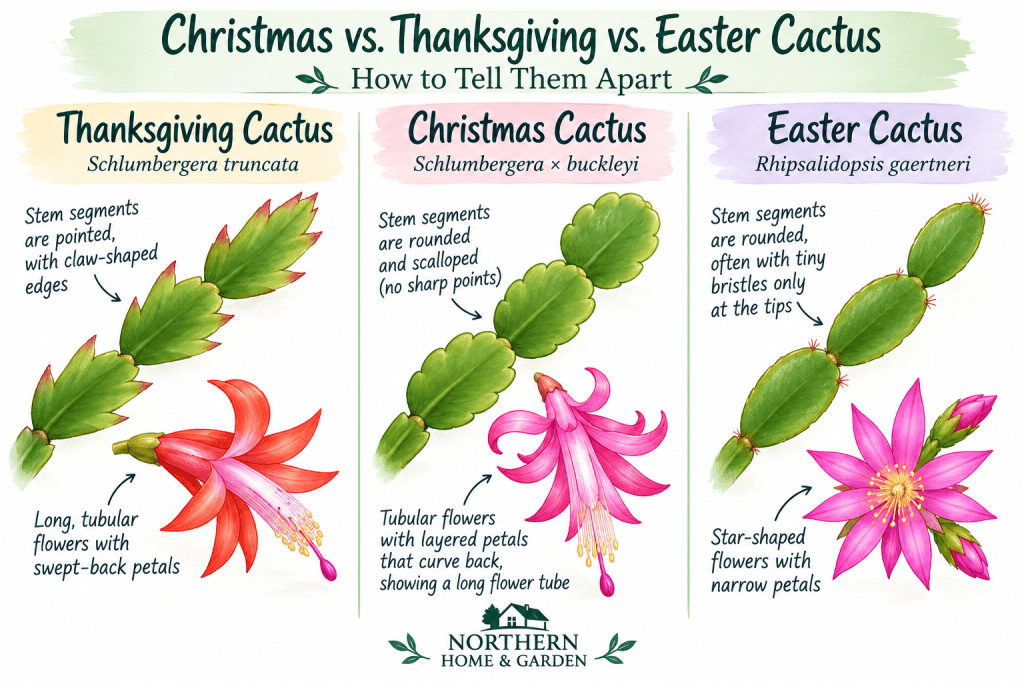
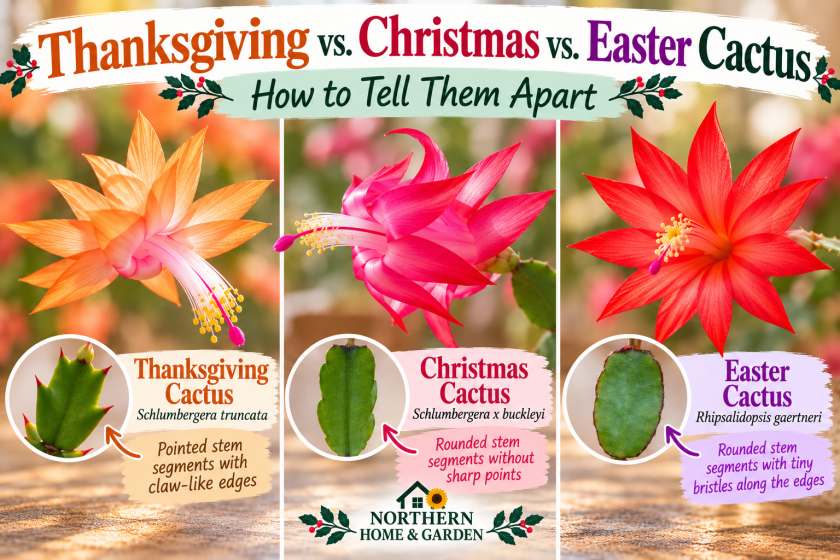
Watercolor comparison of Thanksgiving, Christmas, and Easter cacti showing pointed, rounded, and gently curved stem segments alongside their distinctive flowers.

Although these holiday cacti look similar, each has its own distinctive features. The easiest way to tell them apart is by looking at the shape of their stem segments and flowers.

Thanksgiving Cactus

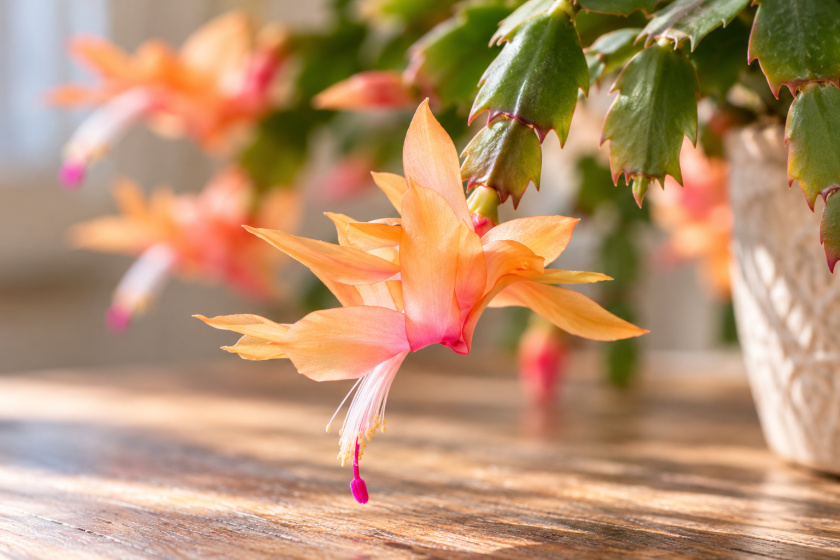
Close-up of a peach-orange Thanksgiving cactus flower with pink accents, hanging from green stem segments with pointed, claw-shaped edges.

Thanksgiving cactus (Schlumbergera truncata) has pointed, claw-shaped edges along its stem segments. It’s usually the first of the three to bloom, often producing colorful flowers in the fall.

Its flowers come in shades of pink, red, purple, orange, and white. Thanksgiving cacti are also commonly sold as Christmas cacti in garden centers, which explains some of the confusion!

Christmas Cactus

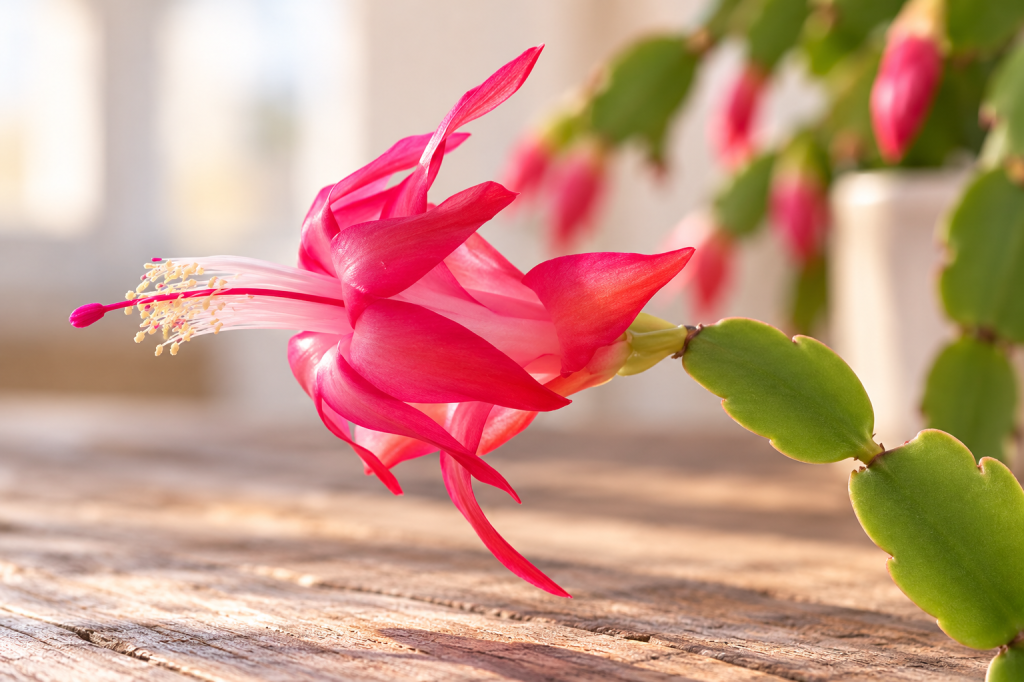
Close-up of a pink Christmas cactus flower with delicate stamens and rounded, scalloped green stem segments against a softly blurred background.

True Christmas cactus (Schlumbergera × buckleyi) has rounded, scalloped stem segments without the sharp points found on Thanksgiving cactus.

Its flowers are typically pink or reddish-pink and hang gracefully from the ends of its stems. Christmas cactus generally blooms in early winter, closer to its namesake holiday.

Easter Cactus

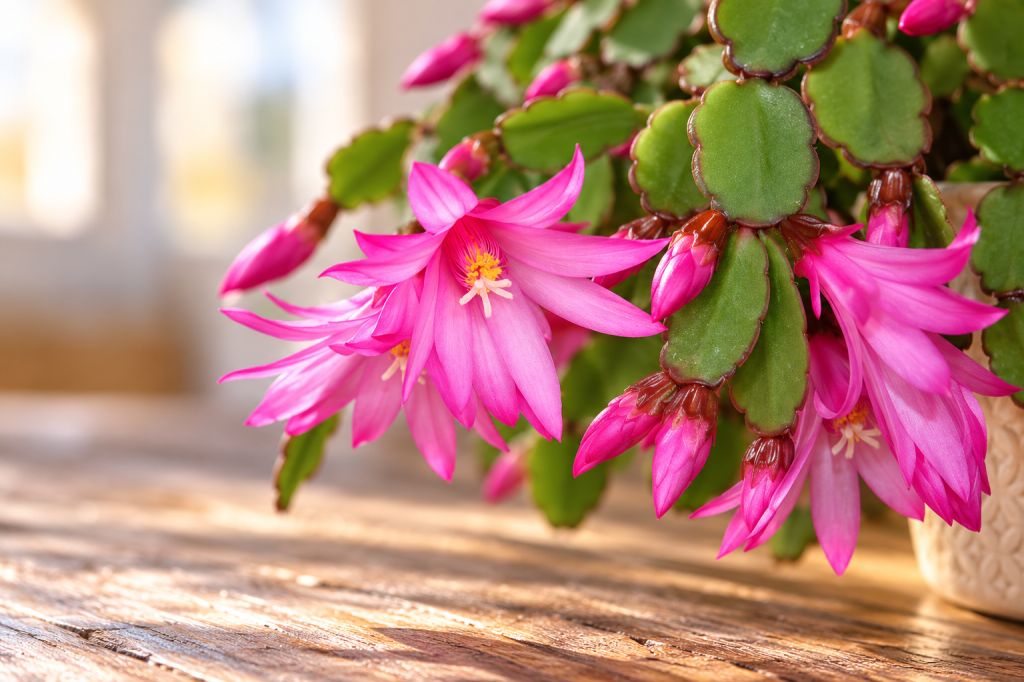
Bright pink Easter cactus flowers and buds surrounded by rounded green leaf segments, cascading from a pot on a sunlit wooden table.

Easter cactus (Schlumbergera gaertneri, formerly Rhipsalidopsis gaertneri) has rounded stem segments, sometimes with tiny bristles along the edges and tips.

Unlike its fall- and winter-blooming relatives, Easter cactus typically flowers in spring. Its cheerful, star-shaped blooms come in shades of pink, red, orange, and white.

How to Care for Holiday Cacti

Although Thanksgiving, Christmas, and Easter cacti bloom at different times, their basic care needs are fairly similar. A little attention to light, water, and soil will help keep them healthy throughout the year.

  • Light: Place your cactus in bright, indirect sunlight. Too much direct sun can scorch the stems.
  • Water: Allow the top inch or so of soil to dry before watering thoroughly. Let excess water drain away, and never leave the pot sitting in water. A soil moisture meter takes the guesswork out of this. I use one for all my houseplants.
  • Soil: Use a well-draining potting mix. Adding perlite or orchid bark can help prevent soggy roots. If it’s time for a bigger pot, a repotting mat keeps the mess off your table. I love mine.
  • Temperature: Average indoor temperatures between 60 and 75°F work well for everyday care.
  • Humidity: Holiday cacti appreciate moderate humidity, especially during the dry winter months.

Unlike many desert cacti, these plants are native to humid environments and prefer a little more moisture. The trick is keeping the soil lightly moist when needed without leaving the roots waterlogged.

Want Your Holiday Cactus to Bloom?

Healthy green stems are lovely, but those colorful flowers are what make holiday cacti so special! Holiday cacti set buds when the nights get long, which is one thing we have no shortage of up here.

If your Christmas or Thanksgiving cactus hasn’t bloomed in a while, visit our guide on How to Get Your Holiday Cactus to Bloom for tips on encouraging flowers, including the importance of temperature, light, and seasonal rest.

Pink holiday cactus blooming in a decorative cream pot beside a snowy window, with the text “How to Get Your Holiday Cactus to Bloom! And Keep It Blooming!”

Final Thoughts

Whether your holiday cactus blooms in November, December, or spring, each one brings a little color into the house when we need it most.

And now that you know what to look for, you’ll have a much easier time figuring out which holiday cactus is sitting on your windowsill!

Shopping for a fellow houseplant lover this season? Our gift guide for cold-climate gardeners has plenty of ideas.

🌻 Northern Home & Garden

More Northern Tips, Straight to Your Inbox 🌻

Get practical gardening advice, seasonal ideas and new posts from Northern Home & Garden delivered to your inbox.
How to Get Your Holiday Cactus to Bloom (And Keep It Blooming!)

Wondering why your holiday cactus won’t bloom? Learn four simple steps to encourage beautiful flowers on Christmas and Thanksgiving cactus, prevent bud drop, and keep your plant healthy year after year.

Few things brighten a dark winter afternoon like a holiday cactus covered in flowers. When it’s cold and snowy outside, those cheerful pink, red, or white blooms are a very welcome splash of color.

But what if your Christmas or Thanksgiving cactus refuses to bloom? Or worse, it develops flower buds only to drop them before they open?

Getting your holiday cactus to bloom isn’t complicated, I promise. With the right combination of light, temperature, and watering, you can encourage beautiful flowers year after year.

Affiliate Disclosure: This post contains affiliate links. As an Amazon Associate I earn from qualifying purchases.

4 Simple Steps to Encourage Holiday Cactus Blooms

Christmas and Thanksgiving cacti respond to changes in daylight and temperature. As fall approaches, longer nights and cooler conditions signal that it’s time to produce flower buds.

Christmas cactus covered in bright pink flowers and unopened buds beside a sunny window overlooking snow-covered trees.

1. Give It Longer, Uninterrupted Nights

For about six to eight weeks in the fall, give your holiday cactus approximately 13 to 14 hours of uninterrupted darkness each night.

Up here, fall nights get long fast, so nature does most of the work for us. The real troublemakers are lamps and TVs. If your cactus lives in the living room, every evening of Netflix counts as daytime to your plant, so a spare room that stays dark after sunset works best.

During the day, keep your cactus in bright, indirect light.

2. Keep Temperatures on the Cooler Side

Cooler temperatures can encourage flower buds, even when the plant receives fewer hours of darkness. Aim for nighttime temperatures around 55 to 60°F, if possible.

There’s no need to turn your house into a refrigerator! A naturally cooler room may be all your plant needs.

3. Water Carefully

Christmas and Thanksgiving cacti aren’t quite like the desert cacti we’re used to seeing. They’re tropical plants that prefer a little more moisture.

Water when the upper inch of soil feels dry. Allow excess water to drain away, and avoid leaving the pot sitting in water.

During the fall blooming preparation period, avoid keeping the soil constantly wet, but don’t let the plant become severely dried out either.

I like to use a soil moisture meter to help check when my houseplants need water. It’s especially handy for larger plants when it’s hard to tell how damp the soil is beneath all that foliage.

4. Give It a Little Time

Flower buds don’t appear overnight.

After several weeks of favorable conditions, you may begin noticing tiny buds forming at the tips of the stem segments. It can take several more weeks for those buds to open.

Once buds appear, continue providing bright, indirect light and consistent temperatures as the flowers develop.

What to Do When Flower Buds Appear

Christmas cactus with vibrant pink flowers and unopened flower buds hanging from green stems beside a sunlit window.

You’ve waited patiently, and your holiday cactus finally has flower buds! Now the goal is to keep those little buds happy until they open.

Christmas and Thanksgiving cacti can be sensitive to sudden changes in their environment, especially while they’re developing flowers.

A few simple precautions can help prevent bud drop:

  • Keep temperatures consistent. Avoid placing your plant near heating vents, drafty doors, or cold windows.
  • Maintain steady watering. Don’t let the soil become completely dry for long periods, but avoid overwatering.
  • Provide bright, indirect light. Once buds appear, you can return to a normal day and night lighting schedule. Your cactus no longer needs the long nights used to encourage bud formation.
  • Avoid sudden changes in location. Moving your plant isn’t necessarily harmful, but changes in light, temperature, or humidity can cause buds to drop.
  • Hold off on repotting. Wait until after flowering to avoid disturbing the roots unnecessarily.

Why Isn’t My Holiday Cactus Blooming?

If your Christmas or Thanksgiving cactus looks healthy but refuses to flower, don’t give up on it just yet!

Usually, the problem comes down to lighting, temperature, or watering. A few small adjustments may be all it needs.

Possible ProblemWhat to Try
Too much artificial light at nightProvide 13 to 14 hours of uninterrupted darkness for several weeks during fall.
Temperatures are too warmTry a cooler location, ideally around 55 to 60°F at night during bud formation.
Not enough daytime lightMove your cactus to a spot with bright, indirect sunlight. During our dark northern winters, a grow light can help too.
Improper wateringWater when the upper inch of soil feels dry, and avoid soggy soil.
Recent repotting or other stressGive your plant time to settle into a stable environment.

Can a Holiday Cactus Bloom More Than Once a Year?

Close-up of a vibrant pink Christmas cactus flower with delicate stamens and unopened buds beside a snowy window.

Absolutely! Although Christmas and Thanksgiving cacti are known for their beautiful flowers during the colder months, both can bloom more than once a year when growing conditions are right.

Changes in daylight hours and temperature may encourage another round of flower buds, even outside the usual blooming season.

I’ve experienced this with my own holiday cactus. Not only has it surprised me with beautiful pink flowers in April, but it’s even bloomed in July! And the funny thing is, I haven’t done anything differently to encourage those extra blooms.

Apparently, my cactus has decided that blooming season is more of a suggestion than a rule!

While you can’t count on flowers appearing throughout the year, keeping your plant healthy with proper light, watering, and consistent care gives it the best chance to bloom again when conditions are favorable.

Caring for Your Holiday Cactus After Blooming

Healthy Christmas cactus with cascading green stems in a decorative cream pot beside a sunny window overlooking a snowy landscape.

Once the last flowers have faded, a little routine care will help keep your holiday cactus healthy and ready for its next blooming season. Fortunately, it doesn’t take much!

  • Keep it in bright, indirect light. Avoid harsh afternoon sunshine that can scorch the stems.
  • Water when needed. Allow the upper inch of soil to dry before watering, and never leave the pot sitting in water.
  • Fertilize during active growth. A balanced houseplant fertilizer, diluted according to the label, can help support healthy growth in spring and summer.
  • Repot only when necessary. Holiday cacti can bloom well when slightly rootbound. If your plant needs a larger pot, spring is a good time to repot.
  • Prune after flowering. Removing a few stem segments can encourage branching and fuller growth. And don’t throw those cuttings away! They’re perfect for propagating new plants.

With a little consistent care, Christmas and Thanksgiving cacti can thrive for many years, becoming beautiful houseplants that you can enjoy long after the decorations are packed away.

Looking for a gift for the plant lover in your life? Check out our gift guide for cold-climate gardeners for houseplant tools and other winter favorites.

Not sure which holiday cactus you have?

Comparison of Thanksgiving, Christmas, and Easter cactus flowers with close-ups showing their different stem shapes, including pointed, rounded, and finely bristled edges.

Christmas, Thanksgiving, and Easter cacti may look similar, but their stem shapes and blooming seasons can help you tell them apart. Check out our guide Christmas vs. Thanksgiving vs. Easter Cactus to identify yours!

🌻 Northern Home & Garden

More Northern Tips, Straight to Your Inbox 🌻

Get practical gardening advice, seasonal ideas and new posts from Northern Home & Garden delivered to your inbox.
Meet My Little Turtles: The Cutest Way I’ve Found to Grow String of Turtles

Who knew String of Turtles could be even cuter growing out of a turtle planter? From choosing the right soil to plant care and propagation, I’ll share how I grow these adorable little houseplants and why they’ve become some of my favorite plant projects.

There are some plant and planter combinations that are just meant to be.

A trailing String of Hearts spilling out of a heart-shaped planter? Adorable.

Herbs growing in mason jars on the kitchen counter? Perfect.

But String of Turtles growing out of an actual turtle?

Come on!

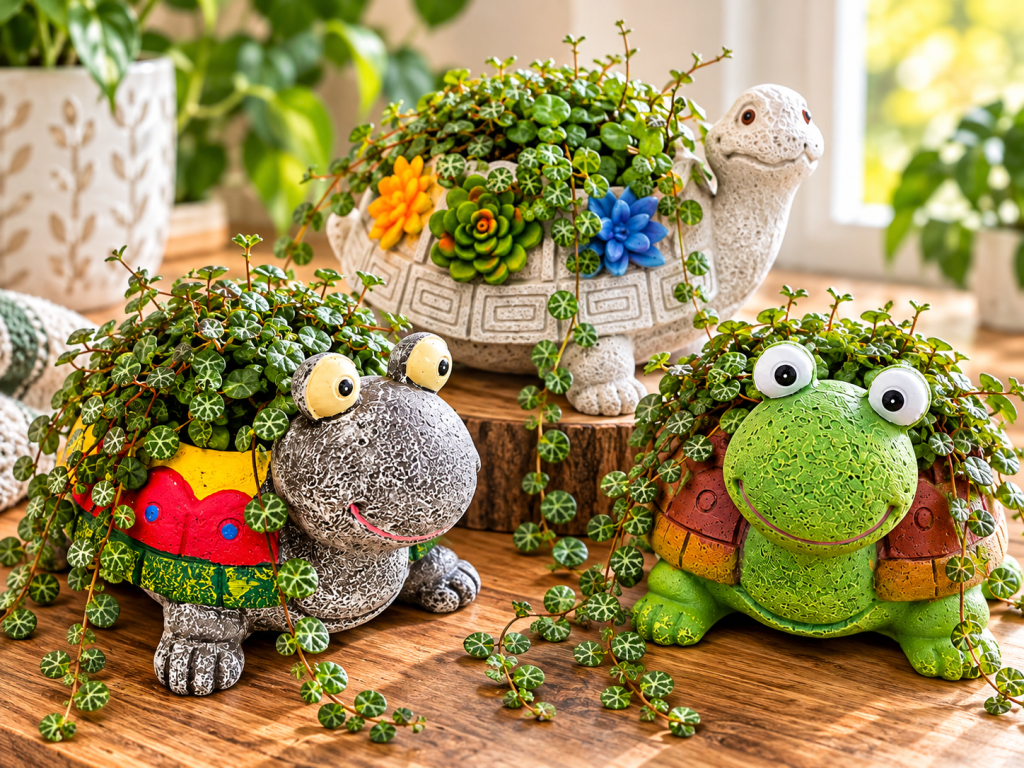
Three colorful turtle planters filled with trailing String of Turtles plants, arranged on a wooden table with a bright, cozy indoor background.

Affiliate Disclosure: This post contains affiliate links. As an Amazon Associate I earn from qualifying purchases.

Meet String of Turtles

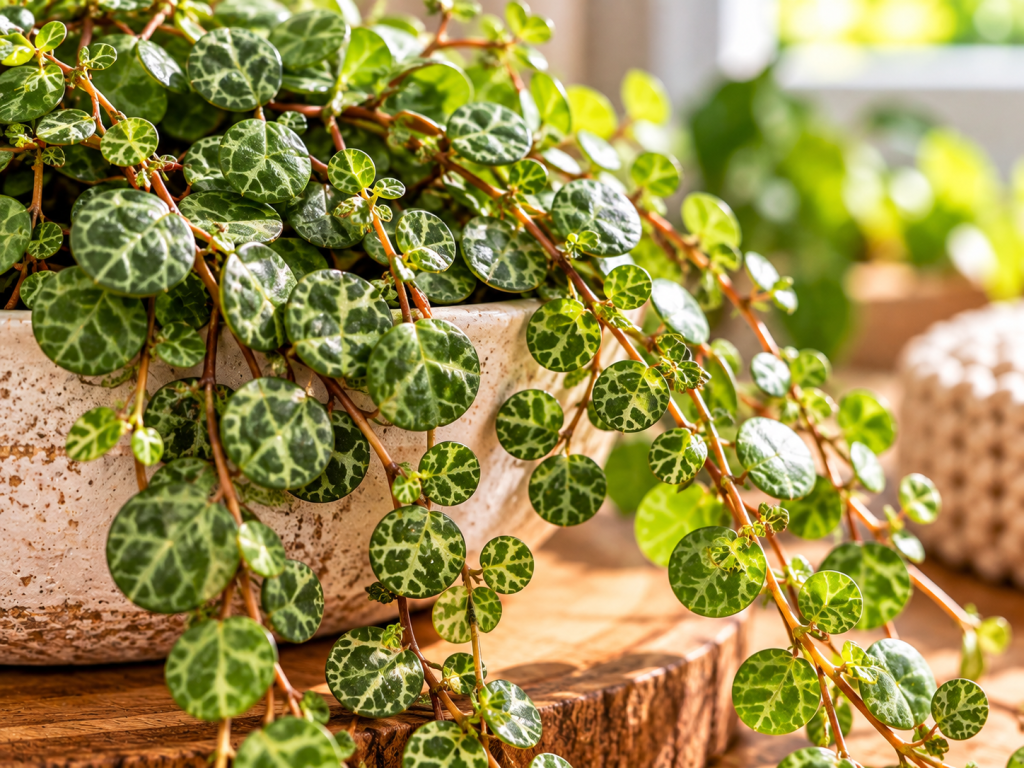
String of Turtles (Peperomia prostrata) is a small trailing houseplant with round leaves covered in beautiful markings that look remarkably like tiny turtle shells.

Which, of course, is exactly why putting one inside a turtle planter is irresistible.

As the plant grows, the vines begin spilling over the sides of the planter, creating a living green “shell.”

Close-up of String of Turtles houseplant showing small, round green leaves with intricate turtle-shell patterns cascading from a ceramic planter.

Why Turtle Planters Work So Well

These are two of the actual turtle planters I used for my String of Turtles arrangements! I loved how much personality they added to such a tiny houseplant.

Shop my turtle planters:

Look for a small decorative turtle planter that’s large enough to hold your plant without overwhelming its relatively small root system.

The most important thing isn’t how adorable its face is. Although, let’s be honest, that certainly helps.

Drainage matters.

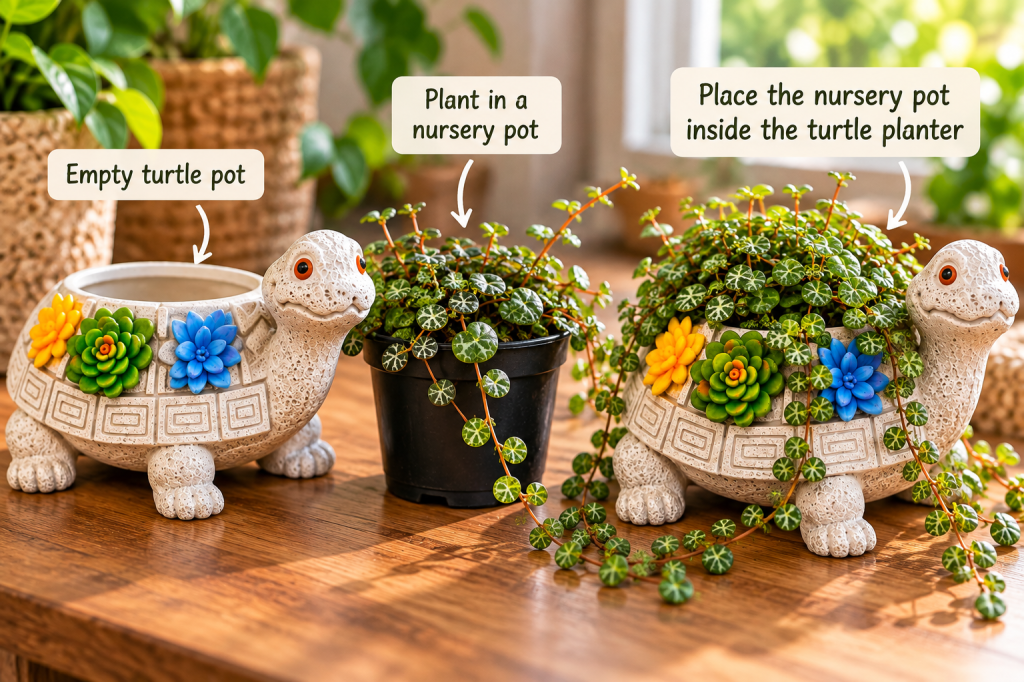
If your perfect turtle doesn’t have drainage, another option is to keep the plant inside a small nursery pot that fits inside the decorative planter. You can remove the inner pot when you water and allow it to drain completely before putting it back.

Three-step visual showing an empty decorative turtle planter, a String of Turtles plant in a nursery pot with drainage holes, and the nursery pot placed inside the turtle planter.

The Soil I Use for String of Turtles

These little plants have delicate roots, so I prefer a light, airy potting mix that holds a little moisture while allowing excess water to drain away.

My DIY String of Turtles Soil Mix

If you’d like to make your own, here’s a simple combination:

  • 50% indoor potting mix for a little moisture retention
  • 30% perlite or pumice to improve drainage and airflow
  • 20% fine orchid bark (rather than large chunks) to keep the mix loose and airy

Mix everything together before planting.

Prefer a Ready-Made Mix?

If you’d rather use a premixed option, this chunky houseplant mix contains coco coir, pumice, and fir bark to help with drainage and airflow.

How to Plant a String of Turtles Turtle

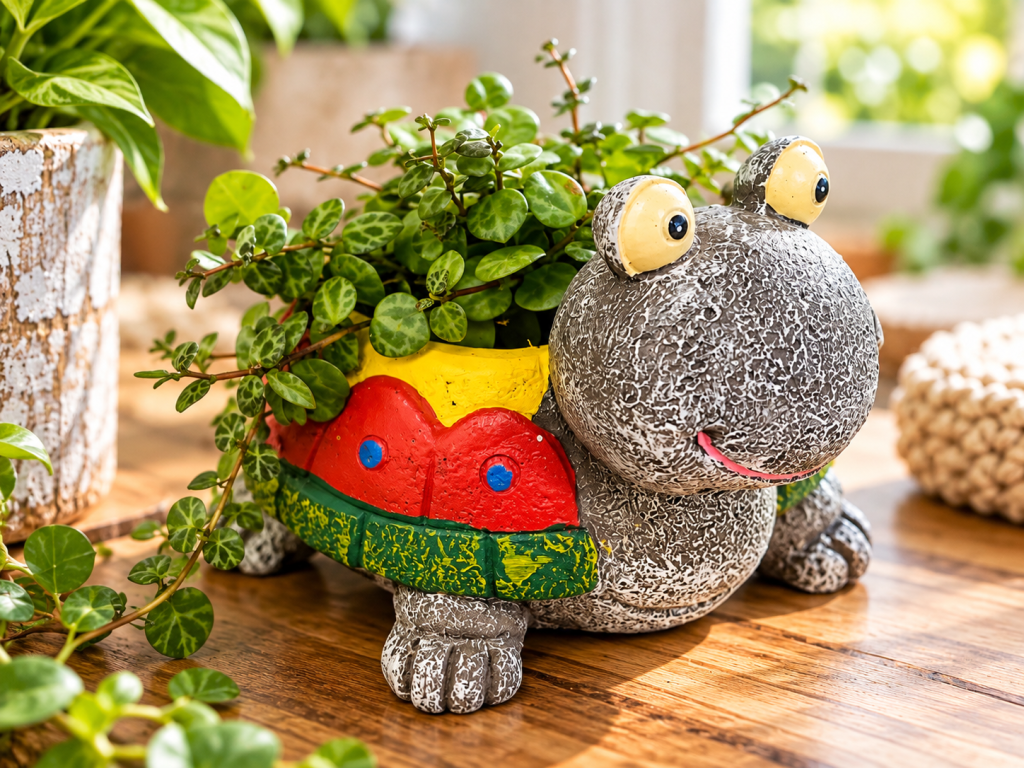
Gray turtle planter with a colorful red, yellow, and green shell, filled with String of Turtles vines on a wooden table in a bright indoor setting.

Once you’ve found your turtle, and a healthy String of Turtles plant, it’s a pretty simple project.

Add your potting mix, leaving enough room for the plant’s existing roots.

Gently position the plant in the planter and fill around the roots with additional soil. Avoid burying the little leaves or packing the soil down too firmly.

Give Your Turtle Plenty of Light

String of Turtles generally does best with plenty of bright, indirect light.

Good light helps maintain compact growth and those beautiful markings on the leaves.

One thing worth watching is the top of the planter. With trailing plants, it’s easy to admire all those long vines while forgetting that the crown of the plant needs light too.

If your String of Turtles isn’t getting enough bright, indirect light (and in a northern December, whose is?), a small LED grow light can be a helpful option.

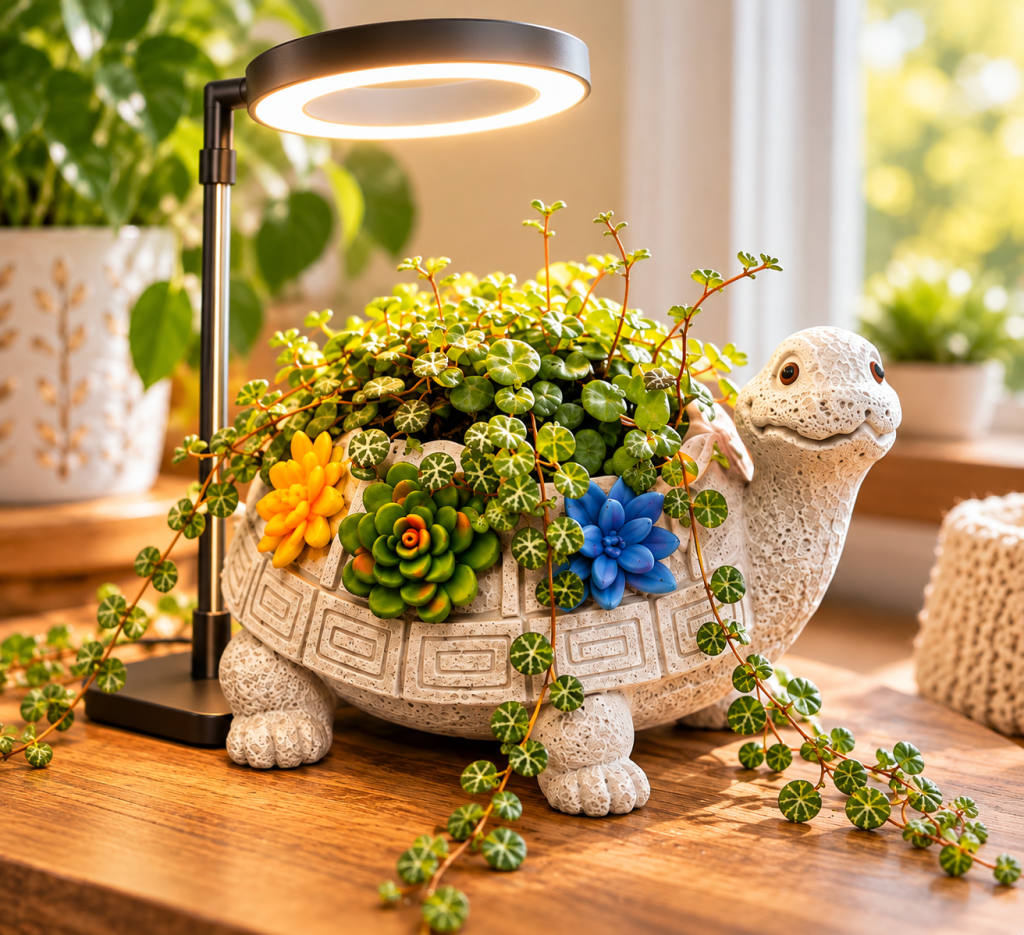
I especially love the idea of a little turtle planter sitting beneath its own miniature grow light. How cute would that be?!

Gray stone-look turtle planter with colorful succulent accents and trailing String of Turtles vines, sitting beneath a small ring-shaped LED grow light on a wooden table.

Watering String of Turtles

This is another place where I’d rather teach you how to read the plant and soil than tell you to water every Tuesday.

Conditions inside our homes vary far too much for a rigid schedule.

Before watering, check the soil. I allow the potting mix to dry considerably rather than keeping it constantly damp.

Then I water thoroughly and allow the excess to drain away.

Tiny planters can be deceptive because they hold relatively little soil. Depending on the conditions in your home, they may dry faster than larger houseplants. But that doesn’t mean they need constant little sips of water.

Turn One Turtle Into More Turtles

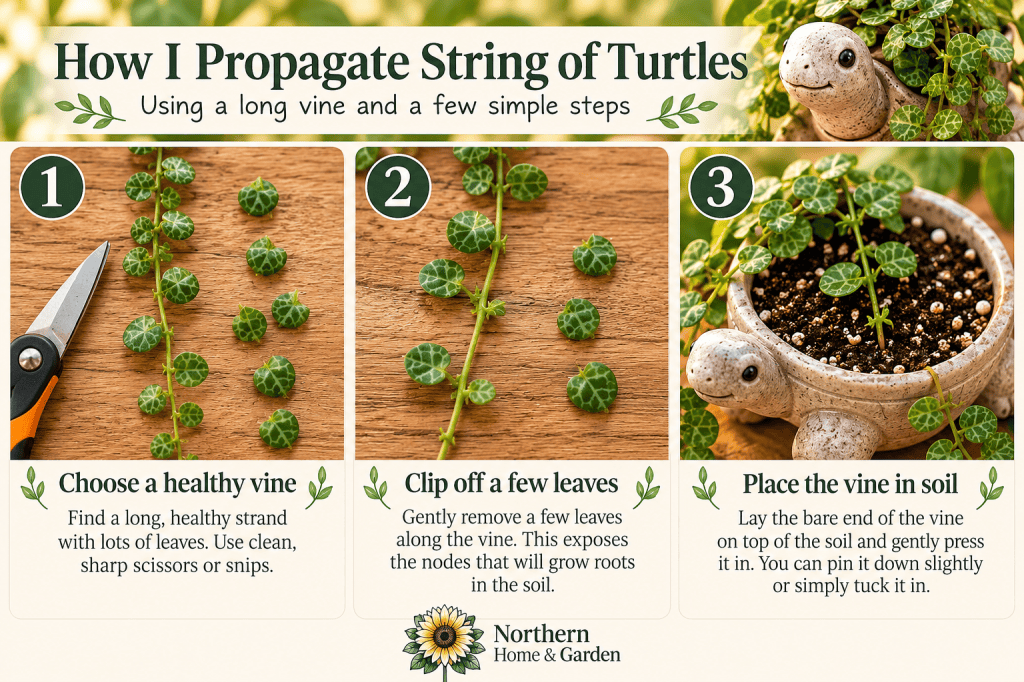
String of Turtles can be propagated from healthy vines. Here’s the method I’ve used with mine.

  1. Choose a healthy, longer strand of String of Turtles.
  2. Carefully remove a few leaves along the section of vine you want to plant. This exposes the little nodes where new roots can develop.
  3. Gently tuck that bare section of vine into lightly moist, airy potting soil, keeping the remaining leaves above the surface.
  4. Make sure the nodes have good contact with the soil. You can use a small plant pin to hold the vine in place if needed.
  5. Place your planter somewhere warm with bright, indirect light and keep the soil lightly moist, not soggy, while roots develop.

And before you know it, you might have the beginnings of another little turtle plant! 🐢

String of Turtles propagation tutorial showing how to choose a healthy vine, remove lower leaves to expose nodes, and plant the bare stem in soil using a turtle planter.

Sometimes Houseplants Should Just Be Fun

I love learning about plants.

I love figuring out what makes them grow well, experimenting with propagation, and watching a tiny cutting eventually become a full plant.

But I also think we can get so wrapped up in doing everything “right” that we forget one of the best things about growing houseplants:

They’re supposed to bring us joy.

Sometimes that means growing a beautiful specimen plant.

Sometimes it’s propagating something that belonged to someone you love.

And sometimes…

it’s putting String of Turtles inside a turtle because you absolutely cannot resist. 🐢🌿

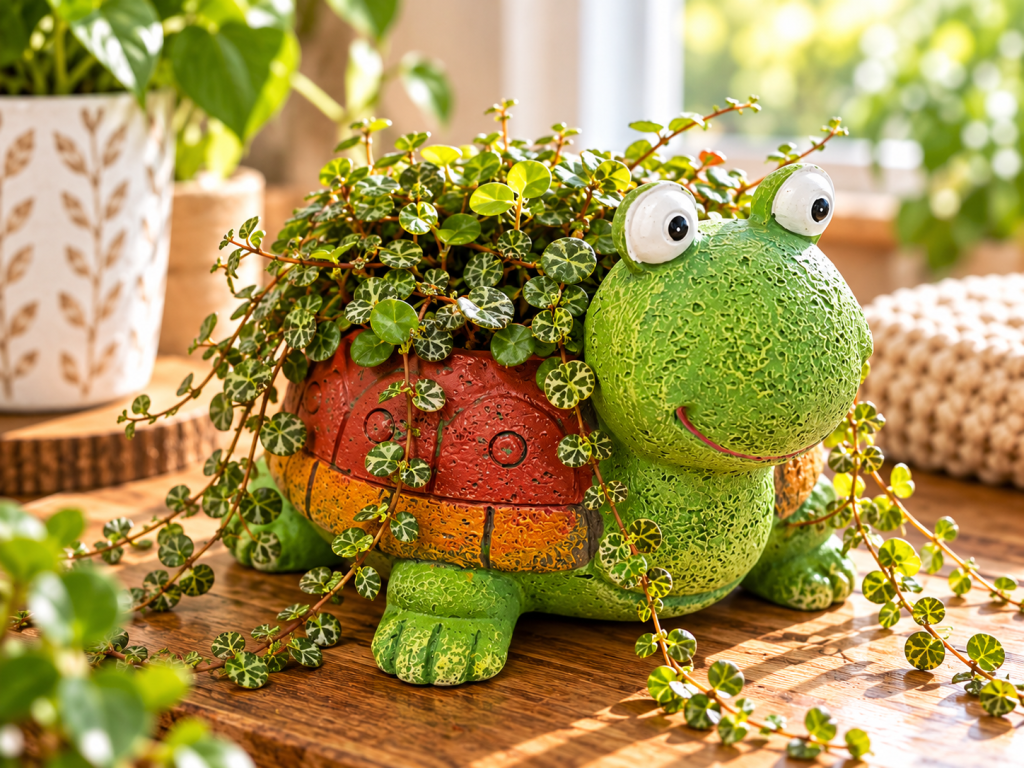
Bright green turtle planter filled with trailing String of Turtles vines, displayed on a wooden table in a sunny indoor setting.

A turtle planter with a String of Turtles inside would make an adorable gift for a plant lover. For more ideas, see our gift guide.

🌻 Northern Home & Garden

More Northern Tips, Straight to Your Inbox 🌻

Get practical gardening advice, seasonal ideas and new posts from Northern Home & Garden delivered to your inbox.
Love Coleus? Here’s How to Keep It Growing Indoors All Winter

Don’t let the first frost take your beautiful coleus! Learn two easy ways to keep it growing indoors all winter, whether you bring the whole plant inside or start fresh with cuttings.

Coleus is one of those plants that’s really hard to say goodbye to at the end of summer.

Thankfully, coleus can grow indoors through winter with the right light, watering, and a little pruning.

Here’s how to keep your coleus growing indoors until spring.

Affiliate Disclosure: This post contains affiliate links. As an Amazon Associate I earn from qualifying purchases.

Can Coleus Really Grow Indoors?

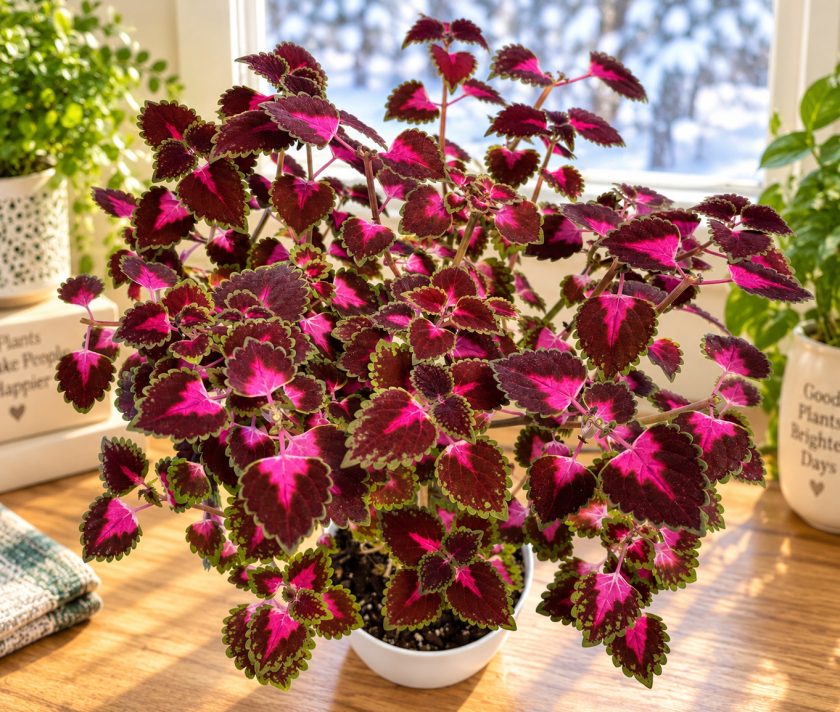
Large colorful coleus plant growing indoors near a sunny window during winter.

Absolutely!

Coleus is a tender perennial that can’t survive our freezing northern winters outdoors, but it can continue growing indoors with the right care.

It may slow down during the shorter winter days, but give it plenty of light, protect it from cold drafts, and adjust your watering to keep it happy until spring.

Two Easy Ways to Save Your Coleus

  • Bring the whole plant indoors. Perfect if your coleus is a manageable size and you have a bright spot for it.
  • Take a few cuttings. My personal favorite! Cuttings take up very little space and are incredibly easy to propagate.

If your coleus has grown into a giant bush over summer, I’d definitely consider the second option.

Option 1: Bringing the Whole Coleus Plant Inside

Just give it a little attention before moving it in!

  1. Inspect for pests. Check the leaves, stems, soil, and pot for aphids, spider mites, fungus gnats, and other unwanted visitors.
  2. Clean it up. Remove dead or damaged leaves and prune back any overgrown stems.
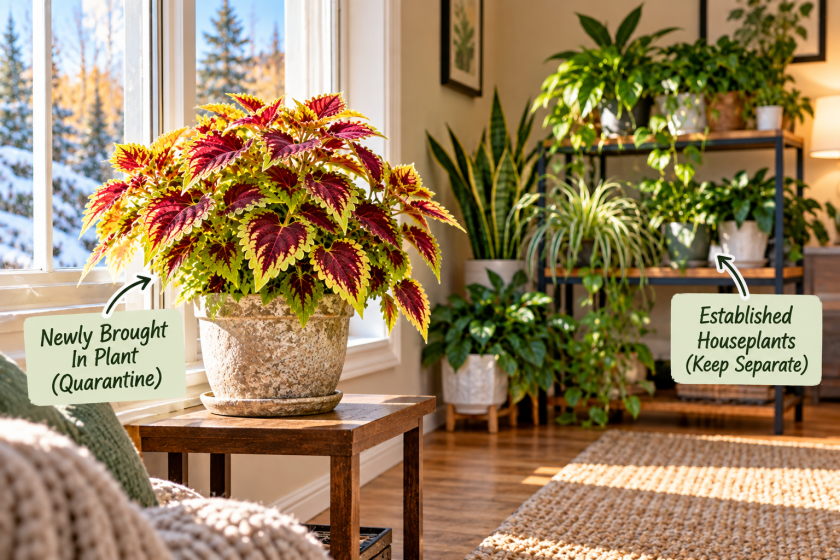
  3. Keep it separate. Quarantine your coleus away from your other houseplants for a couple of weeks, checking regularly for pests.

Nobody wants to bring a beautiful coleus indoors only to discover it brought a few hundred friends along with it.

Newly brought indoor coleus plant kept separate from established houseplants during quarantine.

For more tips, check out our How to Bring Outdoor Plants Inside for Winter guide. It covers inspecting, cleaning, and transitioning outdoor plants into your home.

Option 2: Take Coleus Cuttings Instead

Cuttings take up very little space, and they’re incredibly easy to grow indoors.

Here’s how:

  1. Take a cutting. Choose a healthy stem about 4 to 6 inches long and cut just below a leaf node.
  2. Remove the lower leaves. Strip off any leaves that would sit underwater.
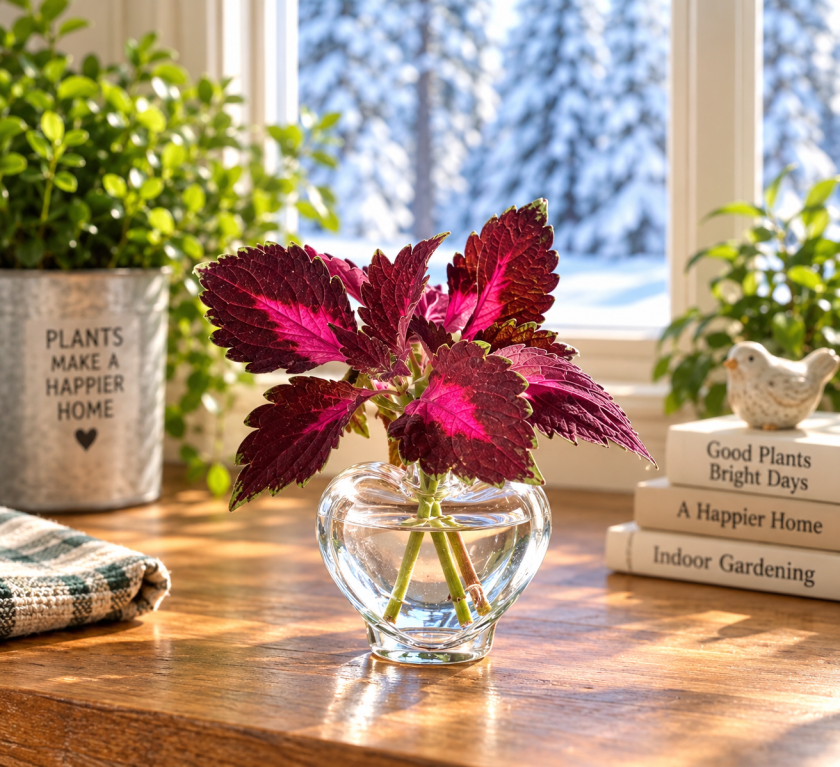
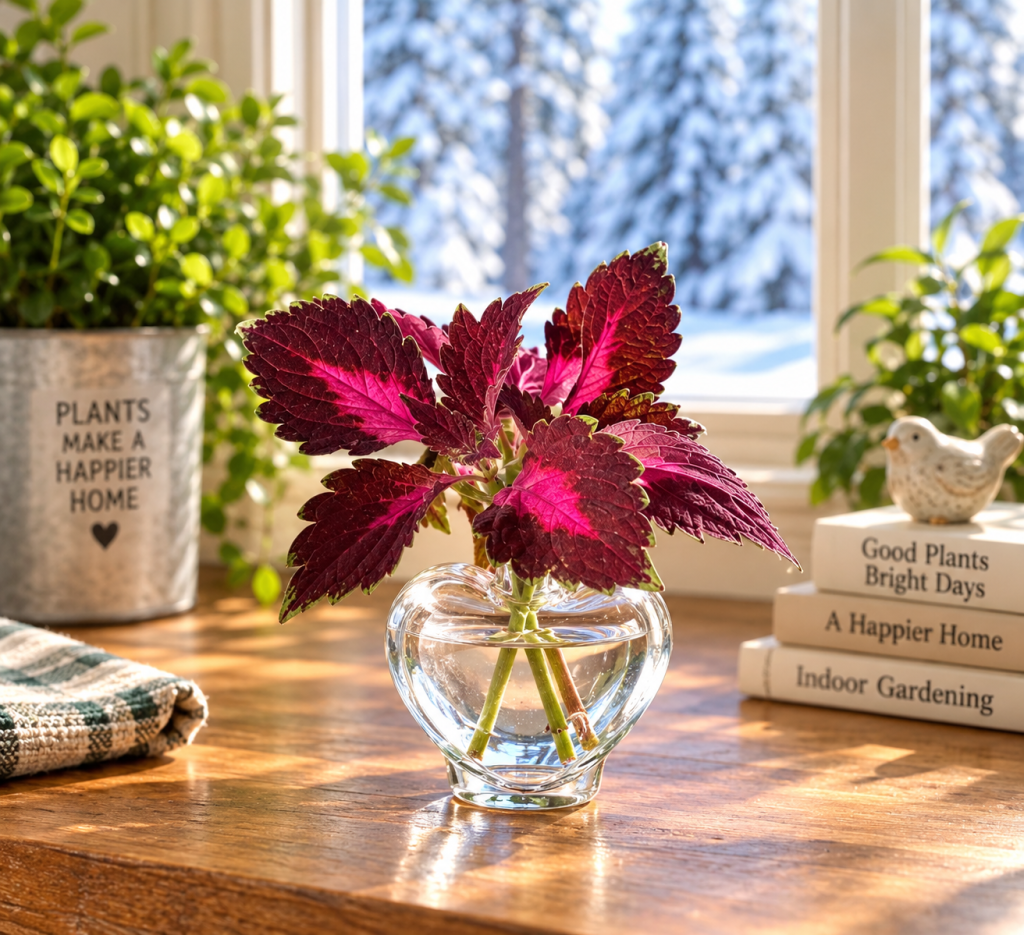
  3. Place in water. Put the cutting in a small glass or propagation vase (I love my heart-shaped one!), keeping the lower nodes submerged and the leaves above water.
  4. Find a bright spot. Keep your cutting in bright, indirect light and refresh the water regularly.

Under good conditions, you may see little white roots developing within a week or two.

Coleus cuttings rooting in water in a heart-shaped glass vase near a sunny winter window.

When Should You Move Coleus Cuttings Into Soil?

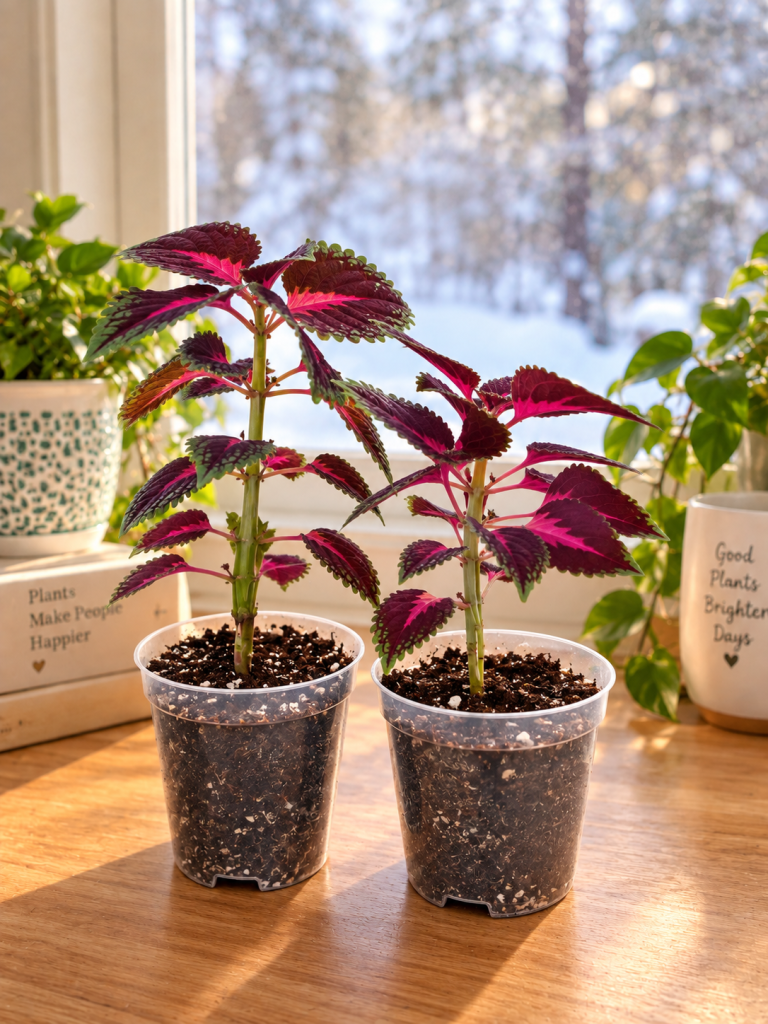
Once your cutting has several healthy roots about 1 to 2 inches long, it’s ready for soil!

  1. Choose a small pot with drainage holes and fill it with well-draining potting mix.
  2. Plant your cutting gently, covering the roots with soil, and water thoroughly.
  3. Keep the soil lightly moist while your coleus adjusts to its new home.

Water-grown roots need a little time to adjust to soil. Once you see healthy new growth, gradually return to a normal watering routine.

Two rooted coleus cuttings planted in clear pots after being propagated in water.

Light Is Probably Your Biggest Winter Challenge

Coleus LOVES light! And during our short northern winter days, getting enough can be tricky. Up here, a December “day” is shorter than most movies, so your sunniest south-facing window is prime real estate.

Place your coleus near a bright window, away from cold drafts.

Signs your coleus needs more light:

  • Long, leggy stems
  • Smaller leaves
  • Fading colors
  • Growth leaning toward the window

Rotate your pot occasionally to encourage even growth.

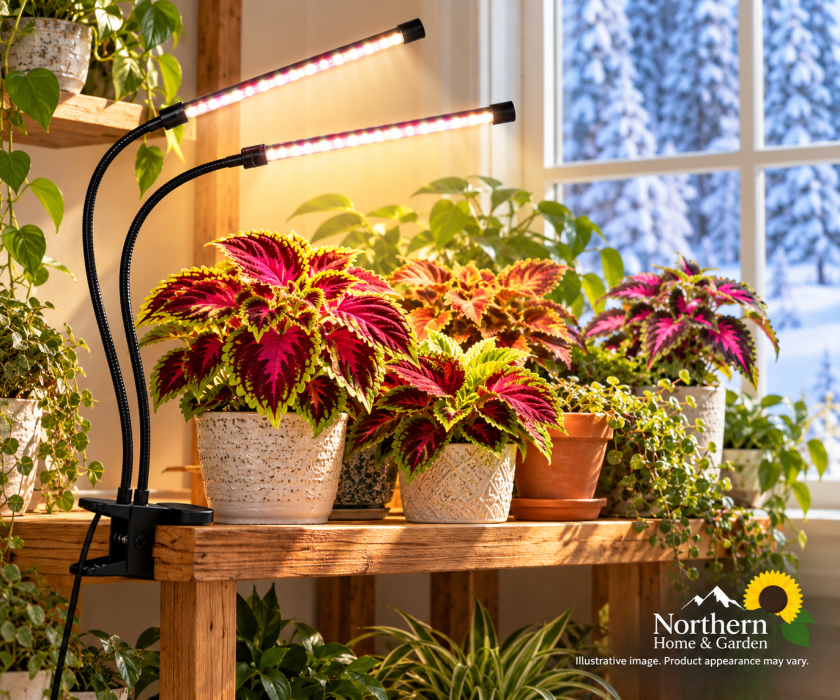
If natural light isn’t enough, a simple clip-on full-spectrum grow light with a timer can make a big difference. For help choosing one, see Grow Lights for Northern Winters.

Colorful coleus plants growing indoors beneath a clip-on LED grow light beside a snowy winter window.

Change the Way You Water

Coleus needs less water during winter when growth slows down. Don’t follow the same watering schedule you used outdoors in summer!

  • Check the soil before watering.
  • Let the top inch of soil begin to dry between waterings.
  • Water thoroughly, allowing excess water to drain from the pot.
  • Avoid letting your coleus stay soggy or become severely wilted.

The goal is lightly moist soil, not constantly wet soil.

❄️ Northern Tip

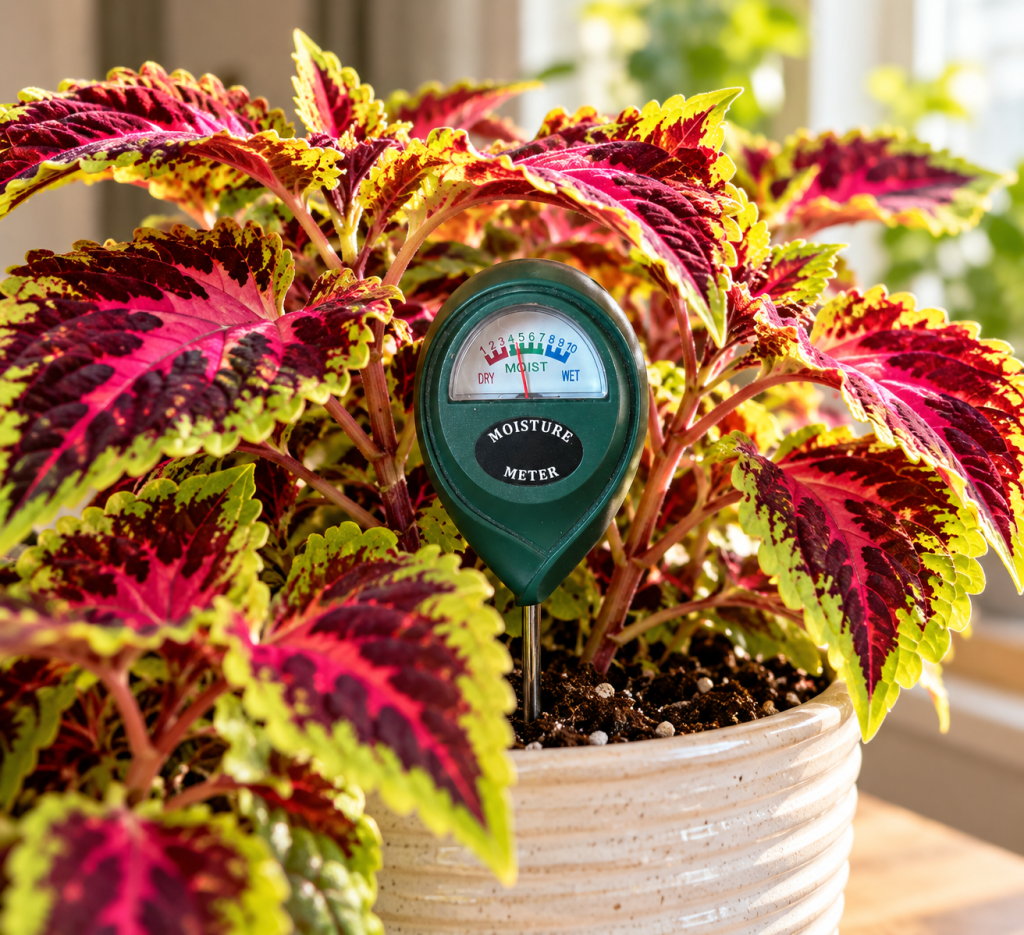
Not sure when to water? A simple moisture meter can help you check below the surface. I use one for all my houseplants!

Find the tools we use to keep our houseplants happy and growing!

Soil moisture meter checking the moisture level of a potted coleus plant.

Pinching and Pruning Keeps Coleus Bushy

Coleus can get tall and leggy without regular pruning, but a little trimming encourages fuller, bushier growth.

Simply pinch off the growing tips or use a pair of sharp micro-tip snips (my go-to for all my houseplants) to cut just above a leaf node. This encourages new branches to grow below the cut.

Don’t Say Goodbye Just Yet

The first frost doesn’t have to mean goodbye to your favorite coleus!

Bring the whole plant indoors or take a few cuttings to grow through winter. With enough light, careful watering, and occasional pruning, you can enjoy those colorful leaves until spring.

And don’t be surprised if one little cutting turns into an entire collection!

Want to Try Something REALLY Fun?

This is where my coleus experiments took an unexpected turn.

You can actually train coleus into a little tree. And yes, it is every bit as cute as it sounds.

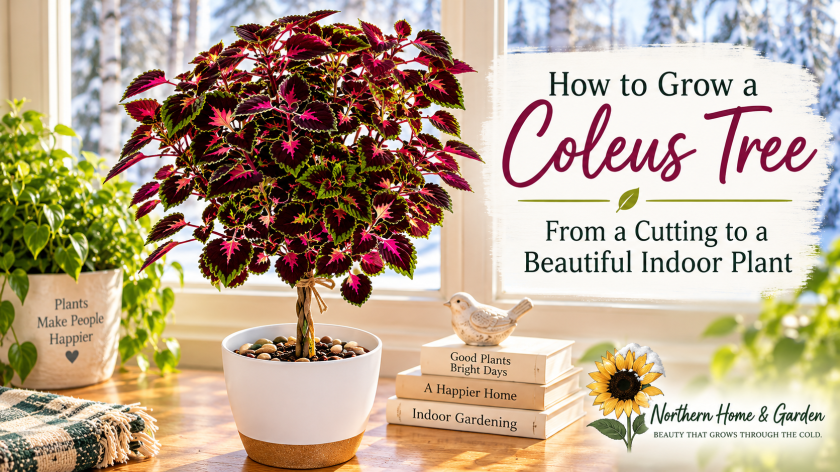
Indoor coleus trained into a small tree shape with a full colorful canopy.

Here’s how: How to Grow a Coleus Tree: From a Cutting to a Beautiful Indoor Plant.

You Might Also Like 🌿

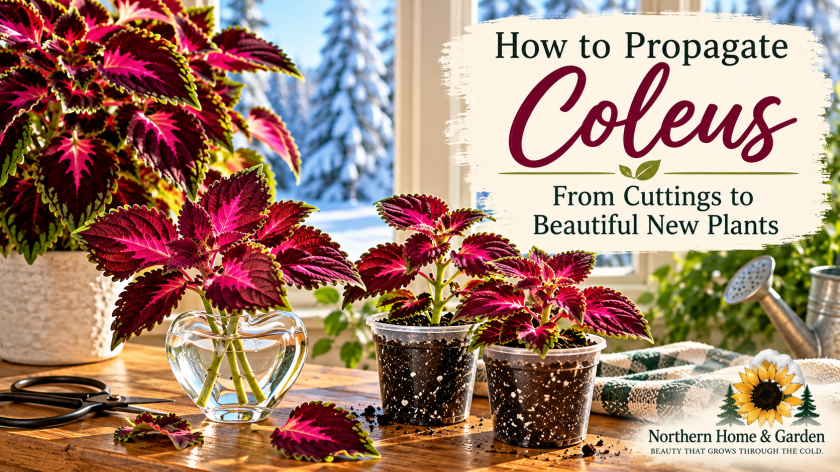
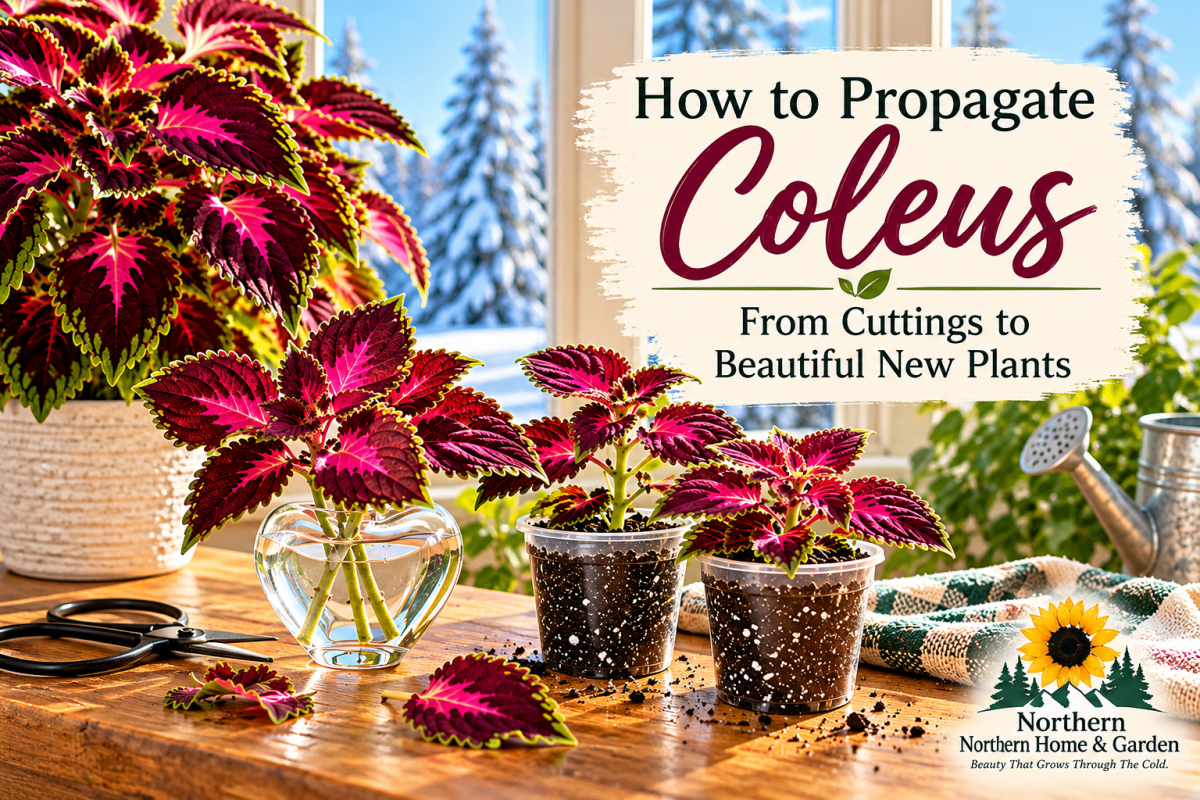
Coleus cuttings rooting in water beside young coleus plants growing in soil on a sunny windowsill with snow outside.

Propagating Coleus: How to Turn One Plant Into a Whole Collection

Shopping for a fellow plant lover? Our gift guide has some fun ideas.

🌻 Northern Home & Garden

More Northern Tips, Straight to Your Inbox 🌻

Get practical gardening advice, seasonal ideas and new posts from Northern Home & Garden delivered to your inbox.
How to Bring Outdoor Plants Inside for Winter (Without Bringing the Bugs)

Want to save a favorite outdoor plant before winter arrives? Here’s how to bring outdoor plants inside safely, check for pests, make the transition easier, and avoid bringing unwanted little hitchhikers into your home.
Every fall, there comes a point when I look around outside and decide which plants I’m willing to let go… and which ones are getting rescued from the cold. Because after spending all summer growing a beautiful plant, I’m supposed to just calmly let the first hard freeze take it? Absolutely not!

Continue reading “How to Bring Outdoor Plants Inside for Winter (Without Bringing the Bugs)”

Propagating Coleus: How to Turn One Plant Into a Whole Collection

Learn how to take coleus cuttings, root them in water, transplant them into soil, and keep your new plants growing happily indoors through winter.

Coleus might be one of the most dangerously easy plants to propagate.

You start with one plant. You snip off a little cutting, stick it in a glass of water, and suddenly you’re looking around the house wondering where you’re going to put the other 14 coleus plants you somehow acquired.

Ask me how I know. 😂

Continue reading “Propagating Coleus: How to Turn One Plant Into a Whole Collection”

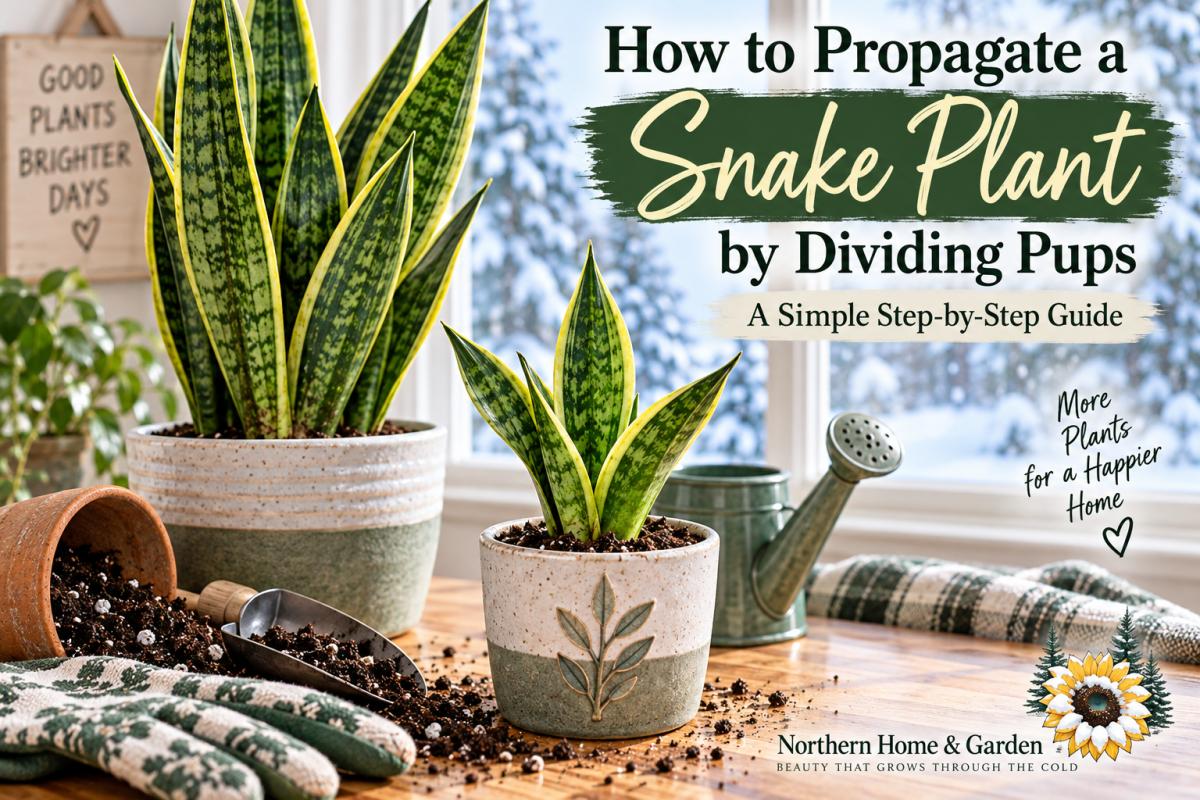
How to Propagate a Snake Plant by Dividing Pups

Learn how to propagate a snake plant by separating pups from the mother plant. This beginner-friendly guide walks you through dividing, repotting, and caring for your new snake plant.

Snake plants are pretty generous houseplants. Give them a decent spot, don’t drown them, and they’ll usually carry on without demanding much attention.

Then one day, you look down into the pot and realize…

You have babies. 🌿

Continue reading “How to Propagate a Snake Plant by Dividing Pups”

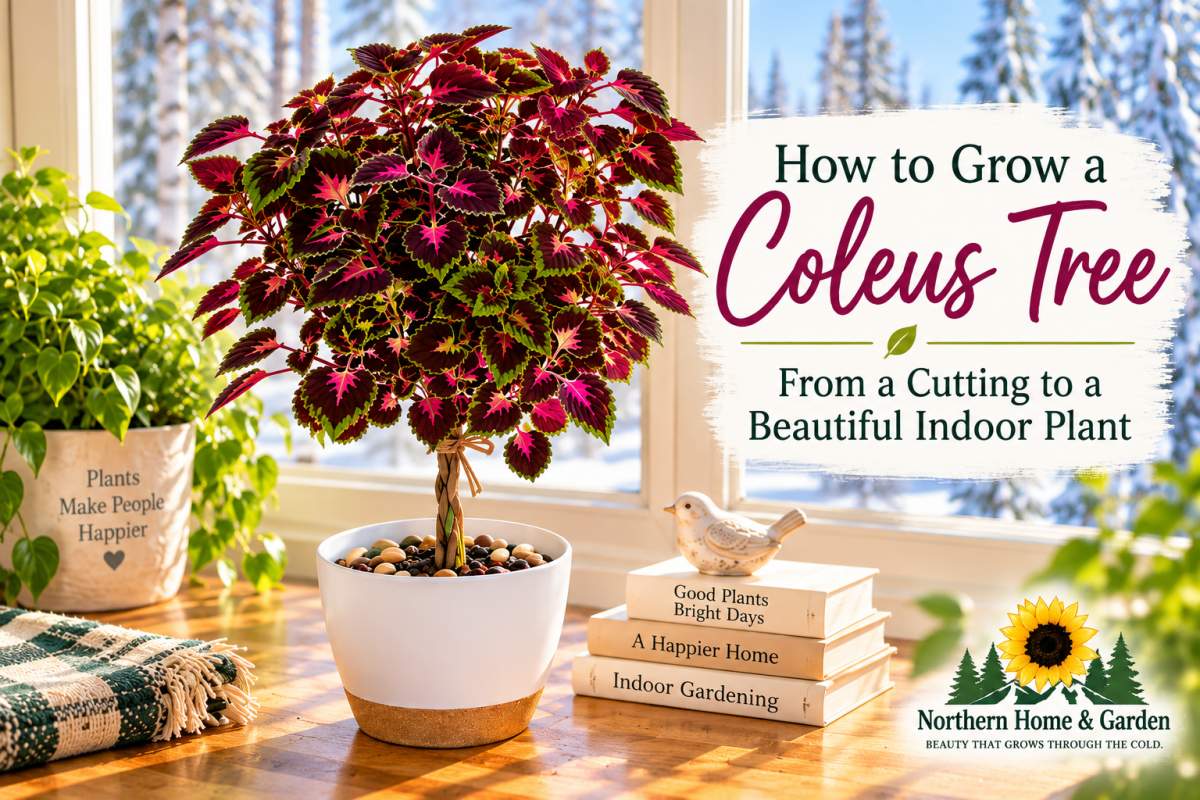
How to Grow a Coleus Tree: From a Cutting to a Beautiful Indoor Plant

Turn an ordinary coleus into a beautiful indoor tree with a little patience and plenty of pruning. Learn how to train the stems, shape a full canopy, and keep your coleus growing indoors through winter.

Most of us think of coleus as a bushy plant tucked into containers or garden beds. But with some strategic pruning, you can train a coleus into an entirely different shape, complete with a miniature trunk and a full canopy of colorful leaves.

And because coleus is so easy to propagate, you don’t need to buy a large plant to get started. All you need is a few cuttings.

Here’s how I grew mine.

Affiliate Disclosure: This post contains affiliate links. As an Amazon Associate I earn from qualifying purchases.

What Is a Coleus Tree?

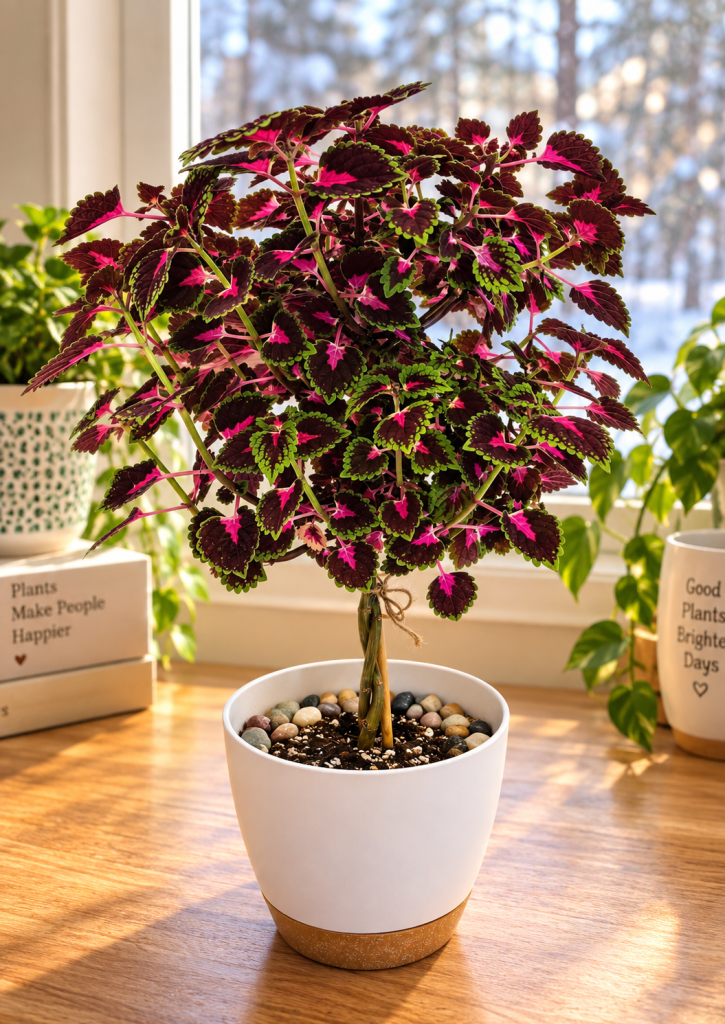
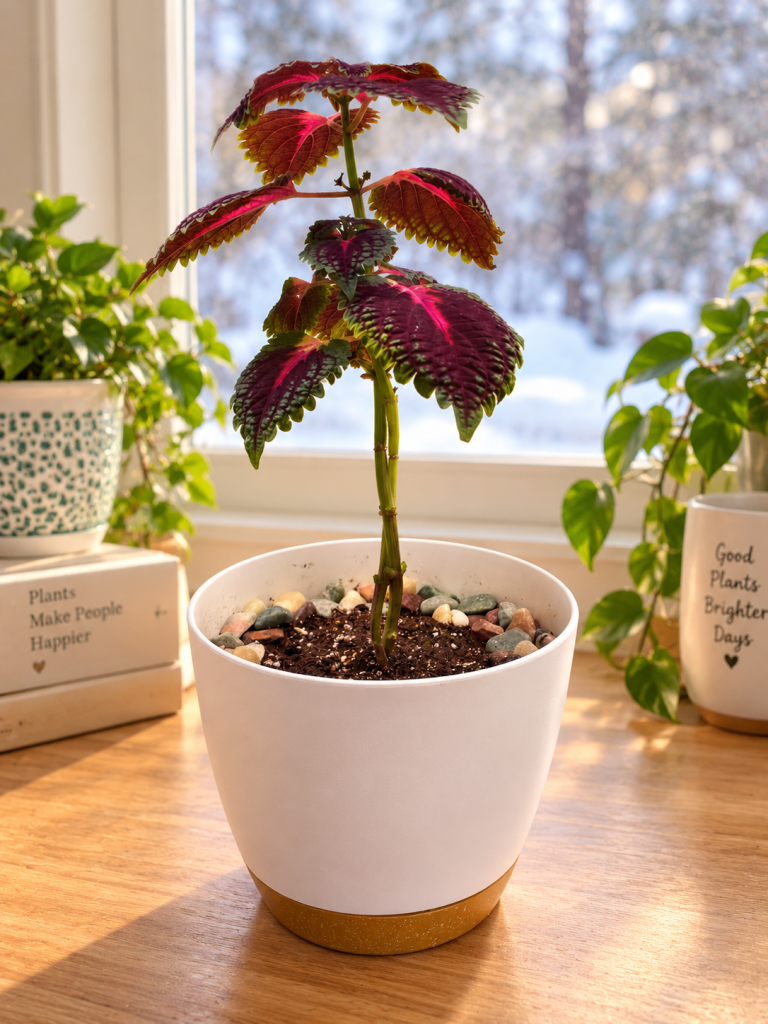
Coleus tree with a braided trunk and a full canopy of pink and burgundy leaves with green edges, in a white pot topped with pebbles on a sunny windowsill.

A coleus tree isn’t a special variety of coleus. It’s simply a coleus plant trained into a tree shape rather than allowed to grow naturally as a bush.

By encouraging one or two main stems to grow taller, removing lower growth, and pruning the top, you can create a miniature trunk with a full, rounded canopy.

And that little tree can have leaves in beautiful shades of pink, burgundy, green, purple, or just about any combination in between!

❄️ Northern Tip:

Coleus grows quickly under good conditions, making it a fun plant to experiment with. Don’t worry if your first attempt isn’t perfectly shaped. Coleus is forgiving and gives you plenty of new growth to work with!

Start With a Healthy Coleus Plant or Cutting

Coleus cuttings rooting in water in a small heart-shaped glass propagation vase.

You don’t need a large plant to grow a coleus tree. A healthy young plant or even a rooted cutting is enough to get started.

If you’re starting from a cutting, choose a healthy stem, remove the lower leaves, and place it in water until roots develop. Then transplant it into potting soil.

New to propagating coleus? Check out our Propagating Coleus: How to Turn One Plant Into a Whole Collection guide for step-by-step instructions.

Once your plant is established and actively growing, you’re ready to begin training it into a tree.

Choose Your Main Stems

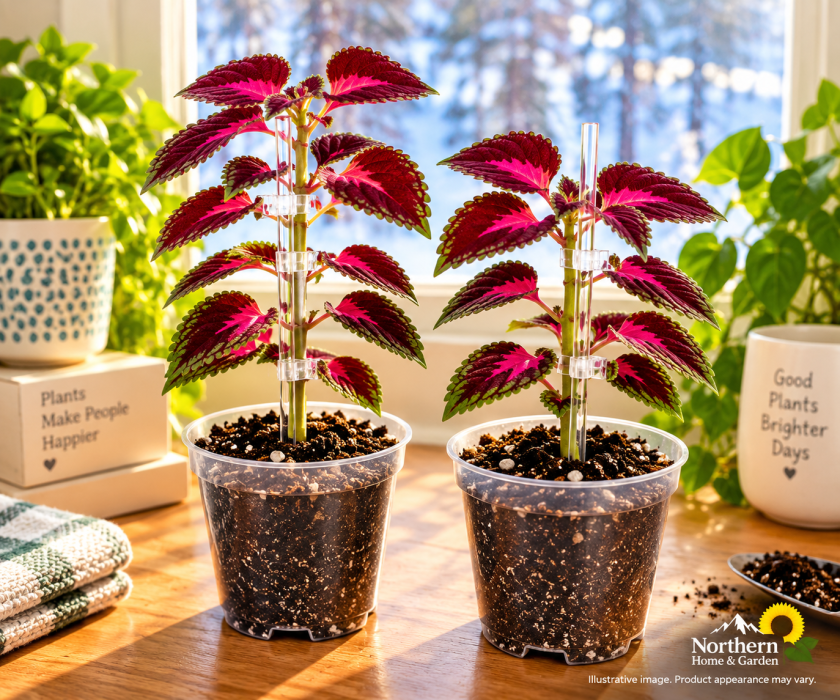
Two young pink and burgundy coleus plants in clear nursery pots supported by transparent acrylic plant stakes and clips on a sunny indoor windowsill.

For my coleus trees, I started with two young plants growing together in the same pot.

As they grew, I gently wrapped the stems around each other, gradually removing the lower side growth. Over time, they created a thicker, more interesting-looking trunk that supported the leafy canopy above.

Don’t worry if the stems look skinny at first. They’ll thicken as the plants mature.

You can also grow a coleus tree using a single strong stem, but I really liked the look of growing two together!

❄️ Northern Tip:

If your young coleus leans, use a thin clear plant support stake beside the stem. I like clear acrylic stakes because they provide support without being very noticeable once the plant fills in.

Find the tools we use to keep our houseplants happy and growing!

Let It Grow Up Before You Let It Grow Out

This might be the hardest part, especially if you’re someone who wants to start shaping everything immediately!

For a coleus tree, we want height first and bushiness later.

Let the main stem grow upward, gradually removing lower side shoots as they appear. You can also remove lower leaves as the plant gets taller, but don’t strip the stem bare all at once. Those leaves are still helping your young plant grow.

As the plant gains height, you’ll start seeing that little trunk take shape. Rotate the pot a quarter turn every week or so, so your trunk grows straight instead of leaning toward the window. (In winter, our coleus would happily lean all the way to Hawaii if we let it.)

And yes, there will probably be an awkward phase.

That skinny stem with a handful of leaves at the top might not look impressive yet, but don’t give up on it.

That’s the beginning of your tree!

Young coleus tree trained with two intertwined stems growing in a white pot.

Decide How Tall You Want Your Coleus Tree

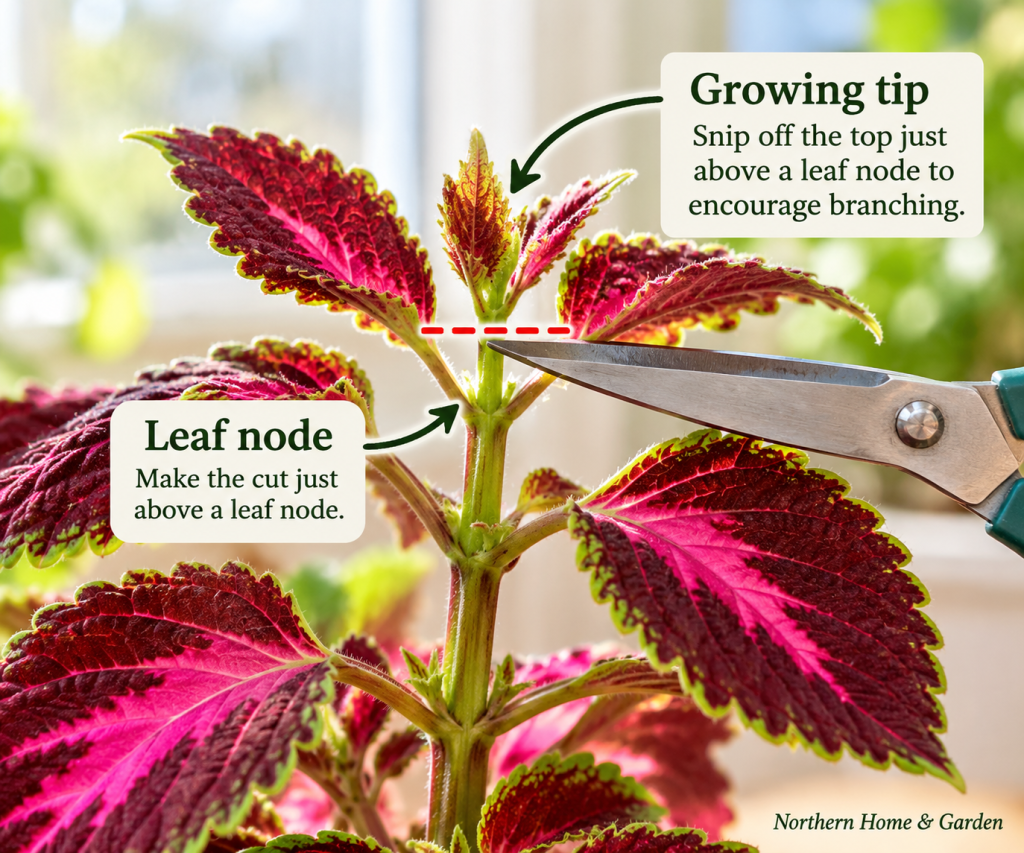
When you’re happy with the height of your main stem, pinch or prune off the growing tip just above a leaf node. This encourages new branches to develop below the cut.

It might feel wrong to cut the top after spending all that time encouraging it to grow taller.

Do it anyway!

This is when the fun really starts.

Close-up of a colorful pink and burgundy coleus plant showing where to snip the growing tip just above a leaf node to encourage branching and create a fuller coleus tree.

Pinch and Prune to Build the Canopy

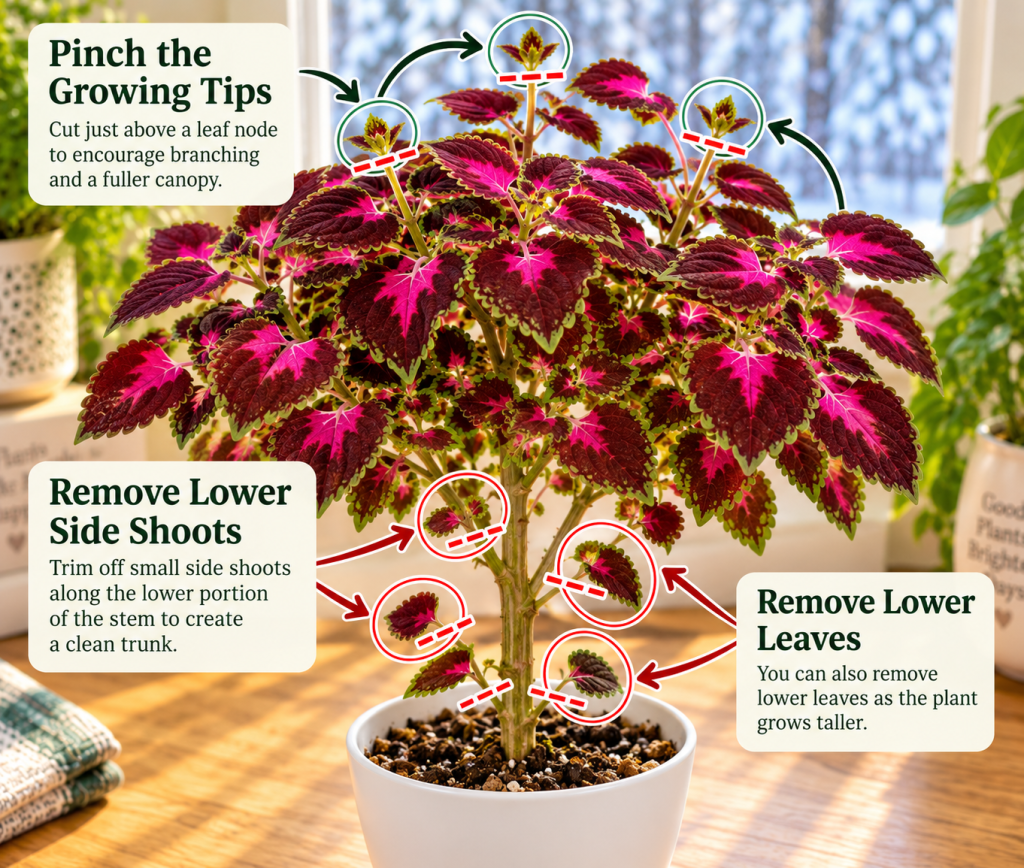
Once your coleus begins branching at the top, it’s time to focus on creating a full, rounded canopy.

Allow several branches to develop, then pinch their growing tips just above a leaf node. Use clean, sharp pruning snips (my micro-tip snips are perfect for this) to make your cuts.

Each time you pinch a growing tip, you encourage additional branching below the cut. Repeat as needed to gradually create a fuller canopy.

You may also notice new shoots growing along the lower trunk.

Simply remove those shoots as they appear and continue shaping the canopy to keep your little tree looking full and balanced.

Coleus tree pruning guide showing where to pinch growing tips above leaf nodes and remove lower side shoots to encourage a full, rounded canopy and clean trunk.

Water Without Keeping the Soil Soggy

Coleus prefers consistently moist soil, but not soggy roots.

Use a pot with drainage holes and water thoroughly when the top inch of soil begins to dry. A soil moisture meter takes the guesswork out of it. Let any excess water drain away.

Coleus can be a little dramatic when it’s thirsty! A wilted plant may perk up quickly after watering, but repeated wilting can stress it.

From a Little Plant to a Coleus Tree

Mature coleus tree with a full rounded canopy and two intertwined stems growing in a white pot beside a snowy window.

Watching this little plant grow into a coleus tree was half the fun! 🌿

It started as a couple of small plants, went through a rather awkward tall-and-skinny stage, and eventually became a colorful little indoor tree.

If you already have a coleus growing at home, give this project a try! It’s a fun way to enjoy your coleus indoors, especially when the outdoor gardening season is on hold for, oh, about seven months.

And if you’re keeping coleus going through the winter, see Love Coleus? Here’s How to Keep It Growing Indoors All Winter.

You Might Also Like 🌿

Coleus cuttings rooting in water beside young coleus plants growing in soil on a sunny windowsill with snow outside.

Propagating Coleus: How to Turn One Plant Into a Whole Collection

Coleus propagation supplies including heart-shaped glass vases, indoor potting mix, nursery pots, and an LED grow light, with a Shop Our Houseplant Favorites invitation from Northern Home & Garden.

Shopping for a fellow plant lover? Our gift guide has some fun ideas.

🌻 Northern Home & Garden

More Northern Tips, Straight to Your Inbox 🌻

Get practical gardening advice, seasonal ideas and new posts from Northern Home & Garden delivered to your inbox.